Show child attributes
**card**
Show child attribute
**capture_type**
Describes the capture_type of a card payment. Possible values are `automatic` or `manual`. This is used for hold then capture feature. Please refer to this [guide](/docs/guide/developer_handbook/payments/payment_methods/card/hold_then_capture) for more details.
**allowed_bins**
Restricts the allowed card BINs for a card payment. Please refer to this [guide](/docs/guide/developer_handbook/payments/payment_methods/card/allowed_bins) for more details.
**allowed_funding**
Restricts the allowed card funding for a card payment. Please refer to this [guide](/docs/guide/developer_handbook/payments/payment_methods/card/allowed_funding) for more details.
Show child attributes
**last_payment_error.code**
The developer-friendly code why a payment has failed.
**last_payment_error.detail**
The human-readable detail why a payment has failed.
Show child attributes
**next_action.type**
The type of the next action to perform, The possible value is `redirect`.
**next_action.redirect_url**
The URL for authenticating a payment by redirecting your customer.
Show child attributes
**card**
Show child attribute
**capture_type**
Describes the capture_type of a card payment. Possible values are `automatic` or `manual`. This is used for hold then capture feature. Please refer to this [guide](/docs/guide/developer_handbook/payments/payment_methods/card/hold_then_capture) for more details.
**allowed_bins**
Restricts the allowed card BINs for a card payment. Please refer to this [guide](/docs/guide/developer_handbook/payments/payment_methods/card/allowed_bins) for more details.
**allowed_funding**
Restricts the allowed card funding for a card payment. Please refer to this [guide](/docs/guide/developer_handbook/payments/payment_methods/card/allowed_funding) for more details.
Show child attributes
**name**
The billing name of the customer
**email**
The billing e-mail address of the customer
**phone**
The billing phone of the customer
**address**
Show child attribute
**line1**
The billing Address Line1 of the customer
**line2**
The billing address line2 of the customer
**city**
The billing address city of the customer
**state**
The billing address state of the customer
**postal_code**
The billing address postal code of the customer
**country**
The billing address country of the customer in two-letter ISO format.
Show child attributes
**custom_fields**
If available for the PayRex Page, this holds the custom fields value based on the input of your customer.
**line_items**
This holds the products bought by your customer if the payment originated from Pages and the template is storefront.
Show child attribute
**id**
Unique identifier of the custom field
**name**
Name of the custom field
**value**
Value provided by your customer for the custom field
Show child attribute
**id**
Unique identifier of the line item
**price_id**
Unique identifier of the Price resource
**price_amount**
Base amount of the Price resource.
**price_description**
Description of the Price resource
**product_id**
ID of the Product Resource
**product_name**
Name of the Product Resource
**product_description**
Description of the Product Resource
**quantity**
Quantity of the Price resource selected by your customer.
**total_amount**
Quantity multiplied by the Price amount. Total amount of the line item
Show child attributes
**type**
Defines the payment method of the Payment.
**card**
This attribute is only visible if the payment_method.type is `card`.
**qrph**
This attribute is only visible if the payment_method.type is `qrph`.
Show child attribute
**first6**
The first 6 digits of the card used to complete a payment
**last4**
The last 4 digits of the card used to complete a payment
**brand**
The brand of the card used to complete a payment
Show child attribute
**account_name**
The name of the account owner
**last4_account_number**
The last 4 digit of the account number used in the QR Ph payment
**account_institution**
The institution code of the account owner
**account_institution_name**
The institution name of the account owner
Show child attributes
**account_name**
The account name of the bank account
**account_number**
The account number of the bank account.
**bank_name**
The name of the bank.
Show child attributes
**payment_methods**
The list of payment methods allowed to be processed by the payment intent of the billing statement. Possible values are `card`, `gcash`, `maya`, and `qrph`.
If this attribute is not passed, the [default payment methods](/docs/guide/getting_started/using_the_dashboard/manage_default_payment_methods_dashboard) of your PayRex merchant account will be used.
**payment_method_options**
A set of key-value pairs that can modify the behavior of the payment method attached to the payment intent.
Show child attributes
**card**
Show child attribute
**allowed_bins**
Restricts the allowed card BINs for a card payment. Please refer to this [guide](/docs/guide/developer_handbook/payments/payment_methods/card/allowed_bins) for more details.
**allowed_funding**
Restricts the allowed card funding for a card payment. Please refer to this [guide](/docs/guide/developer_handbook/payments/payment_methods/card/allowed_funding) for more details.
Show child attributes
**id**
Unique identifier for the resource. The prefix is `bstm_li`.
**resource**
Represents the resource's type. The value is `billing_statement_line_item`.
**description**
The description of the line item. It could be a product name or the service that you offer.
**unit_price**
The amount of the line item in a single unit.
This is a positive integer in the smallest currency unit, cents. If the line item should be ₱ 120.50, the amount should be 12050.
**quantity**
The quantity of the line item. The quantity will be multiplied by the line_item.amount to compute the final amount of the billing statement.
Show child attributes
**payment_methods**
The list of payment methods allowed to be processed by the payment intent of the billing statement. Possible values are `card`, `gcash`, `maya`, `billease`, and `qrph`.
Show child attributes
**payment_methods**
The list of payment methods allowed to be processed by the payment intent of the billing statement. Possible values are `card`, `gcash`, `maya`, `billease`, and `qrph`.
**payment_method_options**
A set of key-value pairs that can modify the behavior of the payment method attached to the payment intent.
Show child attributes
**card**
Show child attribute
**allowed_bins**
Restricts the allowed card BINs for a card payment. Please refer to this [guide](/docs/guide/developer_handbook/payments/payment_methods/card/allowed_bins) for more details.
**allowed_funding**
Restricts the allowed card funding for a card payment. Please refer to this [guide](/docs/guide/developer_handbook/payments/payment_methods/card/allowed_funding) for more details.
The `line_items` attribute will compute the final amount that your customer will pay. The formula for the final amount is the sum of `line_items.quantity` * `line_items.amount` which is automatically computed by the Checkout Session.| | success_url | You must create a page where the customer will be redirected once they successfully paid a CheckoutSession. The CheckoutSession will handle the redirection for you. | | cancel_url | You must create a page where the customer will be redirected once they decided that they don't want to pay and go back to your website. The CheckoutSession will handle the redirection for you. | | payment_methods | The list of payment methods allowed for the CheckoutSession. This is the same payment_methods attribute from the PaymentIntent resource. If you did not indicate the list of payment methods, the [default payment methods](/docs/guide/getting_started/using_the_dashboard/manage_default_payment_methods_dashboard) of your PayRex account will be used | To learn more about the other possible attributes for checkout sessions, you can check the [API reference](/docs/api/checkout_sessions/create). > **INFO** The CheckoutSession creates a PaymentIntent resource under the hood. If you are not familiar yet with PaymentIntents, you can refer to this [guide](/docs/guide/developer_handbook/payment_intents_api/). ### [OPTIONAL] Require or make billing information fields optional By default, PayRex will show all the billing information fields in our payment form. The billing information provided by your customer will be used to complete the payment and increase the accuracy of assessing the transaction risk. PayRex can allow you to either always show a certain billing information field or let PayRex handle it for you. On top of your code to create a checkout session, you can pass another attribute called `billing_details_collection` to manage the behavior of the billing information fields rendered in the payment form. | Billing information field setting | Description | | --------------------------------- | ---------------------------------------------------------------------------------------- | | auto | Set this configuration if you will let PayRex handle if a field a required field or not. | | always | Set this configuration if you want to always show the field to your customer. | > **WARNING** If your chargeback rate is increasing, there's a chance that our Fraud & Risk team will require you to show all billing information fields to manage your chargeback rate. ## 2. Redirect the customer to the CheckoutSession `url` and let the customer complete the payment After creating the CheckoutSession, redirect your customer to the URL for the Checkout page returned in the response from step 1. The URL of the CheckoutSession is referenced via `url` attribute. Once the customer completed the payment, they will be redirected to your nominated `success_url`. > **INFO** A CheckoutSession expires at some point. If the CheckoutSession has transitioned to expired, you must create a new CheckoutSession if you want your customer to complete the payment. --- # PayRex Elements Source: https://docs.payrex.com/docs/guide/developer_handbook/payments/integrations/elements Path: docs/guide/developer_handbook/payments/integrations/elements.mdx const [loading, setLoading] = useState(false) const [copied, setCopied] = useState(false) return
{
setLoading(true)
setTimeout(() => {
setLoading(false)
setCopied(true)
}, 1500)
setTimeout(() => {
setCopied(false)
}, 3000)
}}>
<>
{(!loading && !copied) && }
{(loading && !copied) &&
}
{
copied &&
}
{!copied && Copy for LLM}
{copied && Copied!}
};
const [loading, setLoading] = useState(false)
return
<>
View as Markdown
};
# Elements
Learn how to receive payments through PayRex Elements by embedding a payment form in your application. The client and server-side code create a checkout form with PayRex Elements.
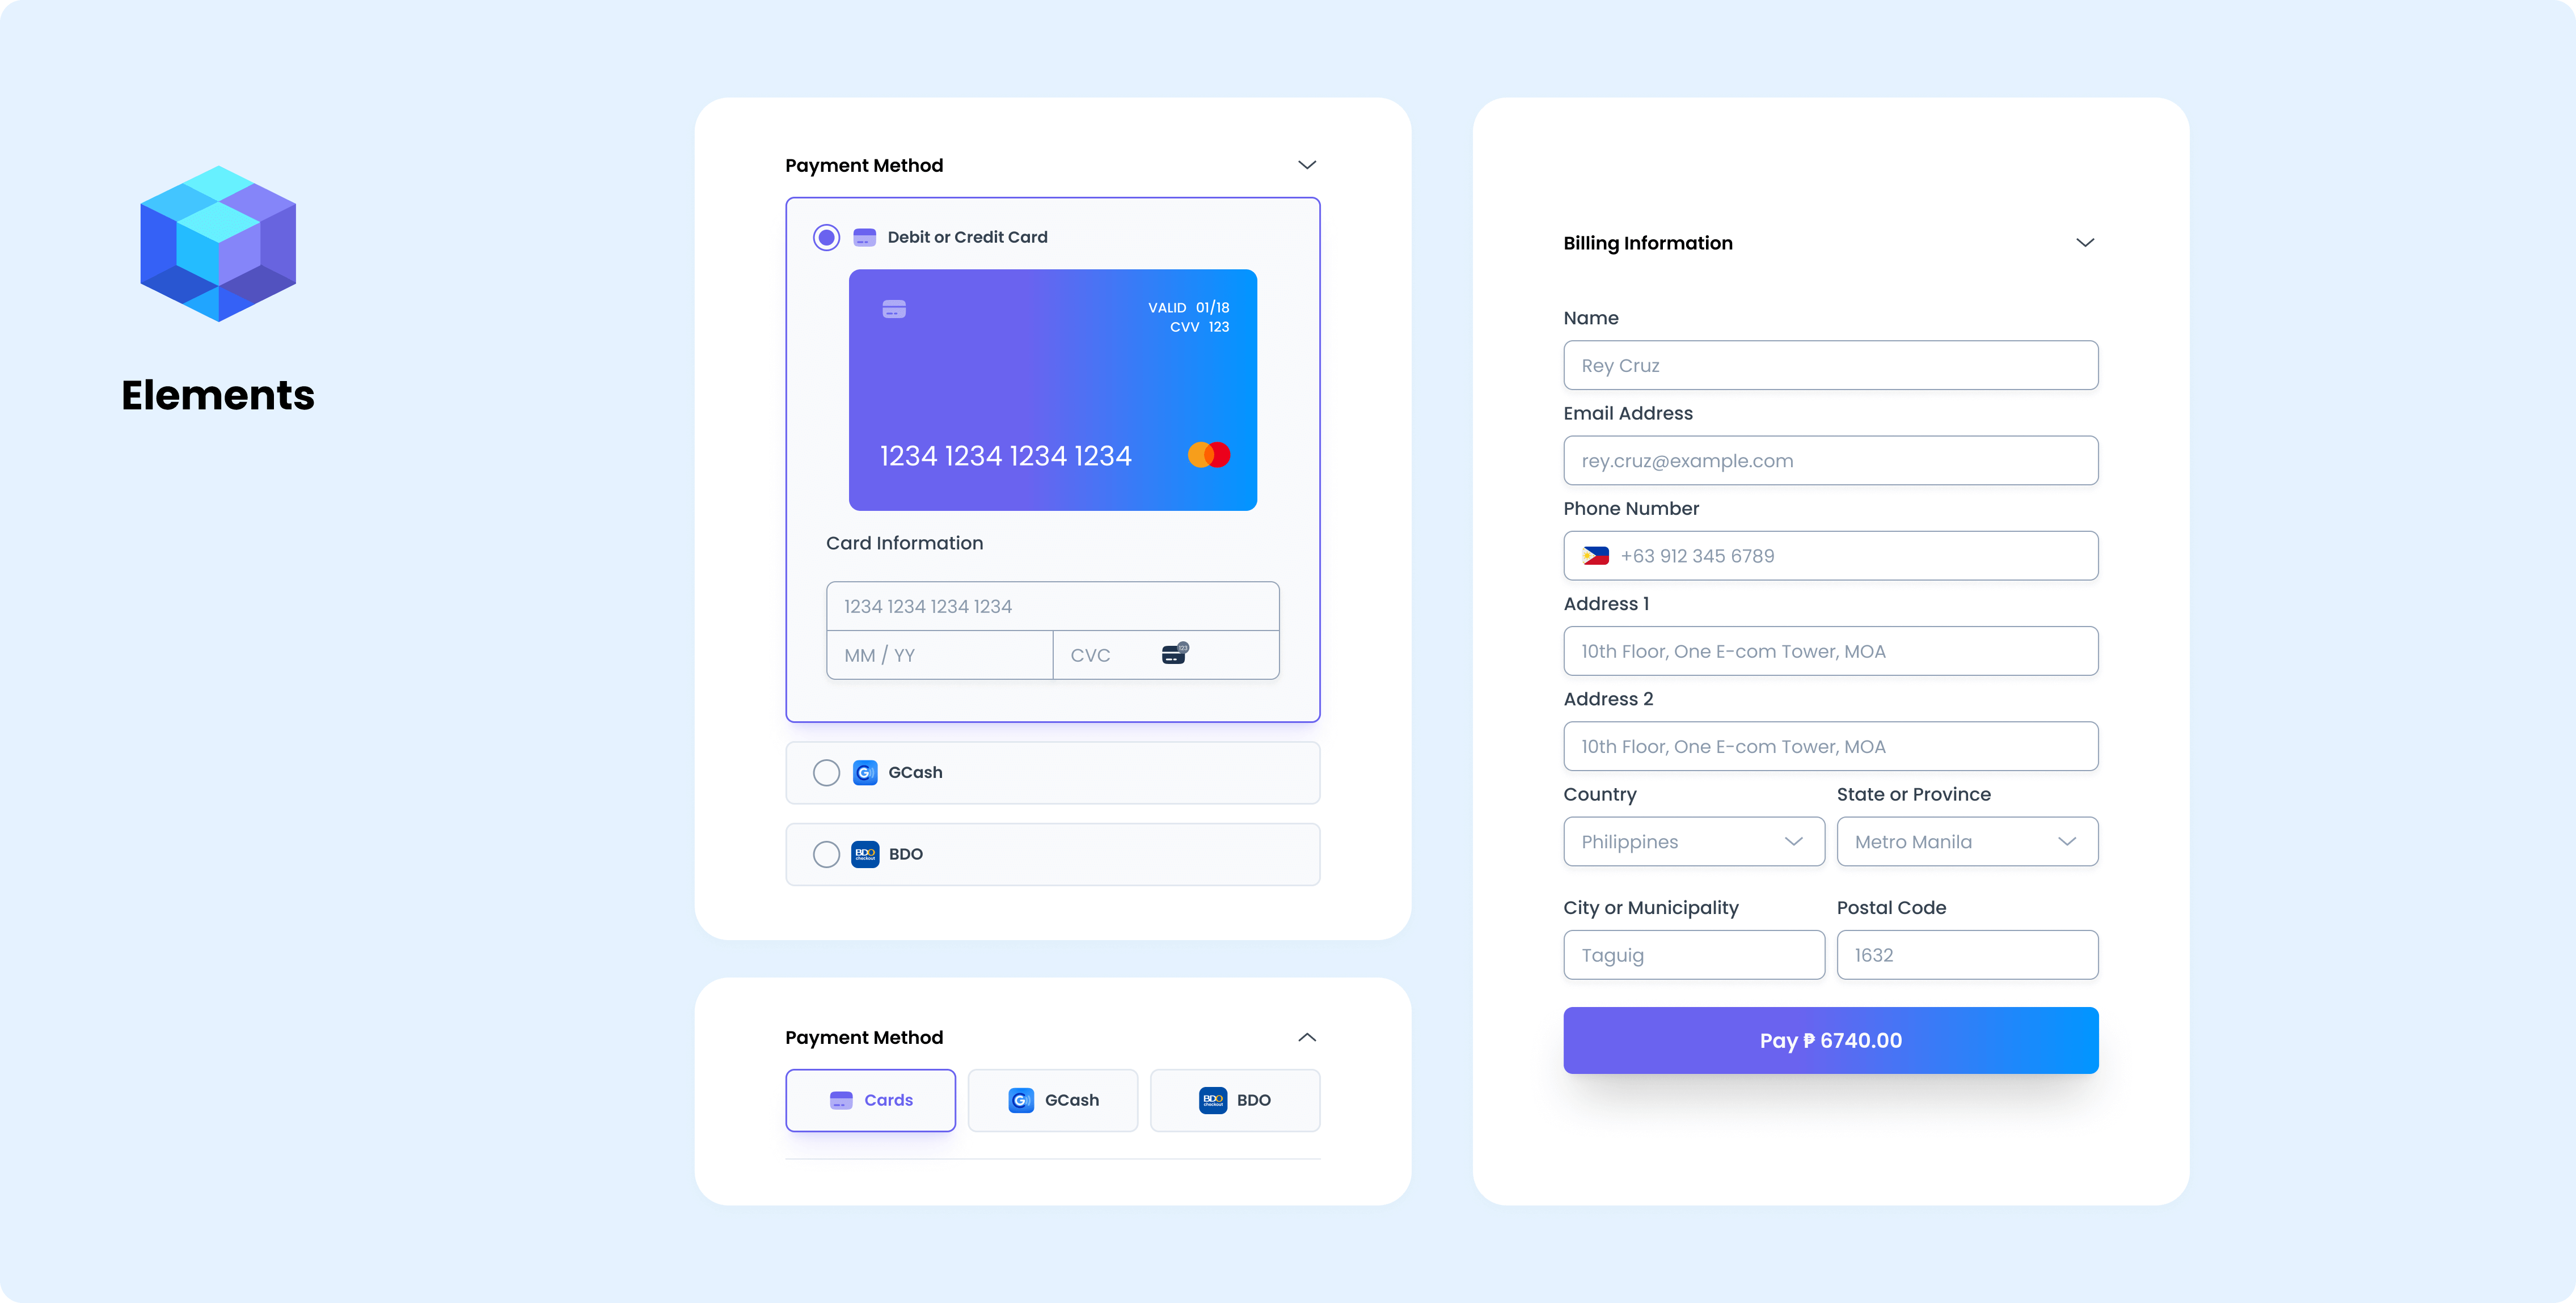
## 1. Set up the server-side
### Install the server-side SDK and initialize with your secret API key
Install the appropriate SDK for your programming language and import it. If we don't support your programming language yet, you may skip this step and use your preferred REST client.
### Create a payment intent
> **INFO**
The example below creates a PaymentIntent via Ajax. If you prefer to create a payment intent before rendering your checkout page, you can adjust the code below.
Create a PaymentIntent on the server side. A PaymentIntent resource tracks the customer's payment lifecycle, identifying failed payment attempts and ensuring the customer is only charged once. In the response, return the PaymentIntent's client secret to finish the payment on the client.
After initializing the SDK with your secret API key, you must create a PaymentIntent. A PaymentIntent is a resource that manages your customer's payment lifecycle. It tracks all failed payment attempts and ensures your customer is charged correctly. Once a PaymentIntent is created, return the PaymentIntent's `client_secret` attribute in the response. The PaymentIntent's `client_secret` will be used on the client side, which is the next step of the integration process.
To learn more about the other possible payload when creating a payment intent, you can check the [API reference](/docs/api/payment_intents).
## 2. Create a checkout page on the client-side.
### Load Payrex.js
From the client side, load the PayRex javascript library called Payrex.js. This library helps you maintain compliance, such as PCI-DSS, by ensuring that payment information is not passed to your server but sent directly to PayRex.
> **WARNING**
Payrex.js domain is `js.payrexhq.com`, and you must load the javascript library from this domain. Do not store a copy of this javascript library.
> **INFO**
If you prefer CommonJS or ES6 modules when importing PayRex.JS, you can use our official [library](https://github.com/payrexhq/payrex-js).
```html showLineNumbers title="checkout.html"
` on your checkout page. This embeds a payment form, allowing your customer to select a payment method. The payment form collects the payment details for the selected payment method.
```js showLineNumbers title="checkout.js"
// Add your PayRex Public API key.
const payrex = window.Payrex('');
let elements;
initialize();
checkPaymentIntentStatus();
async function payAction() {
showLoading(true)
await payrex.attachPaymentMethod({
elements,
options: {
// Return URL is where the customer will be redirected after completing a payment.
return_url: "http://localhost:4242/checkout.html",
},
});
showLoading(false)
}
function showLoading(flag) {
const btnPayText = document.querySelector("#btn-pay-text");
const spinner = document.querySelector("#spinner");
// Disable the button to ensure that no double payment might happen
btnPayText.disabled = flag
if (flag) {
// Disable the button and show a spinner
spinner.classList.remove("hidden");
btnPayText.classList.add("hidden");
} else {
spinner.classList.add("hidden");
btnPayText.classList.remove("hidden");
}
}
async function initialize() {
const {clientSecret} = await fetch(
"/create_payment_intent.php",
{
method: "POST",
}
).then((r) => r.json());
elements = payrex.elements({
clientSecret
});
// highlight-start
const paymentElementOptions = {
layout: "accordion",
};
const paymentElement = elements.create(
"payment",
paymentElementOptions
);
paymentElement.mount("#payment-element");
// highlight-end
}
// Fetches the payment intent status after payment submission
async function checkPaymentIntentStatus() {
const clientSecret = new URLSearchParams(window.location.search).get(
"payment_intent_client_secret"
);
if (!clientSecret) {
return;
}
const paymentIntent = await payrex.getPaymentIntent(clientSecret);
switch (paymentIntent.status) {
case "succeeded":
window.alert("Payment succeeded.")
break;
case "processing":
window.alert("Payment is still being processed.")
break;
case "awaiting_payment_method":
window.alert("Payment was not successful. Try again..")
break;
default:
window.alert("Something went wrong")
break;
}
}
```
### [OPTIONAL] Providing default values in billing information
Suppose you already have the customer's billing information in your system and want to speed up the payment process. In that case, you can add the' defaultValues' attribute to supply default values to the payment element.
```js showLineNumbers title="checkout.js"
// redacted code
const paymentElementOptions = {
layout: "accordion",
// highlight-start
defaultValues: {
billingDetails: {
name: "John Smith",
phone: "+639170000000",
email: "johnsmith@somedomain.com",
address: {
line1: "Address Line 1",
line2: "Address Line 2",
country: "PH",
city: "Address City",
state: "Address State",
postalCode: "1902",
},
},
},
// highlight-end
};
// redacted code
```
### [OPTIONAL] Require or make billing information fields optional
By default, PayRex will show all the billing information fields in our payment form. The billing information provided by your customer will be used to complete the payment and increase the accuracy of assessing the transaction risk. PayRex can allow you to either always show a certain billing information field or let PayRex handle it for you.
| Billing information field setting | Description |
| --------------------------------- | ---------------------------------------------------------------------------------------- |
| auto | Set this configuration if you will let PayRex handle if a field a required field or not. |
| always | Set this configuration if you want to always show the field to your customer. |
> **WARNING**
If your chargeback rate is increasing, there's a chance that our Fraud & Risk team will require you to show all billing information fields to manage your chargeback rate.
```js showLineNumbers title="checkout.js"
// redacted code
const paymentElement = elements.create(
"payment",
{
layout: "accordion",
// highlight-start
fields: {
billingDetails: {
email: "auto",
name: "auto",
phone: "auto",
address: {
line1: "auto",
line2: "auto",
city: "auto",
postalCode: "auto",
state: "auto",
country: "auto"
}
}
},
// highlight-end
}
);
// redacted code
```
## 3. Complete the payment on the client
For test cards, you can refer to this [guide](/docs/guide/developer_handbook/testing/testing_your_integration).
### Handle the submit event of the pay button
Listen to your pay button's `onClick` event and attach a PaymentMethod resource to the PaymentIntent through the PayRex API. If you prefer to listen to a form-submit event, it could be your alternative approach.
> **WARNING**
Make sure that the button is disabled while the payment is being processed from our end. This will avoid possible double payment from your customer.
```js showLineNumbers title="checkout.js"
// Add your PayRex Public API key.
const payrex = window.Payrex('');
let elements;
initialize();
checkPaymentIntentStatus();
// highlight-start
async function payAction() {
showLoading(true)
await payrex.attachPaymentMethod({
elements,
options: {
// Return URL is where the customer will be redirected after completing a payment.
return_url: "http://localhost:4242/checkout.html",
},
});
showLoading(false)
}
// highlight-end
function showLoading(flag) {
const btnPayText = document.querySelector("#btn-pay-text");
const spinner = document.querySelector("#spinner");
// Disable the button to ensure that no double payment might happen
btnPayText.disabled = flag
if (flag) {
// Disable the button and show a spinner
spinner.classList.remove("hidden");
btnPayText.classList.add("hidden");
} else {
spinner.classList.add("hidden");
btnPayText.classList.remove("hidden");
}
}
async function initialize() {
const {clientSecret} = await fetch(
"/create_payment_intent.php",
{
method: "POST",
}
).then((r) => r.json());
elements = payrex.elements({
clientSecret
});
const paymentElementOptions = {
layout: "accordion",
};
const paymentElement = elements.create(
"payment",
paymentElementOptions
);
paymentElement.mount("#payment-element");
}
// Fetches the payment intent status after payment submission
async function checkPaymentIntentStatus() {
const clientSecret = new URLSearchParams(window.location.search).get(
"payment_intent_client_secret"
);
if (!clientSecret) {
return;
}
const paymentIntent = await payrex.getPaymentIntent(clientSecret);
switch (paymentIntent.status) {
case "succeeded":
window.alert("Payment succeeded.")
break;
case "processing":
window.alert("Payment is still being processed.")
break;
case "awaiting_payment_method":
window.alert("Payment was not successful. Try again..")
break;
default:
window.alert("Something went wrong")
break;
}
}
```
### Attach a PaymentMethod to the PaymentIntent
Call `.attachPaymentMethod()` from Payrex.js and pass along the Payment Element instance and a `return_url` to instruct PayRex to redirect your customer after they complete the payment.
For payment methods that require authentication, such as credit cards, PayRex will display a modal for authentication, e.g., 3DS for credit or debit cards, or redirect your customer to an authentication page, depending on the payment method. After your customer completes the authentication process, they will be redirected to your nominated `return_url`.
```js showLineNumbers title="checkout.js"
// Add your PayRex Public API key.
const payrex = window.Payrex('');
let elements;
initialize();
checkPaymentIntentStatus();
async function payAction() {
showLoading(true)
// highlight-start
await payrex.attachPaymentMethod({
elements,
options: {
// Return URL is where the customer will be redirected after completing a payment.
return_url: "http://localhost:4242/checkout.html",
},
});
// highlight-end
showLoading(false)
}
function showLoading(flag) {
const btnPayText = document.querySelector("#btn-pay-text");
const spinner = document.querySelector("#spinner");
// Disable the button to ensure that no double payment might happen
btnPayText.disabled = flag
if (flag) {
// Disable the button and show a spinner
spinner.classList.remove("hidden");
btnPayText.classList.add("hidden");
} else {
spinner.classList.add("hidden");
btnPayText.classList.remove("hidden");
}
}
async function initialize() {
const {clientSecret} = await fetch(
"/create_payment_intent.php",
{
method: "POST",
}
).then((r) => r.json());
elements = payrex.elements({
clientSecret
});
const paymentElementOptions = {
layout: "accordion",
};
const paymentElement = elements.create(
"payment",
paymentElementOptions
);
paymentElement.mount("#payment-element");
}
// Fetches the payment intent status after payment submission
async function checkPaymentIntentStatus() {
const clientSecret = new URLSearchParams(window.location.search).get(
"payment_intent_client_secret"
);
if (!clientSecret) {
return;
}
const paymentIntent = await payrex.getPaymentIntent(clientSecret);
switch (paymentIntent.status) {
case "succeeded":
window.alert("Payment succeeded.")
break;
case "processing":
window.alert("Payment is still being processed.")
break;
case "awaiting_payment_method":
window.alert("Payment was not successful. Try again..")
break;
default:
window.alert("Something went wrong")
break;
}
}
```
### Show success/failed status message after redirection
Once PayRex redirects your customer to your nominated `return_url`, Payrex.js appends the `payment_intent_client_secret` query parameter, which is the PaymentIntent's `client_secret`. Use this parameter to retrieve the PaymentIntent to determine if the payment succeeds and show the relevant message to your customer.
```js showLineNumbers title="checkout.js"
// Add your PayRex Public API key.
const payrex = window.Payrex('');
let elements;
initialize();
checkPaymentIntentStatus();
async function payAction() {
showLoading(true)
await payrex.attachPaymentMethod({
elements,
options: {
// Return URL is where the customer will be redirected after completing a payment.
return_url: "http://localhost:4242/checkout.html",
},
});
showLoading(false)
}
function showLoading(flag) {
const btnPayText = document.querySelector("#btn-pay-text");
const spinner = document.querySelector("#spinner");
// Disable the button to ensure that no double payment might happen
btnPayText.disabled = flag
if (flag) {
// Disable the button and show a spinner
spinner.classList.remove("hidden");
btnPayText.classList.add("hidden");
} else {
spinner.classList.add("hidden");
btnPayText.classList.remove("hidden");
}
}
async function initialize() {
const {clientSecret} = await fetch(
"/create_payment_intent.php",
{
method: "POST",
}
).then((r) => r.json());
elements = payrex.elements({
clientSecret
});
const paymentElementOptions = {
layout: "accordion",
};
const paymentElement = elements.create(
"payment",
paymentElementOptions
);
paymentElement.mount("#payment-element");
}
// highlight-start
// Fetches the payment intent status after payment submission
async function checkPaymentIntentStatus() {
const clientSecret = new URLSearchParams(window.location.search).get(
"payment_intent_client_secret"
);
if (!clientSecret) {
return;
}
const paymentIntent = await payrex.getPaymentIntent(clientSecret);
switch (paymentIntent.status) {
case "succeeded":
window.alert("Payment succeeded.")
break;
case "processing":
window.alert("Payment is still being processed.")
break;
case "awaiting_payment_method":
window.alert("Payment was not successful. Try again..")
break;
default:
window.alert("Something went wrong")
break;
}
}
// highlight-end
```
---
# PayRex Integrations
Source: https://docs.payrex.com/docs/guide/developer_handbook/payments/integrations
Path: docs/guide/developer_handbook/payments/integrations/index.mdx
# Integrations
Check all the possible integrations with Payment product.
---
# Integrate BDO installment Payment
Source: https://docs.payrex.com/docs/guide/developer_handbook/payments/payment_methods/bdo_installment
Path: docs/guide/developer_handbook/payments/payment_methods/bdo_installment/index.mdx
# BDO Installment
This section contains information about integrating PayRex's BDO Installment payment method into your website or application. This payment method allows you to accept payments from your customers who use credit cards issued by BDO and make payments in installments.
---
# BDO Installment Payment Integration
Source: https://docs.payrex.com/docs/guide/developer_handbook/payments/payment_methods/bdo_installment/receive_a_payment
Path: docs/guide/developer_handbook/payments/payment_methods/bdo_installment/receive_a_payment.mdx
# Receive a BDO Installment payment
Learn how to receive a `bdo_installment` payment from your customer.
The BDO Installment payment method allows your customers to use their BDO-issued credit card to complete a payment in installments. To complete a BDO Installment payment, your customer should select BUY NOW, PAY LATER with the BDO logo as the payment method, and complete the necessary steps.
> **WARNING**
BDO Installment is a different payment method from a card payment method. If you want to implement straight card payments regardless of the issuing bank, please check the [card](/docs/guide/developer_handbook/payments/payment_methods/card) payment method section.
> **INFO**
In test mode, you can try the BDO installment payment method. For live mode payments, this payment method should be requested for activation through customer support.
## The BDO Installment payment flow
At checkout, your customer can select BUY NOW, PAY LATER with the BDO logo as the preferred payment method. Once your customer clicks the pay button, the customer is redirected to the BDO checkout page, and your customer must complete the payment. BDO facilitates its payment step. PayRex facilitates the transaction by rendering the payment page provided by BDO.
```mermaid
stateDiagram-v2
direction Lr
customer: Customer
checkout: Checkout Page
successful: Completed Payment
[*] --> customer
customer --> checkout
checkout --> successful
```
## Payment terms and installment types.
### Installment Types
- Regular Installment - regular
- 0% Interest Installment - zero
- Regular Installment with Payment Holiday - regular_holiday
- 0% Interest Installment with Payment Holiday - zero_holiday
### Payment terms
- 3
- 6
- 9
- 12
- 18
- 24
- 36
## Low-code integration
PayRex offers a low-code solution that gives you more payment integration control.
- [Checkout](/docs/guide/developer_handbook/payments/integrations/checkout): This lets you redirect your customers to a PayRex-hosted checkout page.
- [Elements](/docs/guide/developer_handbook/payments/integrations/elements): A UI component that you can embed into your website. When your customer is ready to complete a purchase, you create a PaymentIntent and configure how you want to display payment methods.
- [Pages](/docs/guide/payments/pages/overview): Always-on payment pages that your customers can access any time to pay for your products and services. With Pages, you can receive payments right away without building a website.
## Receiving a BDO installment payment
To receive a BDO Installment payment, you must specify that you allow a BDO Installment payment when creating a payment intent. The example below is for payment intent workflow.
Once you specify the `bdo_installment` string, PayRex will handle the rest of your customer's payment flow.
## Overriding installment types or payment terms
By default, PayRex provides the full payment method options for the BDO installment payment method. If you want to override the default payment method options e.g. you will only allow zero installment options, please see sample code below:
---
# Integrate Billease Payment
Source: https://docs.payrex.com/docs/guide/developer_handbook/payments/payment_methods/billease
Path: docs/guide/developer_handbook/payments/payment_methods/billease/index.mdx
# Billease
This section contains information about integrating PayRex's Billease payment method into your website or application. This payment method allows you to accept payments from your customers who use Billease.
---
# Billease Payment Integration
Source: https://docs.payrex.com/docs/guide/developer_handbook/payments/payment_methods/billease/receive_a_payment
Path: docs/guide/developer_handbook/payments/payment_methods/billease/receive_a_payment.mdx
# Receive a Billease payment
Learn how to receive a `billease` payment from your customer.
The Billease payment method is a buy now, pay later payment method type through [Billease](https://billease.ph/). To complete a Billease payment, your customer should select Billease as the payment method and complete the Billease checkout step.
## The Billease payment flow
At checkout, your customer can select Billease as the preferred payment method. Once your customer clicks the pay button, Billease will handle your customer's transaction within their checkout page, and your customer must complete the checkout step. Billease facilitates its checkout step. PayRex facilitates the Billease transaction by rendering the checkout page provided by Billease.
```mermaid
stateDiagram-v2
direction Lr
customer: Customer
checkout: Checkout Page
verification: Verification step
successful: Completed Payment
[*] --> customer
customer --> checkout
checkout --> verification
verification --> successful
```
## Low-code integration
PayRex offers a low-code solution that gives you more payment integration control.
- [Checkout](/docs/guide/developer_handbook/payments/integrations/checkout): This lets you redirect your customers to a PayRex-hosted checkout page.
- [Elements](/docs/guide/developer_handbook/payments/integrations/elements): A UI component that you can embed into your website. When your customer is ready to complete a purchase, you create a PaymentIntent and configure how you want to display payment methods.
- [Pages](/docs/guide/payments/pages/overview): Always-on payment pages that your customers can access any time to pay for your products and services. With Pages, you can receive payments right away without building a website.
## Receiving a Billease payment
To receive a Billease payment, you must specify that you allow a Billease payment when creating a payment intent. The example below is for payment intent workflow.
Once you specify the `billease` string, PayRex will handle the rest of your customer's payment flow.
---
# Allow selected BINs
Source: https://docs.payrex.com/docs/guide/developer_handbook/payments/payment_methods/card/allowed_bins
Path: docs/guide/developer_handbook/payments/payment_methods/card/allowed_bins.mdx
# Allow selected BINs
Learn how to allow specific card BINs when processing a card payment.
## Overview
BIN stands for Bank Identification Number. It is the first six digits of a credit/debit card number and identifies the issuer.
The allow selected BINs feature adjusts the payment intent's behavior when processing `card` payments. Suppose your use case is to allow selected BINs whenever your customer completes a `card` payment. In that case, you can specify the list of permitted BINs during your integration.
> **WARNING**
Card brand acceptance suppression rules are mandates established by major networks—such as Visa, Mastercard, Discover, and American Express—that dictate when a merchant may decline specific card types or transactions. These rules are typically utilized for targeted promotions, such as offering exclusive discounts for specific issuing banks. To remain compliant, merchants must clearly communicate these intentions to customers and ensure that suppression is never used to unfairly discriminate against cardholders.
## Allow selected card BINs in your integration
When creating a payment intent, you must add a payload attribute called `payment_method_options` to specify the allowed card BINs before your customer completes a card payment.
> **INFO**
If you don't know yet how to integrate payments, please refer to this [guide](/docs/guide/developer_handbook/payments/integrations)
With the code above, you are instructing that card payment processed by Payment Intent should only allow the 2 card BINs, `424242` and `411111`. The payment form will return an error if the customer uses a card with no BIN in the list.
---
# Allow specific card funding
Source: https://docs.payrex.com/docs/guide/developer_handbook/payments/payment_methods/card/allowed_funding
Path: docs/guide/developer_handbook/payments/payment_methods/card/allowed_funding.mdx
# Allow specific funding
Learn how to restrict the funding of a card. e.g. debit or credit.
## Overview
One of the attributes of a card in card payments is the type of funding. The funding of the cards used by your customer can be either `debit` or `credit`.
Debit cards allow customers to spend money by pulling funds from their bank account. In contrast, credit cards allow customers to borrow money from the card issuer up to a certain credit limit. These two funding types behave differently when used in online payments.
The allow specific funding feature adjusts the payment intent's behavior when processing `card` payments. For example, if your use case only allows `credit` (or `debit`) cards, you can instruct the payment intent to do so.
> **WARNING**
Card brand acceptance suppression rules are mandates established by major networks—such as Visa, Mastercard, Discover, and American Express—that define when a merchant may limit the use of certain card types, such as debit or credit cards, for specific transaction flows. These rules are typically applied in cases where product behavior differs—such as pre-authorization transactions, installments, or recurring payments—where certain card types may not provide an optimal or reliable customer experience. To remain compliant, merchants must clearly communicate these limitations to customers and ensure that any restriction is based on legitimate product or operational requirements, and never used to unfairly discriminate against cardholders.
## Allow specific card funding in your integration
When creating a payment intent, you can add a payload attribute called `payment_method_options` to specify the allowed card funding before your customer completes a card payment.
> **INFO**
If you don't know yet how to integrate payments, please refer to this [guide](/docs/guide/developer_handbook/payments/integrations)
With the code above, you are instructing that card payment processed by Payment Intent should only allow `credit` cards and not `debit.` The payment form will return an error if the customer uses a card where the funding is `debit`.
---
# Card pre-authorization and manual capture
Source: https://docs.payrex.com/docs/guide/developer_handbook/payments/payment_methods/card/hold_then_capture
Path: docs/guide/developer_handbook/payments/payment_methods/card/hold_then_capture.mdx
# Hold then Capture
Learn how to authorize an amount then capture the funds later separately.
## Overview
In your payments integration, you can set up to hold or reserve your customer's authorized amount and capture the funds later. One common use case for this type of integration is hotel bookings. Hotels often authorize the payment in full before a guest arrives or during check-ins, then capture the money when the guest checks out.
An authorized payment ensures that your customer authorized the amount. You need to capture the authorized amount before the authorization expires. If the authorization expires before you capture the authorized amount, the amount will be released back to the customer.
Before implementing, please see the following limitations for authorizing and capturing separately.
- Hold then capture is only supported in `card` payment method.
- The authorization expires in 7 days. This means you must capture the authorized amount before the authorization expires and return the funds to your customer.
## Hold a payment and authorize an amount later
To specify that your integration should separate authorize and capture, specify the `payment_method_options.card.capture_type` payload attribute to `manual` when creating a Payment Intent. This attribute configures a Payment Intent to authorize the amount but not capture it.
> **INFO**
If you don't know yet how to integrate payments, please refer to this [guide](/docs/guide/developer_handbook/payments/integrations)
With the code above, the Payment Intent created sets the payment methods that support hold and then capture to separate authorization and capture. For example, if you set the allowed payment methods with `card`, and `gcash`, only `card` payments will separate the authorization and capture, while `gcash` payments will combine both authorization and capture since `gcash` does not support hold then capture.
After creating the payment intent, present the payment form and let your customer pay using `card` payment method. Paying using `card` is required before you can capture an amount.
## Capture the authorized amount
After your customer authorizes an amount, the Payment Intent status transitions to `awaiting_capture`.
Capturing the authorized amount can be triggered either via webhook. Suppose you want to capture an amount once your customer authorizes it. In that case, you can subscribe to the payment_intent via `payment_intent.amount_capturable` webhook event and capture the authorized amount. You can refer to this [guide](/docs/guide/developer_handbook/payments/after_payment/handle_webhook_event) to know more about webhooks.
You must call the capture payment intent endpoint to capture the authorized amount. This API call captures the authorized amount and transitions the Payment Intent status to `succeeded`. You can refer to the `amount_capturable` attribute to know how much you can capture from the authorized amount.
> **INFO**
You can capture either **partial** or the **full** authorized amount **once**. This means once you capture the Payment Intent, you cannot capture further amounts from the same Payment Intent.
Once the Payment Intent is captured, it transitions to the `succeeded` status, and a payment resource is created. You can refer to the `amount_received` for the captured amount of the Payment Intent.
## Cancel authorized amount
If your customer successfully authorized an amount and there is a valid reason to cancel the authorization, e.g., the product is out of stock, or the customer changed their mind, you should call the [cancel payment intent endpoint](/docs/api/payment_intents/cancel). Canceling the payment intent manually reverses the authorization, rather than waiting 7 days for the authorized amount to be automatically reversed.
> **WARNING**
Once you cancel the `awaiting_capture` payment intent, you cannot reverse this action.
---
# Credit and debit card payments
Source: https://docs.payrex.com/docs/guide/developer_handbook/payments/payment_methods/card
Path: docs/guide/developer_handbook/payments/payment_methods/card/index.mdx
# Card
This section contains information about integrating PayRex's card payment method into your website or application. This payment method allows you to accept payments from your customers if they use a credit or debit card.
PayRex provides different use cases for card payments. Feel free to explore the best use case for your business and add it to your integration.
---
# Receive a card payment
Source: https://docs.payrex.com/docs/guide/developer_handbook/payments/payment_methods/card/receive_a_straight_payment
Path: docs/guide/developer_handbook/payments/payment_methods/card/receive_a_straight_payment.mdx
# Receive a card payment
Learn how to receive a card payment from your customer.
Card payment is when your customer uses a credit or debit card. To complete a card payment, your customer should enter their card information at checkout.
## The card payment flow
At checkout, your customers enter their credit card information. Your customers' experience completing a card payment varies based on different factors. Their card network, issuing bank, and current country are common factors that might affect their experience due to additional security verification steps such as 3DS.
```mermaid
stateDiagram-v2
direction Lr
customer: Customer
checkout: Checkout Page
three_d_secure: 3DS Secure (experience varies)
successful: Completed Payment
[*] --> customer
customer --> checkout
checkout --> three_d_secure
three_d_secure --> successful
```
## Low-code integration
PayRex offers a low-code solution that gives you more payment integration control.
- [Checkout](/docs/guide/developer_handbook/payments/integrations/checkout): This lets you redirect your customers to a PayRex-hosted checkout page.
- [Elements](/docs/guide/developer_handbook/payments/integrations/elements): A UI component that you can embed into your website. When your customer is ready to complete a purchase, you create a PaymentIntent and configure how you want to display payment methods.
- [Pages](/docs/guide/payments/pages/overview): Always-on payment pages that your customers can access any time to pay for your products and services. With Pages, you can receive payments right away without building a website.
## Receiving a straight payment
To receive a straight card payment, you must specify that you allow a card payment when creating a payment intent. The example below is for payment intent workflow.
Once you specify the `card` string, PayRex will handle the rest of your customer's payment flow. The card payment form will show if you successfully integrated one of our low-code solutions.
---
# Integrate GCash Payment
Source: https://docs.payrex.com/docs/guide/developer_handbook/payments/payment_methods/gcash
Path: docs/guide/developer_handbook/payments/payment_methods/gcash/index.mdx
# GCash
This section contains information about integrating PayRex's GCash payment method into your website or application. This payment method allows you to accept payments from your customers who use GCash.
---
# GCash Payment Integration
Source: https://docs.payrex.com/docs/guide/developer_handbook/payments/payment_methods/gcash/receive_a_payment
Path: docs/guide/developer_handbook/payments/payment_methods/gcash/receive_a_payment.mdx
# Receive a GCash payment
Learn how to receive a `gcash` payment from your customer.
The GCash payment method is when customers use their [GCash](https://www.gcash.com/) account. To complete a GCash payment, your customer should select GCash as the payment method and complete the GCash verification step.
## The GCash payment flow
At checkout, your customer can select GCash as the preferred payment method. Once your customer clicks the pay button, GCash will verify the transaction, and your customer must complete the verification step. GCash facilitates its verification step. PayRex facilitates the GCash transaction by rendering the payment page provided by GCash.
```mermaid
stateDiagram-v2
direction Lr
customer: Customer
checkout: Checkout Page
verification: Verification step
successful: Completed Payment
[*] --> customer
customer --> checkout
checkout --> verification
verification --> successful
```
## Low-code integration
PayRex offers a low-code solution that gives you more payment integration control.
- [Checkout](/docs/guide/developer_handbook/payments/integrations/checkout): This lets you redirect your customers to a PayRex-hosted checkout page.
- [Elements](/docs/guide/developer_handbook/payments/integrations/elements): A UI component that you can embed into your website. When your customer is ready to complete a purchase, you create a PaymentIntent and configure how you want to display payment methods.
- [Pages](/docs/guide/payments/pages/overview): Always-on payment pages that your customers can access any time to pay for your products and services. With Pages, you can receive payments right away without building a website.
## Receiving a GCash payment
To receive a GCash payment, you must specify that you allow a GCash payment when creating a payment intent. The example below is for payment intent workflow.
Once you specify the `gcash` string, PayRex will handle the rest of your customer's payment flow.
## Handling GCash Authentication
> **WARNING**
If you don't implement the necessary code changes, your customer's payment experience for gcash payment method in mobile will not proceed once the new authentication is deployed by GCash.
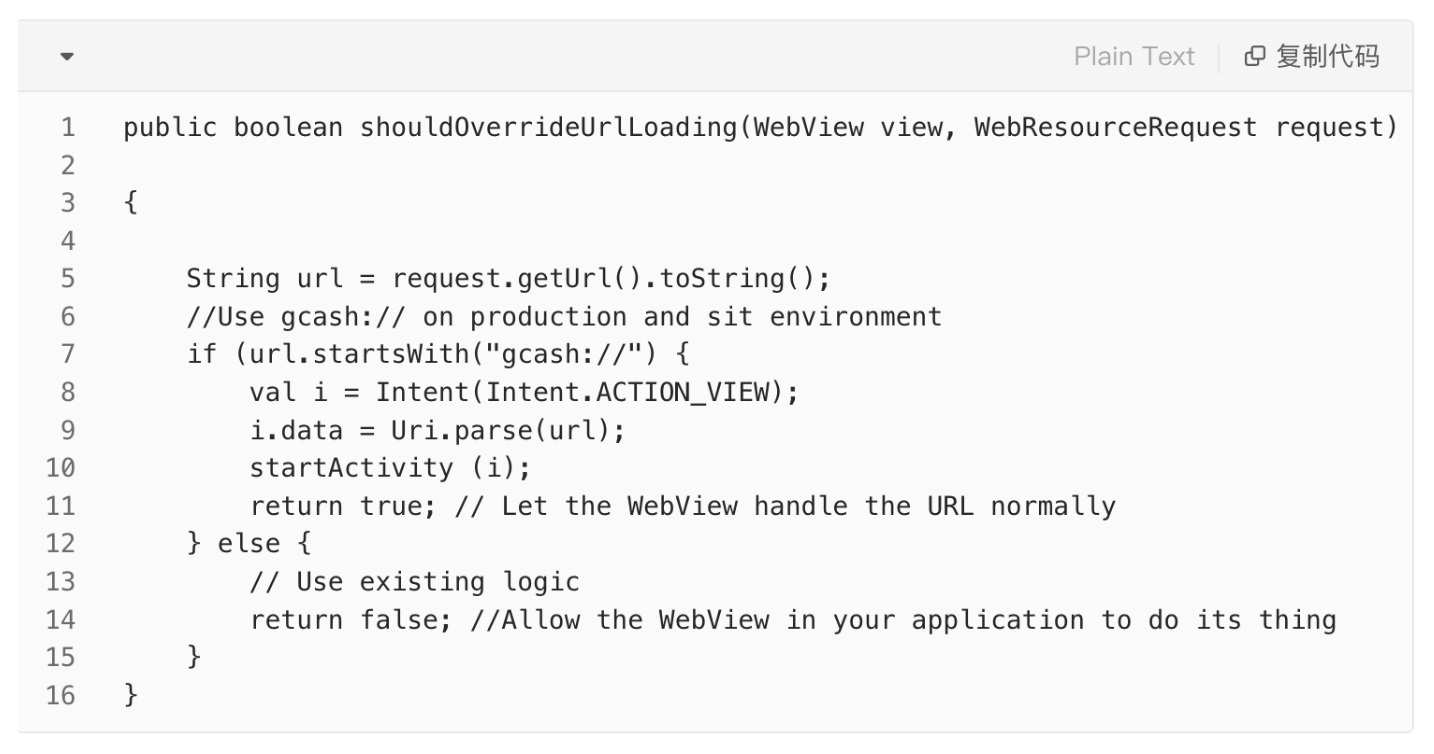
If you have integrated gcash payment method in a mobile app, you must apply some code changes in your app to handle the authentication of GCash.
GCash dynamically adjusts their UI if your customer is paying through mobile or desktop.
For customers who pay through a desktop, GCash displays a QR code that your customer can scan using the GCash app.
For customers who pay through mobile (either via a native mobile app or mobile web), no QR code will be displayed. Your customer should click the "Open app" button provided by GCash. The "Open app" button contains a deep link, and your mobile app should handle the deep link behavior.
### For Android
### For IOS
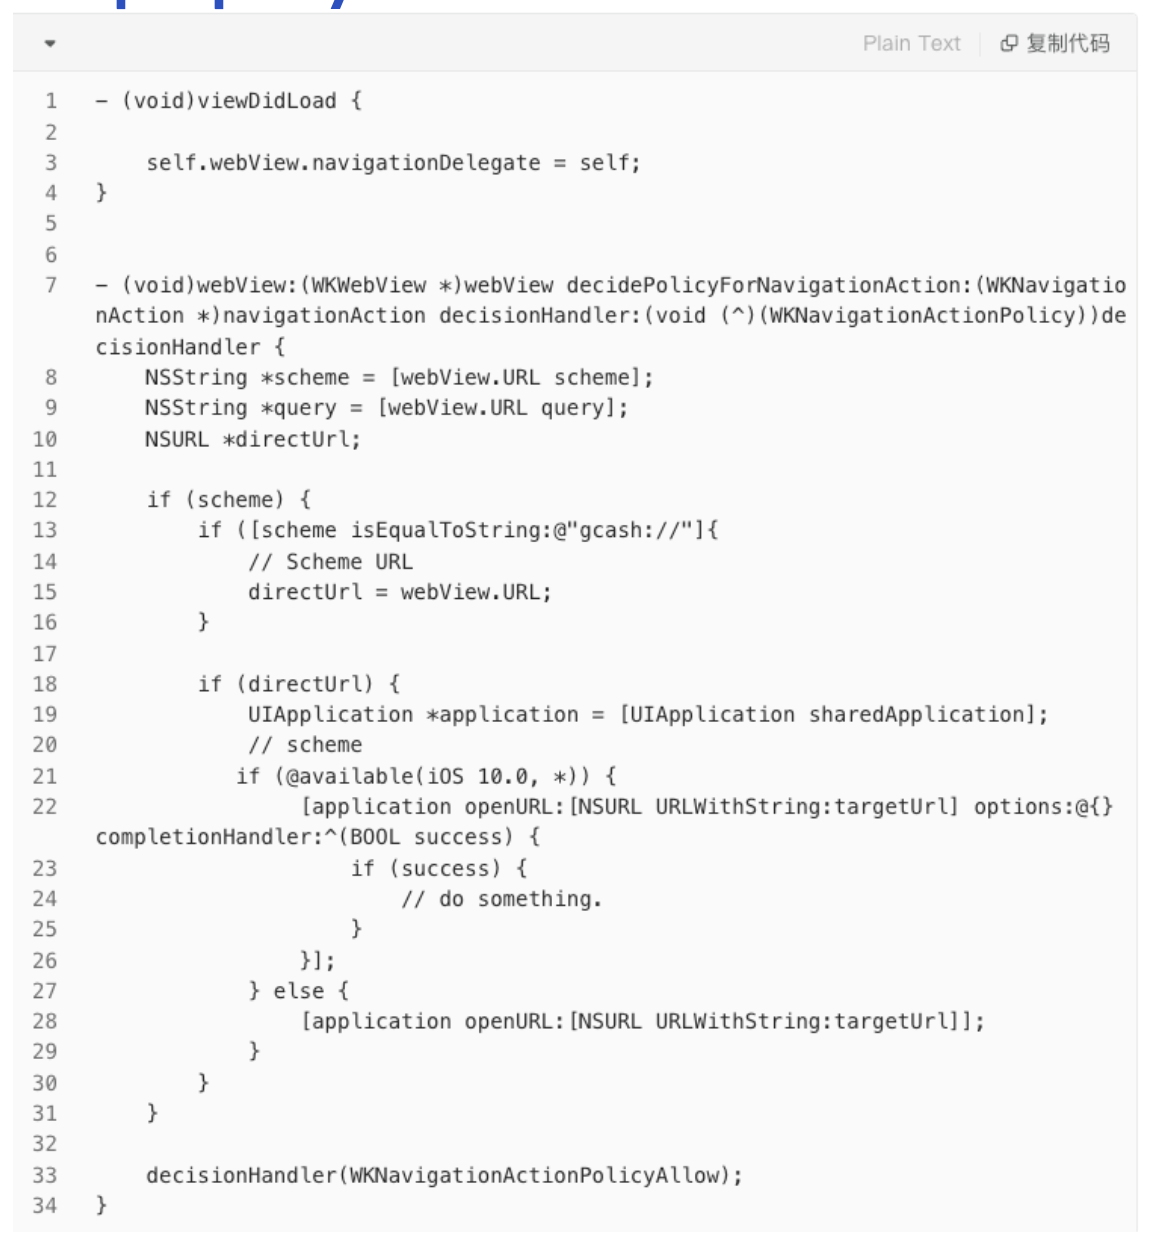
### For cross-platform mobile frameworks
> **WARNING**
If you are using cross-platform mobile frameworks such as Flutter or React Native, you must handle deep linking in your webview. You can use `onShouldStartLoadWithRequest` property for react native or `navigationDelegate` in Flutter. If the URL starts with `gcash://`, handle the redirection gracefully.
---
# Integrate Google Pay™ payments
Source: https://docs.payrex.com/docs/guide/developer_handbook/payments/payment_methods/googlepay
Path: docs/guide/developer_handbook/payments/payment_methods/googlepay/index.mdx
# Google Pay
This section contains information about integrating Google Pay into your website or application. You can accept payments from your customers by allowing them to use Google Pay.
---
# Google Pay Payment Integration
Source: https://docs.payrex.com/docs/guide/developer_handbook/payments/payment_methods/googlepay/receive_a_payment
Path: docs/guide/developer_handbook/payments/payment_methods/googlepay/receive_a_payment.mdx
# Receive a payment through Google Pay™
> **INFO**
We are currently in closed beta for Google Pay. If you are interested to be part of the closed beta release, please reach out to support@payrex.com.
Learn how to receive a payment from your customer when they use Google Pay.
[Google Pay](https://pay.google.com/about/) lets your customers pay in your app or website using any credit or debit card saved to their Google Account. PayRex allows you, as a merchant, to request any credit or debit card payment stored in your customer's Google account.
## The Google Pay payment flow
At checkout, your customer can select Google Pay as the preferred payment method. Once your customer clicks the pay button, Google Pay shows a modal that lists all the debit or credit cards stored within your customer's Google account. Your customer should select a stored card to complete the payment.
```mermaid
stateDiagram-v2
direction Lr
customer: Customer
checkout: Google Pay Stored Card Modal
successful: Completed Payment
[*] --> customer
customer --> checkout
checkout --> successful
```
## Low-code integration
PayRex offers a low-code solution that gives you more payment integration control.
- [Checkout](/docs/guide/developer_handbook/payments/integrations/checkout): This lets you redirect your customers to a PayRex-hosted checkout page.
- [Elements](/docs/guide/developer_handbook/payments/integrations/elements): A UI component that you can embed into your website. When your customer is ready to complete a purchase, you create a PaymentIntent and configure how you want to display payment methods.
- [Pages](/docs/guide/payments/pages/overview): Always-on payment pages that your customers can access any time to pay for your products and services. With Pages, you can receive payments right away without building a website.
## Receiving payment through Google Pay
Google Pay is not considered a dedicated payment method within the PayRex platform. It is one way to complement our `card` payment method by simplifying the card input of your customer. If you have already integrated our `card` payment method, you can proceed with the next steps below. If you have not yet integrated our `card` payment method, please implement it first by checking this [guide](/docs/guide/developer_handbook/payments/payment_methods/card/receive_a_straight_payment).
### 1. Enable Google Pay from Dashboard
If you have already integrated the `card` payment method, there is no additional integration step for Google Pay. All you have to do is enable Google Pay from your list of allowed payment methods.
In the PayRex Dashboard, go to Settings > Payment Methods, then enable Google Pay. Once it is enabled, you should see the Google Pay widget from your PayRex integration.
### Final notes
If you provide Google Pay as a payment method to your customers, you must use the official Google Pay logo and button assets in compliance with [Google Pay Android brand guidelines](https://developers.google.com/pay/api/android/guides/brand-guidelines) and [Google Pay web brand guidelines](https://developers.google.com/pay/api/web/guides/brand-guidelines), without modifications to the Google Pay asset colors, proportions, or appearance.
Our hosted checkout integration with Google Pay simplifies your ability to provide Google Pay as a payment option to your customers.
You must additionally complete the following essential steps to enable Google Pay functionality:
Adhere to Google policies: all merchants are required to follow the [Google Pay and Wallet API's Acceptable Use Policy](https://payments.developers.google.com/terms/aup) and accept the terms defined in the [Google Pay API Terms of Service](https://payments.developers.google.com/terms/sellertos).
---
# PayRex Payment Methods
Source: https://docs.payrex.com/docs/guide/developer_handbook/payments/payment_methods
Path: docs/guide/developer_handbook/payments/payment_methods/index.mdx
# Payment Methods
In this section, you will learn how to integrate different payment methods PayRex supports. The only difference between the available payment methods is whether you passed the payment method as an allowed one. Take a look at each specific use case for every payment method.
---
# Integrate Maya Payment Method
Source: https://docs.payrex.com/docs/guide/developer_handbook/payments/payment_methods/maya
Path: docs/guide/developer_handbook/payments/payment_methods/maya/index.mdx
# Maya
This section contains information about integrating PayRex's Maya payment method into your website or application. This payment method allows you to accept payments from your customers who use Maya.
---
# Maya Payment Integration
Source: https://docs.payrex.com/docs/guide/developer_handbook/payments/payment_methods/maya/receive_a_payment
Path: docs/guide/developer_handbook/payments/payment_methods/maya/receive_a_payment.mdx
# Receive a Maya payment
Learn how to receive a `maya` payment from your customer.
The Maya payment method is when customers use their [Maya](https://www.maya.ph/) account. To complete a Maya payment, your customer should select Maya as the payment method and complete the Maya verification step.
## The Maya payment flow
At checkout, your customer can select Maya as the preferred payment method. Once your customer clicks the pay button, Maya will verify the transaction, and your customer must complete the verification step. Maya facilitates its verification step. PayRex facilitates the Maya transaction by rendering the payment page provided by Maya.
```mermaid
stateDiagram-v2
direction Lr
customer: Customer
checkout: Checkout Page
verification: Verification step
successful: Completed Payment
[*] --> customer
customer --> checkout
checkout --> verification
verification --> successful
```
## Low-code integration
PayRex offers a low-code solution that gives you more payment integration control.
- [Checkout](/docs/guide/developer_handbook/payments/integrations/checkout): This lets you redirect your customers to a PayRex-hosted checkout page.
- [Elements](/docs/guide/developer_handbook/payments/integrations/elements): A UI component that you can embed into your website. When your customer is ready to complete a purchase, you create a PaymentIntent and configure how you want to display payment methods.
- [Pages](/docs/guide/payments/pages/overview): Always-on payment pages that your customers can access any time to pay for your products and services. With Pages, you can receive payments right away without building a website.
## Receiving a Maya payment
To receive a Maya payment, you must specify that you allow a Maya payment when creating a payment intent. The example below is for payment intent workflow.
Once you specify the `maya` string, PayRex will handle the rest of your customer's payment flow.
---
# Integrate QRPh Payment Method
Source: https://docs.payrex.com/docs/guide/developer_handbook/payments/payment_methods/qrph
Path: docs/guide/developer_handbook/payments/payment_methods/qrph/index.mdx
# QRPh
This section contains information about integrating PayRex's QRPh payment method into your website or application. This payment method allows you to accept payments from your customers who use QRPh.
---
# QRPh Payment Integration
Source: https://docs.payrex.com/docs/guide/developer_handbook/payments/payment_methods/qrph/receive_a_payment
Path: docs/guide/developer_handbook/payments/payment_methods/qrph/receive_a_payment.mdx
# Receive a QRPh payment
Learn how to receive a `qrph` payment from your customer.
The QRPh payment method is when customers scan a QRPh code to pay. To complete a QRPh payment, your customer should select QRPh as the payment method and complete the payment from the [QRPh participant](https://www.bsp.gov.ph/PaymentAndSettlement/QR%20Ph%20P2M%20Participants.pdf) they want to use.
PayRex currently supports dynamic QRPh to help you receive an accurate amount from your customer.
## The QRPh payment flow
> **WARNING**
Scan a test mode static QR Ph using your phone's camera. This only simulates a test payment. In a real or live mode static QR Ph, you must use your e-wallet or mobile banking app to complete a payment.
At checkout, your customer can select QRPh as the preferred payment method. Once your customer clicks the pay button, A QR code will show and your customer should complete the payment through their preferred [QRPh participant](https://www.bsp.gov.ph/PaymentAndSettlement/QR%20Ph%20P2M%20Participants.pdf). Once your customer completes the payment, PayRex will confirm the successful payment.
```mermaid
stateDiagram-v2
direction Lr
customer: Customer
show_qr: Show QRPh code
scan: Customer scans QRPh code
successful: Completed Payment
[*] --> customer
customer --> show_qr
show_qr --> scan
scan --> successful
```
## Low-code integration
PayRex offers a low-code solution that gives you more payment integration control.
- [Checkout](/docs/guide/developer_handbook/payments/integrations/checkout): This lets you redirect your customers to a PayRex-hosted checkout page.
- [Elements](/docs/guide/developer_handbook/payments/integrations/elements): A UI component that you can embed into your website. When your customer is ready to complete a purchase, you create a PaymentIntent and configure how you want to display payment methods.
- [Pages](/docs/guide/payments/pages/overview): Always-on payment pages that your customers can access any time to pay for your products and services. With Pages, you can receive payments right away without building a website.
## Receiving a QRPh payment
To receive a QRPh payment, you must specify that you allow a QRPh payment when creating a payment intent. The example below is for payment intent workflow.
Once you specify the `qrph` string, PayRex will handle the rest of your customer's payment flow.
---
# PayRex Refunds
Source: https://docs.payrex.com/docs/guide/developer_handbook/refunds
Path: docs/guide/developer_handbook/refunds/index.mdx
# Refunds
Learn more about refunding payments with PayRex.
---
# Refund a PayRex payment
Source: https://docs.payrex.com/docs/guide/developer_handbook/refunds/process-a-refund
Path: docs/guide/developer_handbook/refunds/process-a-refund.mdx
# Process a refund
Learn how to cancel or refund a payment.
## Overview
You can partially or fully refund any `paid` payment. Refunds use your available PayRex balance, which doesn't include any pending balance. To view a list of all your refunds, go to the payments page in the Dashboard and look for payments with `partially refunded` or `refunded` status.
> **WARNING**
When triggering refunds, PayRex doesn't return the transaction fees from the payment.
## Requesting for refunds
We submit the refund requests to the appropriate provider depending on the payment method. For example, for `card` payments, we submit the refund requests to the cardholder's issuing bank, while for `gcash` payments, we send the refund requests to GCash. Once the refund request succeeds, the refund will reflect to the customer's end after the refund SLA of our providers.
| Payment Method | Is supported? |
| -------------- | ----------------------- |
| card | Supported |
| gcash | Supported |
| maya | Supported |
| qrph | Currently not supported |
## Refunding a payment
You can issue refunds via Refunds API. You can either fully refund a payment or create multiple partial refunds against a payment. Still, you can't refund a total greater than the amount of the payment being refunded.
---
# Sample PayRex Projects
Source: https://docs.payrex.com/docs/guide/developer_handbook/sample_projects
Path: docs/guide/developer_handbook/sample_projects.mdx
# Sample Projects
If you're looking for sample projects to start your integration, please refer to the table below.
If you want to request a sample project for your preferred programming language, please contact developers@payrex.com.
| Programming Language | Reference |
| ------------------------- | ---------------------------------------------------------------------------------------------------- |
| PHP (vanilla only) | [https://github.com/payrexhq/payrex-php-sample](https://github.com/payrexhq/payrex-php-sample) |
| NodeJS (NextJS framework) | [https://github.com/payrexhq/payrex-nextjs-sample](https://github.com/payrexhq/payrex-nextjs-sample) |
---
# Statement descriptors
Source: https://docs.payrex.com/docs/guide/developer_handbook/statement_descriptor
Path: docs/guide/developer_handbook/statement_descriptor.mdx
# Statement Descriptors
Learn how statement descriptors work
Statement descriptors are how payments appear on your customers' bank statements. Clear and accurate statement descriptors can reduce or avoid chargebacks.
When you [activate your account](/docs/guide/getting_started/activate_your_account), the value you indicate in the merchant's trade name appears on all customer statements, especially for card payments.
## Override statement descriptor within your integration
You can set the statement descriptor within your integration if your business offers different products or services and wants to use a different statement descriptor from your merchant account's trade name,
You can specify a text value via the `statement_descriptor` attribute within your integration, which is the value your customers will see in their bank statements.
> **WARNING**
It is important to use the appropriate statement descriptors to reduce chargebacks or being flagged by our risk team. We periodically review your transactions to ensure you use the appropriate statement descriptors.
## Statement descriptor requirements
A statement descriptor must meet the following requirements:
- Contains only Latin characters.
- Contains between 5 and 22 characters.
- Contains at least one letter.
- Must not contain any of the following special characters: `<`, `>`, `\`, `'` `"` `*`.
- Reflects your Doing Business As (DBA) name.
- A text value that your customers can recognize your business.
## Overriding the value for statement_descriptor
The following examples show how to override the statement_descriptor value when creating a PaymentIntent.
---
# Testing
Source: https://docs.payrex.com/docs/guide/developer_handbook/testing
Path: docs/guide/developer_handbook/testing/index.mdx
# Testing
Learn more about how to test PayRex quickly without using real money.
---
# Testing your integration
Source: https://docs.payrex.com/docs/guide/developer_handbook/testing/testing_your_integration
Path: docs/guide/developer_handbook/testing/testing_your_integration.mdx
# Testing your integration
Learn more about simulating payments for different scenarios to test your integration.
To check if your integration works correctly, simulate transactions without using real money with our test values in test mode.
## How to use test cards
Remember, the first step in your integration process is using your test mode API keys and test cards provided by PayRex.
- For expiration month and year, use any valid future date. For example, if today is May 2024, you can use 08/24, which is a future date.
- For CVC, use any three-digit CVC.
- Use one of our test cards below.
> **WARNING**
These are test cards that should not be used in live mode or production testing. You can only use them in test mode.
By Card Brands
| Card Number | Brand |
| ----------------- | ------------------------ |
| 4242424242424242 | Visa |
| 4701322211111234 | Visa (debit card) |
| 5425233430109903 | Mastercard |
| 5200828282828210 | Mastercard (debit card) |
By Card Country
| Card Number | Country |
| ---------------- | ------- |
| 4242424242424242 | US |
| 4000000760000002 | PH |
By Card Scenario
| Card Number | Scenario | failed_code |
| ---------------- | ------------------------------------ | ------------------ |
| 4000000000001000 | Fraudulent transaction error | blocked |
| 4005550000000019 | Generic decline error | generic_decline |
| 4503300000000008 | Insufficient fund error | funds_insufficient |
| 4205260000000005 | Incorrect CVC | cvc_incorrect |
| 4001270000000000 | Processing error | processing_error |
| 4012000033330026 | System error | system_error |
| 4311780000241409 | Frictionless authentication | not applicable |
| 4000000000000077 | Declined Frictionless authentication | generic_decline |
---
# Test mode
Source: https://docs.payrex.com/docs/guide/developer_handbook/testing/testmode
Path: docs/guide/developer_handbook/testing/testmode.mdx
# Test mode
Learn more about the concept of test mode to test your integration.
Integrating in test mode allows you to test your integration without using real money or affecting live transactions.
## Test mode
In test mode, you can use our test payment methods, such as test credit cards. You can also simulate transactions to ensure that your integration works correctly. This feature helps identify bugs or errors in your PayRex implementation before you go live with live payments.
Once you've signed up for a PayRex account, you'll receive a set of test API keys in the PayRex Dashboard. These API keys are used to integrate PayRex into your website or application. When you're ready to accept real payments, you must activate your account, turn off test mode, and switch to using the live API keys in your integration.
## Test mode versus live mode
All Payrex API requests can be called in either test or live mode. The resources created in one mode are not accessible in the other. For example, if a Payment Intent is created in test mode, the Payment resources that will be created will not exist in live mode, and vice versa.
| Type | When to use | How to use |
| --------- | ------------------------------------------------------------------------------------------------ | -----------------------------------------------------|
| test mode | Use test mode API keys to complete your integration. In test mode, everything will be simulated. | Use test payment methods provided by PayRex |
| live mode | Once you're done with your integration, switch your test mode API keys to live mode API keys. | Use actual payment methods such as real credit cards |
## Test card numbers
PayRex provides a set of test card numbers that you can use to simulate various payment scenarios. You can use these test card numbers to create simulated payments in test mode without processing actual payments or charges.
When using test card numbers, you can enter any future date for the expiration date and any three-digit CVC code to simulate a successful payment. To simulate a failed payment, you can use specific test card numbers and CVC codes provided by PayRex.
> **INFO**
Test card numbers are only valid in test mode. You cannot use them for real payments.
---
# Webhooks
Source: https://docs.payrex.com/docs/guide/developer_handbook/webhooks
Path: docs/guide/developer_handbook/webhooks.mdx
# Webhooks
Learn how to use webhooks to listen for real-time events on your PayRex account and trigger your business logic around the updates.
## Why should you use a webhook
When integrating with PayRex, you might want your backend system to react to specific events from your PayRex account. Through webhooks, your backend system can run business logic whenever PayRex sends updates to your webhook.
To listen to webhook events, you need to create a Webhook resource. After creating a Webhook resource, PayRex will send the event data to the URL of your Webhook resource when the listened events occur in your PayRex account. The event data is sent as a payload in JSON format and uses HTTPS to make a secure request.
Use cases for using a webhook:
- Execute asynchronous actions or business logic when events happen in your PayRex account, e.g., a successful payment is received, a chargeback has been created, a refund is partially refunded, etc.
- Ensure your business logic occurs even if your customer encounters internet connection problems. For example, for URL redirections, move it to your webhook instead of adding your business logic once your customer is redirected to a successful or failed page.
- Automate exporting data from the PayRex dashboard by receiving events straight to your webhook. One good example is if you're building an ETL for your business, you can use a webhook to receive real-time events in JSON form, transform the data if needed, and send it to your data warehouse.
## What is an Event resource
The requests sent to your webhook have a JSON payload containing information about the event that occurred in your PayRex account.
When an event occurs in your PayRex account, PayRex creates an Event resource. A single API request in your PayRex account might create multiple events. For example, if you receive a successful payment, `payment_intent.succeeded` and `payment.paid` events are created, and it's up to you to subscribe to both events. The difference between these two events is that the `payment_intent.succeeded` subject is a PaymentIntent. At the same time, the `payment.paid` subject is a Payment resource.
Creating webhooks in your PayRex account allows PayRex to automatically send Event resources through POST HTTP requests to the URL you indicated in your Webhook resource. You can run backend business logic once your system receives the Event resource. For example, you can transform and send the event data to your data warehouse. Another example is calling your logistics provider's API to request a shipment after receiving a `payment_intent.succeeded` event.
The Event resource we sent to your webhook contains a snapshot of the changed resource. For example, in a `payment_intent.succeeded` event, the Event resource contains the Payment Intent data that transitions to `succeeded` status.
### Sample Event resource
```json showLineNumbers
{
"id": "evt_bxuGtXXC3zNsWbW3W1zQKiLWf67ZC4sa",
"resource": "event",
"type": "payment_intent.succeeded",
"livemode": false,
"pending_webhooks": 1,
"data":{
"resource": {
"id": "pi_SJuGtXXC3XNRWpW3W1zQKiLWf67ZC4sX",
"resource": "payment_intent",
"amount": 10000,
"payment_methods": ["card", "gcash"],
"status": "awaiting_payment_method",
"capture_type": "automatic",
"client_secret": "pi_SJuGtXXC3XNRWpW3W1zQKiLWf67ZC4sX_secret_7KGizzHuLtPtaLwiRMHekBHRUo6yv52r",
"currency": "PHP",
"description" :"",
"livemode": false,
"metadata": null,
"next_action": {
"type": "redirect",
"redirect_url": "https://my-application/redirect"
},
"created_at": 1700407880,
"updated_at": 1700407880
},
"previous_attributes": {
"status": "awaiting_next_action"
}
},
"created_at": 1680064018,
"updated_at": 1680064015
}
```
## How are events generated?
See the table below to understand how Event resources are created in your PayRex account.
| Event Source | Trigger |
|--------------|---------------------------------------------------------------------|
| Dashboard | When actions in PayRex Dashboard trigger internal PayRex APIs. |
| API | When you call a PayRex API endpoint programmatically. |
## Setting up a Webhook in your PayRex account
### 1. Identify the events that you want to monitor for your webhook URL
PayRex maintains a list of possible events you can monitor from your Account. Please see this [list](/docs/api/events/event_types).
### 2. Prepare your API endpoint
Depending on your programming language and framework, set up an API endpoint that can accept webhook requests from PayRex via a POST method. If you're still developing on your local machine, you can use HTTP. However, it would help if you made the local API endpoint publicly accessible. You can use free public reverse proxy tools such as [ngrok](https://ngrok.com/).
Some requirements when setting up an API endpoint:
1. Responds to POST method requests with a JSON payload composed of an Event resource.
2. Returns a successful HTTP code (2xx) within the server timeout. If your endpoint returns a non-2xx response, we will treat it as a failed send attempt and try again later.
#### Example endpoint
#### Retry behavior
PayRex attempts to deliver a given event to your webhook endpoint for up to 3 days with an exponential back off.
If your Webhook has been disabled or deleted while PayRex attempts to retry sending an event due to failed attempts, future retries of that event will not continue. However, suppose you disable and re-enable the Webhook before PayRex attempts to send the event. In that case, you will still receive the future events.
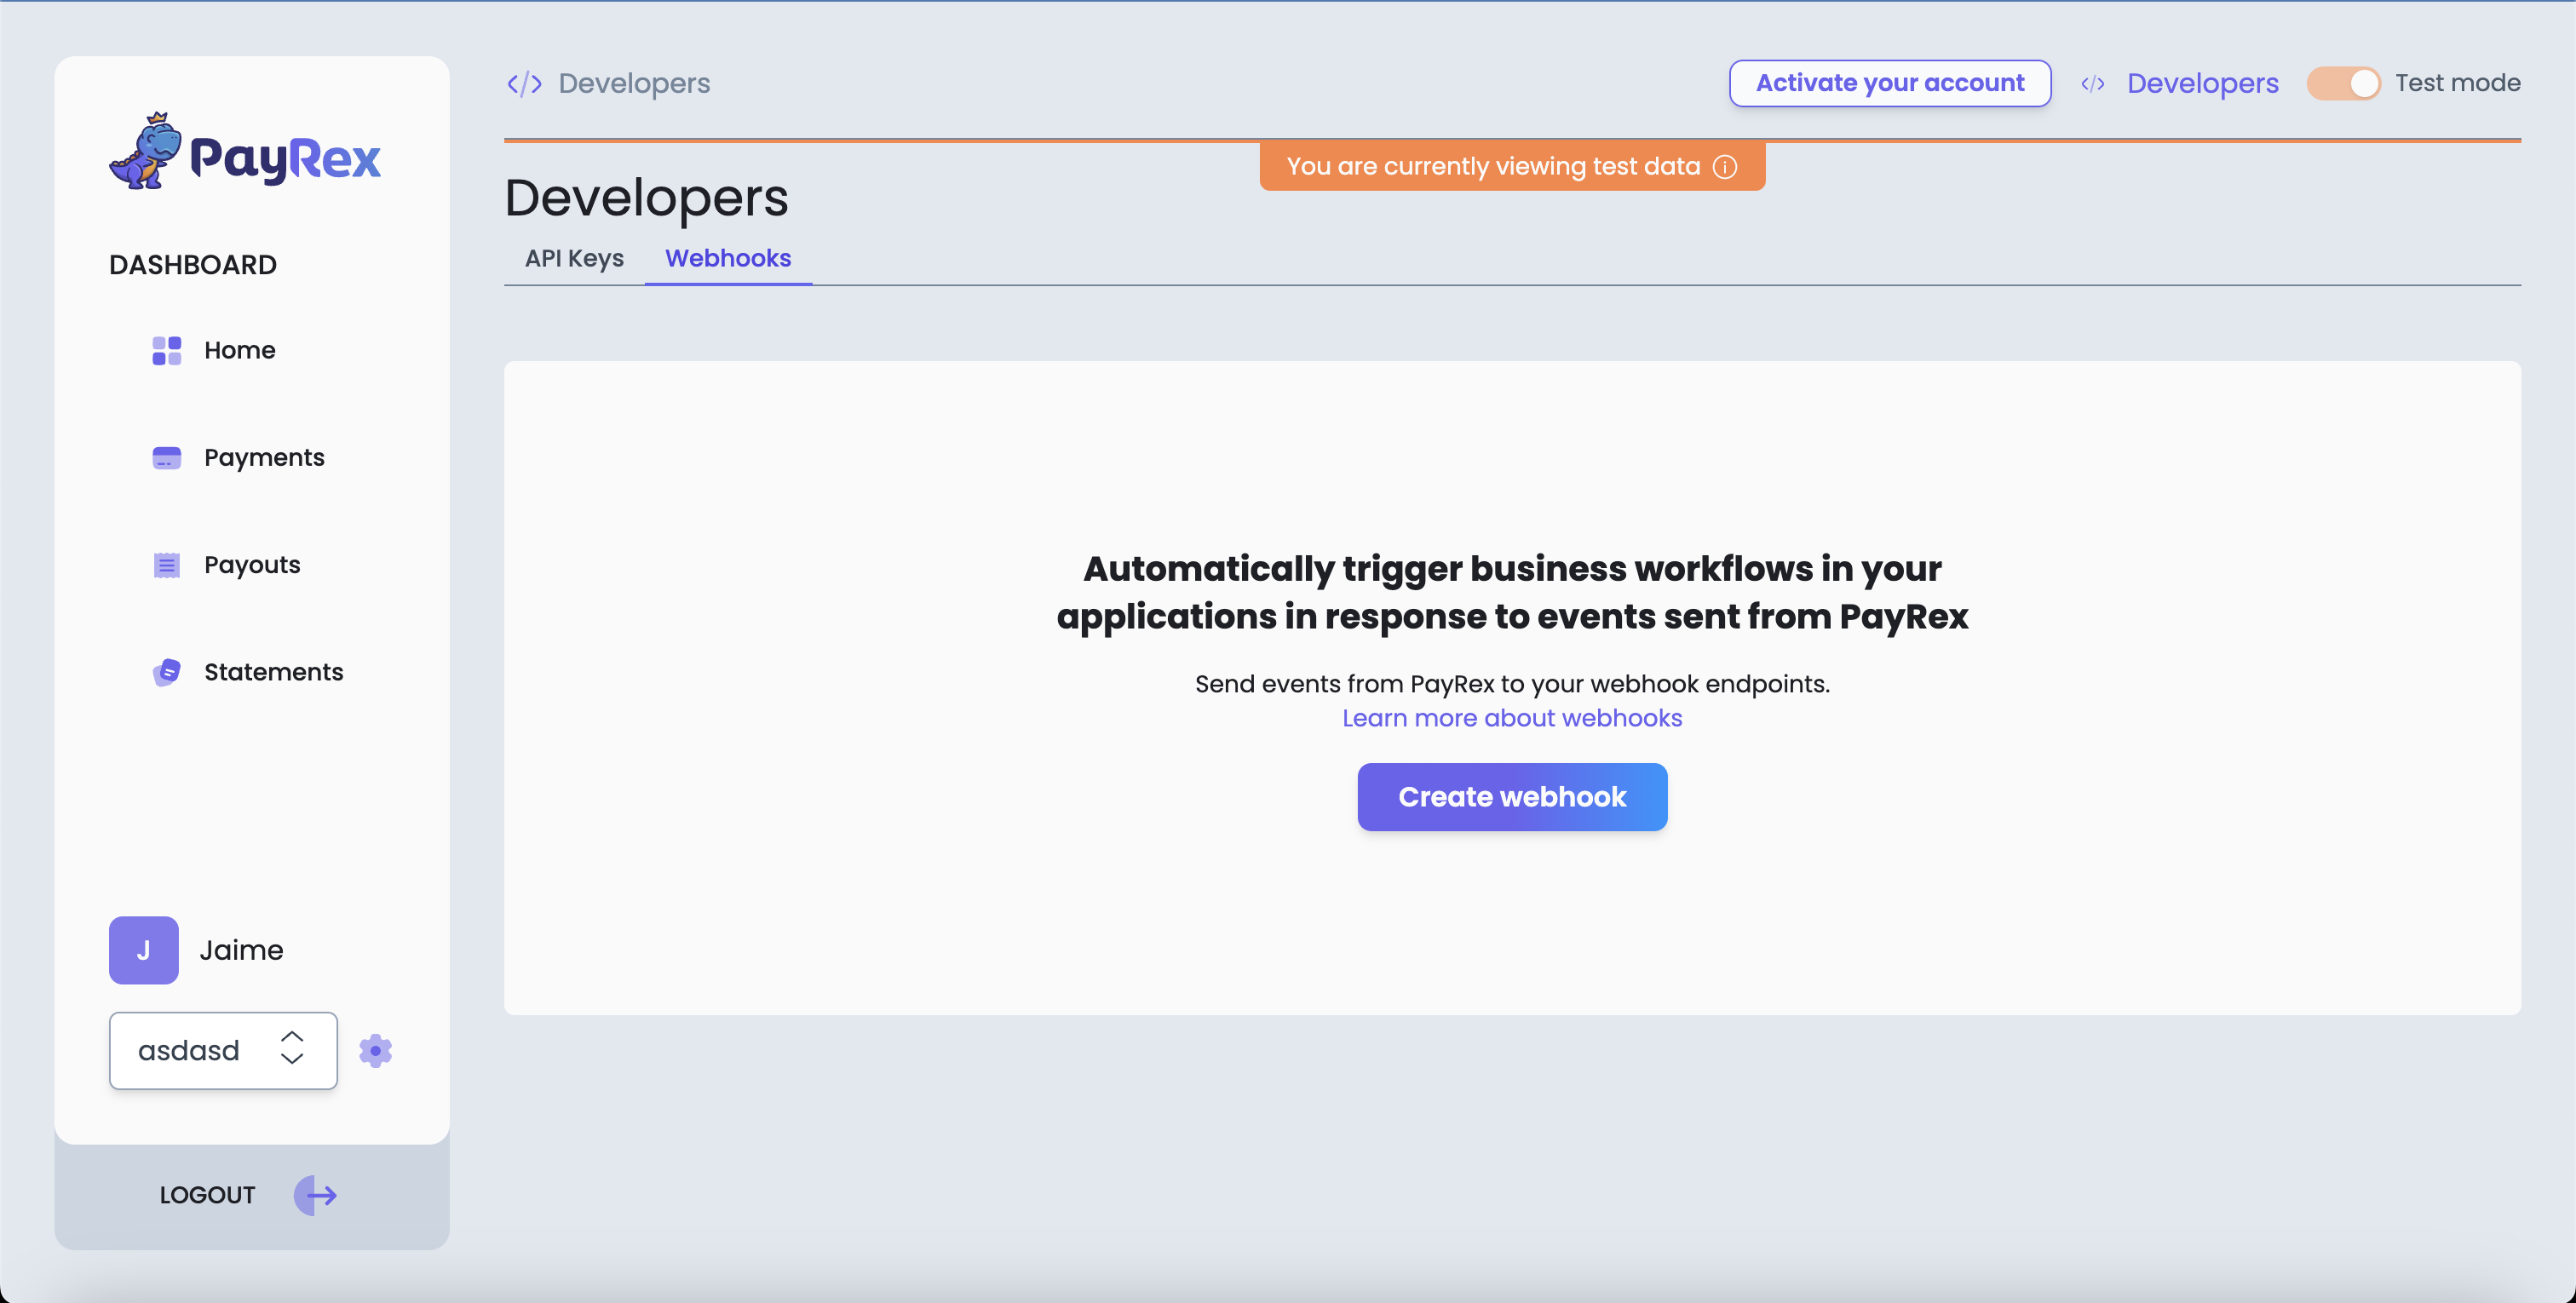
### 3. Create and manage your webhook in PayRex
After testing your webhook endpoint, register your endpoint URL via webhooks module. To create a webhook, go to Developers module from the dashboard, then click webhooks.
`draft` is the initial status of a billing statement. |
## Administrator
The **administrator** user role can perform all actions within the merchant account except change account ownership and update bank details.
:heavy_multiplication_x: The **administrator** cannot: **User Invitations** - Invite users with administrator roles **Users** - Delete users with administrator roles **Customer Support** - Ask to change account ownership - Ask to update existing bank account details **Chargebacks** - Receive chargeback notifications
## IAM Administrator
The **IAM administrator** user role is best assigned to users whose job is to invite other users but cannot view other merchant data, such as payments.
:heavy_multiplication_x: The **IAM administrator** cannot: **User Invitations** - Invite users with administrator roles **Users** - Delete users with administrator roles **Payments** - View and export list of payments - Refund payments **Billing statements** - View and export list of billing statements - Create and update billing statement details **Customers** - View list of customers - View, create, update, and delete customers **Pages** - View list of pages - Create and update page details - View and export list of payments under a page **Product catalog** - View and export product catalog listing - Add or bulk import new products - View and update product information - View, add, update, or delete product prices and images **Payouts** - View list of payouts - View and export list of transactions under a payout **Developers** - View and copy developer API keys **Customer Support** - Ask to change account ownership - Ask to update existing bank account details **Chargebacks** - Receive chargeback notifications
## Developer
The **developer** user role is best assigned to users whose job is to manage the merchant's current integration with PayRex.
:heavy_multiplication_x: The **developer** cannot: **User invitations** - View or delete user invitations - Invite users with administrator and non-administrator roles - Update assigned roles on user invitations **Users** - View list of users - Update user's assigned role - Remove users with administrator and non-administrator roles **Product catalog** - Add or bulk import new products - Update product details - Add, update, or delete product prices and images **Payouts** - View list of payouts - View and export list of transactions under a payout **Customer Support** - Ask to change account ownership - Ask to update existing bank account details **Chargebacks** - Receive chargeback notifications
## Billing Statements Manager
The **billing statements manager** user role is best assigned to users who handle the creation and management of billing statements but do not need to access the other dashboard modules, such as payments, payouts, and settings.
:heavy_multiplication_x: The **billing statements manager** cannot: **User invitations** - View or delete user invitations - Invite users with administrator and non-administrator roles - Update assigned roles on user invitations **Users** - View list of users - Update user's assigned role - Remove users with administrator and non-administrator roles **Payments** - View and export list of payments - Refund payments **Customers** - Create, update, and delete customers **Pages** - View list of pages - Create and update page details - View and export list of payments under a page **Product catalog** - View and export product catalog listing - Add or bulk import new products - View and update product information - View, add, update, or delete product prices and images **Payouts** - View list of payouts - View and export list of transactions under a payout **Developers** - View and copy developer API keys **Customer Support** - Ask to change account ownership - Ask to update existing bank account details **Chargebacks** - Receive chargeback notifications
## Pages Manager
The **pages manager** user role is best assigned to users who manage the creation and details of pages, without needing to access the payments, payouts, and settings modules.
:heavy_multiplication_x: The **pages manager** cannot: **User invitations** - View or delete user invitations - Invite users with administrator and non-administrator roles - Update assigned roles on user invitations **Users** - View list of users - Update user's assigned role - Remove users with administrator and non-administrator roles **Payments** - View and export list of payments - Refund payments **Billing statements** - View and export list of billing statements - Create and update billing statement details **Product catalog** - Export product catalog listing - Add or bulk import new products - Update product details - Add, update, or delete product prices and images **Customers** - View list of customers - View, create, update, and delete customers **Payouts** - View list of payouts - View and export list of transactions under a payout **Developers** - View and copy developer API keys **Customer Support** - Ask to change account ownership - Ask to update existing bank account details **Chargebacks** - Receive chargeback notifications
## Product Catalog Manager
The **product catalog manager** user role is best assigned to users whose sole responsibility is to handle the creation and management of the product catalog, and has no need to access the other dashboard modules such as payments, payouts, settings, and other PayRex products.
:heavy_multiplication_x: The **product catalog manager** cannot: **User invitations** - View or delete user invitations - Invite users with administrator and non-administrator roles - Update assigned roles on user invitations **Users** - View list of users - Update user's assigned role - Remove users with administrator and non-administrator roles **Payments** - View and export list of payments - Refund payments **Billing statements** - View and export list of billing statements - Create and update billing statement details **Pages** - View list of pages - Create and update page details - View and export list of payments under a page **Customers** - View list of customers - View, create, update, and delete customers **Payouts** - View list of payouts - View and export list of transactions under a payout **Developers** - View and copy developer API keys **Customer Support** - Ask to change account ownership - Ask to update existing bank account details **Chargebacks** - Receive chargeback notifications
## Refund Analyst
The **refund analyst** user role is best assigned to users whose job is to refund payments.
:heavy_multiplication_x: The **refund analyst** cannot: **User invitations** - View or delete user invitations - Invite users with administrator and non-administrator roles - Update assigned roles on user invitations **Users** - View list of users - Update user's assigned role - Remove users with administrator and non-administrator roles **Payments** - Export list of payments **Billing statements** - Create and update billing statement details - Export list of billing statements **Customers** - Create, update, and delete customers **Pages** - Create and update page details - Export list of payments under a page **Product catalog** - View and export product catalog listing - Add or bulk import new products - View and update product information - View, add, update, or delete product prices and images **Developers** - View and copy developer API keys **Customer Support** - Ask to change account ownership - Ask to update existing bank account details **Chargebacks** - Receive chargeback notifications
## View and export-only
The **view and export-only** user role is best assigned to users who view or retrieve data and export it as CSV.
:heavy_multiplication_x: The **view and export-only** cannot: **User invitations** - View or delete user invitations - Invite users with administrator and non-administrator roles - Update assigned roles on user invitations **Users** - View list of users - Update user's assigned role - Remove users with administrator and non-administrator roles **Payments** - Refund payments **Billing statements** - Create and update billing statement details **Customers** - Create, update, and delete customers **Pages** - Create and update page details **Product catalog** - Add or bulk import new products - Update product information - Add, update, or delete product prices and images **Developers** - View and copy developer API keys **Customer Support** - Ask to change account ownership - Ask to update existing bank account details **Chargebacks** - Receive chargeback notifications
## View-only
The **view-only** user role is best assigned to users who view or retrieve data.
:heavy_multiplication_x: The **view-only** cannot: **User invitations** - View or delete user invitations - Invite users with administrator and non-administrator roles - Update assigned roles on user invitations **Users** - View list of users - Update user's assigned role - Remove users with administrator and non-administrator roles **Payments** - Export list of payments **Billing statements** - Export list of billing statements **Customers** - Create, update, and delete customers **Pages** - Export list of payments under a page **Product catalog** - Export product catalog listing - Add or bulk import new products - Update product details - Update or delete product prices and images **Payouts** - Export list of transactions under a payout **Developers** - View and copy developer API keys **Customer Support** - Ask to change account ownership - Ask to update existing bank account details **Chargebacks** - Receive chargeback notifications
---
# Account management
Source: https://docs.payrex.com/docs/guide/getting_started/using_the_dashboard/account_management
Path: docs/guide/getting_started/using_the_dashboard/account_management/index.mdx
# Account management
#### Customize your account to suit your business' needs.
### Settings
The settings of your PayRex account is divided into two parts: account settings and product settings.
The account settings lets you invite and manage your team members and view the activities made on your account.
Product settings on the other hand allows you to set which payment methods to offer to your customers via billing statements, pages, API integration, and your linked Shopify store.
### Developers
Being a developer-first company, PayRex provides you with tools to speed up your development and integration.
Under the Developers settings you will find your API keys, both the public and secret keys, and either in live mode or test mode.
You can also manage your webhooks here - register new webhooks, update configurations, and monitor event logs.
### Profile
Under the Profile settings, you can update your Dashboard user name and manage your two-step authentication configuration and devices.
### Data modes
The PayRex Dashboard allows you to toggle between viewing your live or test data. Live data are the real-world transactions you receive from your customers or PayRex. But in order to access this, you need to make sure that your [account is activated](/docs/guide/getting_started/activate_your_account). Test mode data on the other hand allows you to integrate PayRex with your website or application while you complete your account activation.
Learn more about the difference between live mode and test mode data [here](/docs/guide/developer_handbook/testing/testmode).
### Switch account
PayRex allows you to manage multiple business profiles in one Dashboard. Simply select the profile you want to manage from the sidebar and its corresponding data will be loaded on your Dashboard. You can also create a new business profile from this section.
### Request a feature
At PayRex, we value your feedback. That is why we have a dedicated menu to let you share your usage insights and improvements to make your Dashboard experience more seamless.
---
# Home
Source: https://docs.payrex.com/docs/guide/getting_started/using_the_dashboard/core_resources/home_analytics
Path: docs/guide/getting_started/using_the_dashboard/core_resources/home_analytics.mdx
# Home
#### Your bird's eye view of your business' performance.
Your home page showcases the analytics widgets, offering you immediate insights into your business's performance and growth regarding recent transactions, customer engagement, and product usage.
### Summary today
Evaluate your payment performance from today against yesterday, check how many new customers you've gained, and take a look at the estimated payout amount you can expect on your next payout schedule.
- **Gross revenue**: the amount of paid payments with fees not yet deducted. This also includes the payments that were partially or fully refunded.
- **Net revenue**: the amount of paid payments less of fees. This also includes the payments that were partially or fully refunded.
- **Successful payments**: the number of paid payments, including those that were partially or fully refunded. The list displays the 10 most recent successfully paid payments of the current day.
- **Failed payments**: the list of the 10 most recent failed payments of the current day.
- **Past due billing statements**: the list of the 10 most recent billing statements that are past their due dates. Billing statements with due dates set on the current day will be listed as the most recent.
- **Outstanding billing statements**: the amount of billing statements that are still open, either not yet due or already due. The categories also determines how much billing statements are already past their due date based on the number of days that already passed.
- **New customers**: the count of new customers.
- **Next payout**: the estimated net amount of your next schedule's payout.
Sample use cases:
| The Summary today section can show you: | So that you can analyze: |
| ----------------------------------------------------------------------------------- | ---------------------------------- |
| your revenue and net revenue comparison for the current day and the previous day. | your sales performance and potential for growth through your revenue, and your profitability through your net revenue. |
| which billing statements are already past due and how much do they cost. | how much profit are you losing for not being able to collect payments from past due statements and which to prioritize for follow-ups with your customers. |
| when to expect your upcoming payout and how much. | how best to manage your cashflow. |
### Payments
View your revenue, investigate the causes of unsuccessful payments, and assess the performance of each payment method over a selected time period.
- **Gross revenue**: the amount of paid payments with fees not yet deducted for the selected date range. This also includes the payments that were partially or fully refunded.
- **Net revenue**: the amount of paid payments less of fees for the selected date range. This also includes the payments that were partially or fully refunded.
- **Payment status**: the count of payments per status for the selected date range.
- **Failed payment reasons**: the percentage breakdown and count of reasons why the payments failed to be processed for the selected date range.
- **Top payment methods**: the percentage breakdown and total gross amount processed for each payment method for the selected date range.
Sample use cases:
| The Payments widget can show you: | So that you can analyze: |
| -------------------------------------------------- | ---------------------------------------|
| your revenue and net revenue for x duration | your sales performance and potential for growth through your revenue, and your profitability through your net revenue. |
| what are the common causes of payment failures | which preventive measures to implement and how you can better assist in improving your customers’ payment experience. |
| which payment methods are top performing | if you are catering to your customers’ payment preferences and which payment methods your can offer promos for. | |
### Customers
Check the count of your returning and new customers, the average expenditure they incur, and identify your leading customers within a specific time period.
- **Customers**: The total count of customers, both existing and new, for the selected date range.
- **New customers**: The total count of new customers for the selected date range.
- **Average spend per customer**: the total gross amount of all paid payments with a linked customer divided by the total number of customers with payments.
- **Top customers by spend**: list of top customers by how much is your spend for the selected date range.
Sample use cases:
| The Customers widget can show you: | So that you can analyze: |
| ------------------------------------------------------------- | ----------------------------------------------------------------------------------------- |
| how many new customers do you gain for x duration. | if you are able to reach and convert your potential market to actual, paying customers. |
| how much your customers are spending and during what days. | when best to promote your products and services and which customers you can offer discounts for your loyalty. |
### Billing Statements
See the number of billing statements that convert into revenue and the possible profit you can still gain from overdue billing statements within a certain time period.
- **Status breakdown**: the count of billing statements per status for the selected date range.
- **Total count**: the total count of billing statements for the selected date range.
Sample use case:
| The Billing Statements widget can show you: | So that you can analyze: |
| ------------------------------------------------------------------------ | ------------------------------------------------------ |
| how many billing statements transition from open to paid. | how much profit comes from using billing statements. |
### Pages
Discover the total number of payments and the net revenue you earned through your pages during a particular time period.
- **Sales**: total count of paid and partially refunded payments for all pages for the selected date range.
- **Revenue**: the total total net amount of paid and refunded (both in partial and in full) payments for all pages for the selected date range.
Sample use case:
| The Pages widget can show you: | So that you can analyze: |
| ------------------------------------------------------------ | ----------------------------------------- |
| how many sales and how much revenue do you gain from pages. | how much profit comes from using pages. |
---
# Core resources
Source: https://docs.payrex.com/docs/guide/getting_started/using_the_dashboard/core_resources
Path: docs/guide/getting_started/using_the_dashboard/core_resources/index.mdx
# Core resources
The PayRex Dashboard's core resources are your go-to sections to monitor and understand your PayRex transactions.
### [Home](/docs/guide/getting_started/using_the_dashboard/core_resources/home_analytics)
Your Dashboard home page allows you to view straightforward updates about your merchant account through [analytics widgets](/docs/guide/getting_started/using_the_dashboard/core_resources/home_analytics). These widgets offer quick insights into recent transactions, customer activity, and product utilization.
### [Payments](/docs/guide/getting_started/using_the_dashboard/core_resources/payments)
Monitor your payments in real-time. Search, filter, and export the list of payments to aid in your reconciliation process and view specific payment details such as payment breakdown and billing to help you assess and fulfill your orders.
You can also refund payments on your own with ease and download payment confirmations to share with your customers.
Learn more about these capabilities on our [Payments quick guide](/docs/guide/getting_started/using_the_dashboard/core_resources/payments).
### [Customers](/docs/guide/finance_automation/customers/overview)
Manage the details of your Customers in one place. View their saved payment methods and the transactions they made via [billing statements](/docs/guide/finance_automation/billing_statements/overview) and other PayRex payment channels.
### [Payouts](/docs/guide/getting_started/using_the_dashboard/core_resources/payouts)
Track our settlements to your bank account with Payouts module. View your previous and upcoming payouts, and see the list of transactions included for every payout.
Read on to learn more about [managing your payouts](/docs/guide/getting_started/using_the_dashboard/core_resources/payouts).
---
# Payments
Source: https://docs.payrex.com/docs/guide/getting_started/using_the_dashboard/core_resources/payments
Path: docs/guide/getting_started/using_the_dashboard/core_resources/payments.mdx
# Payments
#### Manage your PayRex transactions real-time, in one place.
The Payments module primarily consists of two parts: the [listing](/docs/guide/getting_started/using_the_dashboard/core_resources/payments#listing) and the [details](/docs/guide/getting_started/using_the_dashboard/core_resources/payments#payment-details).
### Listing
The payments listing includes every transaction you receive through PayRex, whether it's through our no-code solutions, billing statements and pages, or through API integration and third-party plugins like Shopify.
This enables you to keep track of your payments all in one place, even as they come from our various supported channels.
#### Search and filters
You can look for particular payments by entering either the complete or partial details of the following payment information: ID, description, billing details, or custom field. If you integrated PayRex with your website or application, you can also conveniently search by metadata, payment intent id, or page session.
To find a particular set of payments, you can apply filters such as payment status, product type, and date range to narrow down the payments list.
These search and filtering features enable you to swiftly verify your customers' payments and move forward with processing their orders.
#### Export
PayRex enables you to export your payments, allowing you to manage them offline or import them into your preferred accounting tool. Before downloading the CSV file, you have the option to choose which data columns to add or omit, eliminating the need to manually delete them later.
### Payment details
While the payment listing gives you an overview of your payments, the payment details page enables you to explore all the pertinent information for a particular payment in depth.
#### Details
The details section lists the fields that can quickly identify a payment:
- **ID**: the unique, system-generated ID of a payment. You can use this as reference to facilitate faster coordination with our Customer Support team.
- **Payment intent ID**: this unique identifier is primarily used by those who integrated PayRex to programmatically monitor payment status and debug issues.
- **Description**: this field provides information to identify the purpose of the payment.
- **Paid date**: the date and time when a customer successfully fulfilled processed their transaction via PayRex.
- **Cleared at**: the date and time when the payment is expected to be verified and reconciled by our partner banks or financial institutions. It is also by this time that the payment can be included to your payout.
#### Breakdown
The breakdown is composed of the amount and deductions that make up a payment.
- **Amount**: The gross amount of the payment made by your customer.
- **PayRex processing fee**: Our processing fee depending on the payment method that your customer used. For the default rates, you may view our [pricing](https://www.payrexhq.com/pricing) page.
- **Bank buy rate fee**: If you have a direct agreement with our partner bank, this is your agreed processing fee with them.
- **Foreign fee**: This is the processing fee if your customer made the payment using an internation card.
- **Product fee**: This is the fee based on the PayRex product used to facilitate the payment. For the default rates, you may view our [pricing](https://www.payrexhq.com/pricing) page.
- **12% VAT (fee)**: The 12% of vatable sales (the PayRex processing fee).
- **0.5% Withholding tax**:
- if with direct agreement with our partner bank: 0.5% of gross amount
- else: 0.5% of the gross amount less of PayRex processing fee, VAT, product fee (if applicable), and foreign fee (if applicable)
- **2% Expanded withholding tax (fee)**: The 2% of vatable sales (the PayRex processing fee).
These amounts are available across all our [available payment methods](https://www.payrexhq.com/pricing) when applicable.
#### Method
You can find the specifics regarding the payment method in the designated method section.
- **ID**: The payment method ID is primarily used by developers who integrated our vaulting feature to identify the payment method vaulted.
- **Payment method**: The method used by the customer to fulfill the payment. Head over to our [pricing](https://www.payrexhq.com/pricing) page for the list of our existing payment methods.
- **Card number**: This is the last 4 digits of the card used for the payment.
- **Card expiry**: This is the month and year when the card used for the payment will expire.
- **Card issuing country**: This is where the card used for the payment was issued.
- **Billing name**: The name of the payment method owner.
- **Billing email address**: The email address of the payment method owner.
- **Billing address**: The geographical address of the payment method owner.
The card and billing details are provided to help you verify and confirm the legitimacy of your customers' transactions.
#### Metadata
A set of key-value pairs useful for storing additional information about the payment. The metadata from [billing statements](/docs/api/billing_statements/create) or pages are copied to their corresponding payments.
#### Refunds listing
The refunds listing section displays the list of refunds issued for the payment. From here you can easily identify if the issued refund was processed successfully and understand the reason behind its issuance.
Please see the [Refund](/docs/guide/getting_started/using_the_dashboard/core_resources/payments#refund) section below for more details.
#### Related webhook requests
If you integrated our [webhooks](/docs/guide/developer_handbook/webhooks), all subscribed events related to the payment can be seen in this section. You have the option to resend either the successful or failed webhook events right from this section, or you can choose to be redirected to see more details about the event.
#### Download confirmation
Generate a copy of the successful payment confirmation notification that can be sent to your customers as proof of their successful transactions.
#### Refund
You can easily process refunds yourself through your PayRex Dashboard. Refunds can be issued as a partial amount or as a full refund of the payment and may take 5-10 days to reflect on your customer's statement. Additional details such as reason for refund and internal remarks, both of which will not be visible to your customers, can be indicated for documentation purposes. Please note that PayRex doesn't refund its fees for the original payment, but there are no extra charges for the refund.
---
# Payouts
Source: https://docs.payrex.com/docs/guide/getting_started/using_the_dashboard/core_resources/payouts
Path: docs/guide/getting_started/using_the_dashboard/core_resources/payouts.mdx
# Payouts
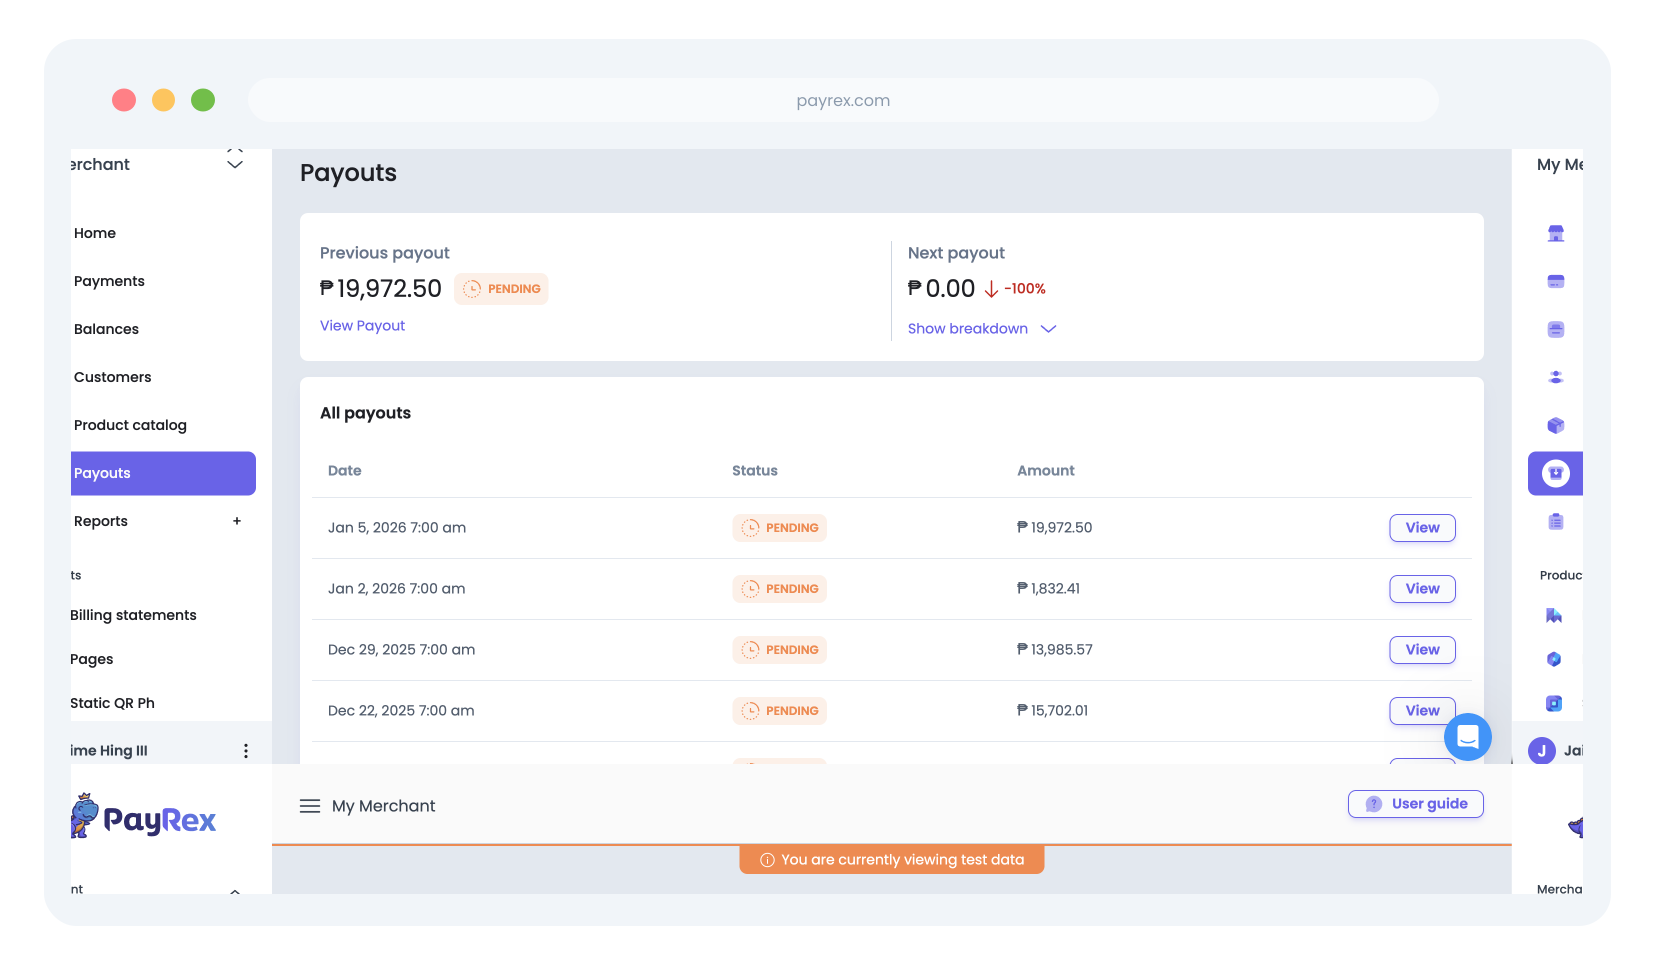
#### Your income consolidated from all sources.
Payouts are the funds that we settle to your nominated bank account. These funds are made up of credited or debited PayRex transactions to your balance, the same way how banks process their transactions:
- **Credit transactions** are those that are added to your PayRex balance. These are:
- **Payments**: The net amount of transactions made via PayRex's [supported payment methods](https://www.payrexhq.com/pricing).
- **Chargebacks**: If you were able to justify that the disputed transaction is genuine, the chargeback fee will be credited back to your balance.
- Other **credit adjustments** to your balance
- **Debit transactions** on the other hand are those that are deducted from your PayRex balance:
- **Refunds**: The funds you issued back to your customers due to unfulfilled orders or overpayment.
- **Chargebacks**: If a customer or a cardholder disputes a payment made using their card, the chargeback fee will be deducted from your balance.
- Other **debit adjustments** to your balance
The Payouts resource helps you understand [when your earnings will be available](https://help.payrex.com/en/articles/10614167-when-will-i-receive-my-payout) and the total amount you can expect. You can check your previous and next payouts, and review the transactions associated with each one.
### Previous and Next Payouts
The **Previous payout** section displays your last generated payout, its amount, and its processing status. You can view the payout to see the details and transactions included in it.
The **Next payout** section displays the estimated amount of your upcoming payout. It shows the breakdown of the included transactions' amounts and applicable fees and taxes.
### Payouts listing
The payouts listing shows all your previously generated and processed payouts. The listing has the high-level details of the payouts: generation date, status, and net amount. You can select a payout to view its details.
### Payout details
The payout details page allows you to better understand how your payout is computed, which bank account it was deposited, and which transactions were included.
#### Details
The details section shows the total values of all transactions, applicable fees, and taxes that made up the specific payout:
- **Payments**: The gross amount of all included payments in the payout.
- **Refunds**: The total amount of refunds issued during the payout cycle.
- **Fees**: The total amount of PayRex processing fees for all included payments in the payout, regardless of the payment method used.
- **Other fees**: The total amount of PayRex product fees and foreign fees for all applicable, included payments in the payout.
- **12% VAT (fee)**: The 12% of the PayRex processing fees and other fees.
- **0.5% Withholding tax**:
- if with direct agreement with our partner bank: 0.5% of gross amount
- else: 0.5% of the gross amount less of PayRex processing fee, VAT, product fee (if applicable), and foreign fee (if applicable)
- **2% Expanded withholding tax (fee)**: The 2% of vatable sales (the PayRex processing fee).
- **Adjustments**: Refers to any transaction other than those mentioned above that credits or debits amount to or from your balance.
- **Net amount**: The total amount of your payout for the current cycle less of refunds, applicable fees, and taxes.
#### Payout destination
The destination section shows your nominated bank account details where the payout was deposited:
- **Bank name**: The name of the bank which your nominated account is under.
- **Bank account name**: The account name of your nominated bank account.
- **Bank account number**: The account number of your nominated bank account, with the middle digits censored for your privacy and protection.
#### Transactions
The transactions section lists the corresponding payments, refunds, and adjustments that make up the payout:
- **Amount**: The net amount of the transaction.
- **Description**: The description of the transaction, if available.
- **Transaction**: The type of transaction - payment, refund, adjustment, transfer, or chargeback
- **Last updated**: The date and time when the transaction was last updated.
- **View**: Payments and refunds will redirect you to their corresponding payment details page.
#### Export
Similar to payments, PayRex allows you to export the transactions included in your specific payout. This is to help you reconcile your payouts with your internal records using your preferred accounting tool. Before downloading the CSV file, you can select which data columns to include or exclude instead of manually removing them from the file afterwards.
To learn more about bank reconciliation, you can refer to this [guide](/docs/guide/reports/bank_reconciliation).
---
# The PayRex Dashboard
Source: https://docs.payrex.com/docs/guide/getting_started/using_the_dashboard
Path: docs/guide/getting_started/using_the_dashboard/index.mdx
# Using the PayRex Dashboard
The [PayRex Dashboard](https://dashboard.payrexhq.com/l/home) serves as your user interface, packed with functionalities designed to assist you in setting up and managing your PayRex account:
- Search for payments from your customers
- Refund paid payments.
- See the breakdown of payments included in your payouts.
- Export reports to support your finance reconciliation processes.
- Invite your team members to collaborate.
- Manage your integrations, and more.
Learn more about how PayRex's Dashboard can help you set up and manage your account by familiarizing with the sections on the sidebar navigation:
---
# Managing default payment methods
Source: https://docs.payrex.com/docs/guide/getting_started/using_the_dashboard/manage_default_payment_methods_dashboard
Path: docs/guide/getting_started/using_the_dashboard/manage_default_payment_methods_dashboard.mdx
# Managing default payment methods
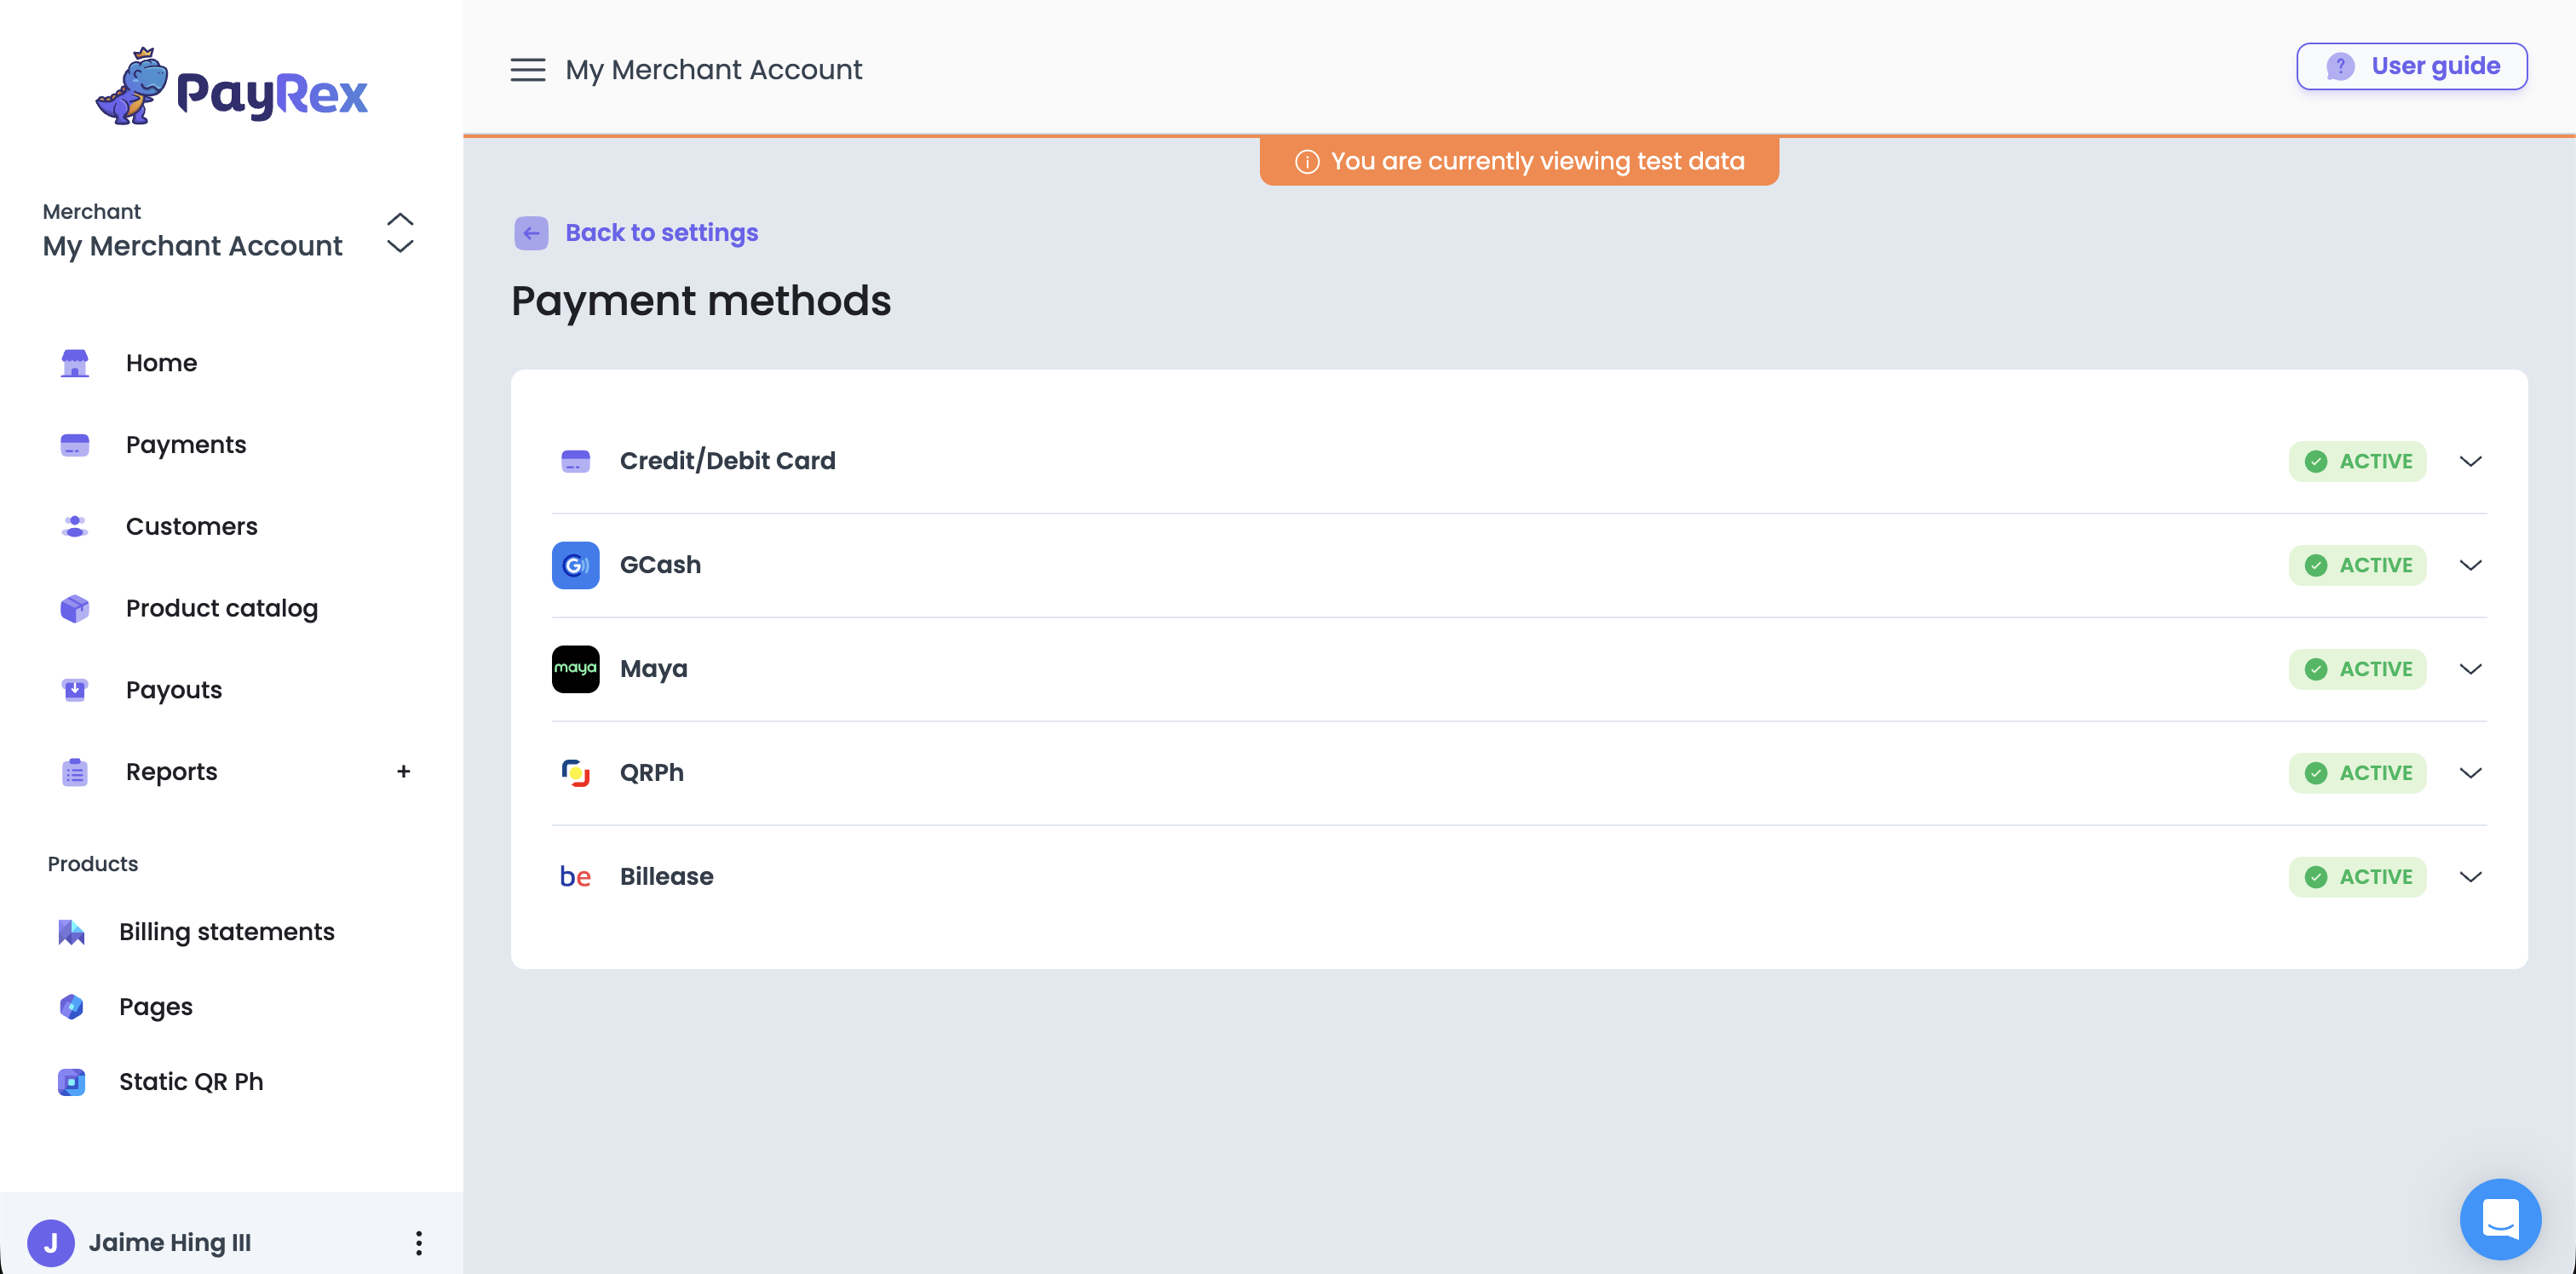
Default payment methods are the fallback payment methods if you did not specify a list of payment methods in your [integration](/docs/guide/developer_handbook/payments/integrations). For no-code solutions such as [Billing Statements](/docs/guide/finance_automation/billing_statements/overview) and [Pages](/docs/guide/payments/pages), the enabled default payment methods are the only allowed payment methods you can set.
## Live vs test default payment methods
There are different sets of default payment method for live and test mode. The test mode default payment methods will reflect only for the test payments while the live mode default payment methods will reflect only for the live or real transactions.
## Test mode default payment methods
For test mode default payment methods, you can enable or disable the payment methods easily without completing your [account activation](/docs/guide/getting_started/activate_your_account).
## Live mode default payment methods
For live mode default payment methods, your PayRex merchant account must be [activated](/docs/guide/getting_started/activate_your_account) first. Once your payrex merchant account is activated and you want to utilize default payment methods, you can enable default payment methods from the Dashboard. If you see an additional action required after enabling a payment method, you must contact support via chat or support@payrex.com. They might ask you for more supporting documents to enable a particular payment method.
---
# Products
Source: https://docs.payrex.com/docs/guide/getting_started/using_the_dashboard/products
Path: docs/guide/getting_started/using_the_dashboard/products/index.mdx
# Products
#### Our products allow you to receive payments without requiring a single code.
### [Billing Statements](/docs/guide/finance_automation/billing_statements/)
Best for one-time payments, use [billing statements](https://dashboard.payrexhq.com/l/billing-statements) to collect payments from your customers.
Learn more about how to take advantage of our [billing statements features](/docs/guide/finance_automation/billing_statements/).
### [Pages](/docs/guide/payments/pages)
For always-on payment checkout, pages is your way to go. Choose from our variety of templates to support your business or cause.
Learn more about how to manage your first [page](/docs/guide/payments/pages) and more.
---
# PayRex Documentation
Source: https://docs.payrex.com/docs/guide/intro
Path: docs/guide/intro.md
# Introduction
Welcome to PayRex, your trusted partner in simplifying payment processing and revolutionizing online transactions. Our API empowers developers and businesses to integrate secure, efficient, and scalable payment solutions into their applications, websites, and e-commerce platforms.
At PayRex, we care about and understand that smooth payment experiences are integral to your business's success. That's why we provide a robust set of tools and features through our API, enabling you to accept payments and enhance your customers' overall payment experience.
> **INFO**
If you want to take advantage of our online technical consultation, please email helloworld@payrex.com. We will schedule a video call based on your availability. The video call is a *free* consultation on how PayRex can solve your business challenges.
## Why PayRex?
**Secure and Trustworthy**: We prioritize the security of your transactions with industry-standard encryption and fraud prevention measures.
**Developer-centric Approach**: PayRex offers clear and well-documented APIs for developers and extensive SDKs to make integration a breeze, regardless of your technical expertise.
**Scalable and Reliable**: Our infrastructure is built to handle high volumes of transactions, ensuring your payments are processed without a hitch, even during peak times.
**Customer-Centric**: Your success is our success. Our dedicated support team is always ready to assist you with your concerns. We would love to hear your feedback on how to improve our service and even our platform.
This documentation will help you understand PayRex's services and platform. It contains everything you need to get started.
## Our Solutions
### [PayRex Elements](/docs/guide/developer_handbook/payments/integrations/elements)
Embed our customizable UI components into your website to collect customer payments while maintaining your branding.
- Meet business-specific needs with modular UI components.
- Maintain your branding by customizing our UI elements with CSS.
- Reduce payment friction to acquire more customers while maintaining payment compliance.
### [PayRex Checkout](/docs/guide/developer_handbook/payments/integrations/checkout)
PayRex-hosted checkout page to launch quickly with our built-in checkout.
- Enable online payments with minimal integration effort.
- Personalize fonts and colors to align with your branding.
- Optimized across mobile, tablet, and desktop that increase customer conversion.
### [PayRex Billing Statement](/docs/guide/finance_automation/billing_statements)
Create, customize, and send a PayRex-hosted payment page in minutes — either via API or no-code approach.
- Collect one-time payments, add line items, and set due dates directly to your billing statements.
- Billing statements optimized across mobile, tablet, and desktop that increase customer conversion.
- Simplify and automate billing statement workflows via PayRex APIs.
### PayRex Pages
Always-on Payment Page for your business - no coding required
- Generate always-on payment pages directly from the Dashboard, no coding required.
- Share across any channel and with multiple customers.
- Customize with your branding by adding your business logo.
### [Third-party plugins](/docs/guide/third_party_plugins)
PayRex creates third-party plugins for platforms used by businesses such as Shopify.
### Reports
PayRex equips you with tools such as reports to help your business operations outside payment acceptance.
- View the payout summary of the merchant account: total payments, refunds, fees, taxes, adjustments, and net amount.
- Export the summary as a CSV file so that you can import your data into your preferred accounting tool.
- Control which columns will be included or excluded from the exported report.
---
# API Integration
Source: https://docs.payrex.com/docs/guide/payments/api_integration
Path: docs/guide/payments/api_integration.mdx
# API Integration
To learn more about how to integrate PayRex payments via API, check our [integration guide](/docs/guide/developer_handbook/payments/integrations).
---
# Balances
Source: https://docs.payrex.com/docs/guide/payments/balances
Path: docs/guide/payments/balances.mdx
# Balances
## What is a balance?
Your PayRex merchant account has a balance resource that can be treated as a general ledger within PayRex, representing other resources such as payments, [payouts](/docs/guide/payouts/overview), refunds, and adjustments.
Understanding balance and balance transactions can help you better manage your cash flow within PayRex, forecast your future payouts, and avoid negative balances.
> **INFO**
Your PayRex merchant account has two separate balance resources, one for each mode.
In test mode, your balance is for testing purposes only. In live mode, the balance represents the general ledger that records actual money coming in or out of your merchant account.
## Pending vs available balance
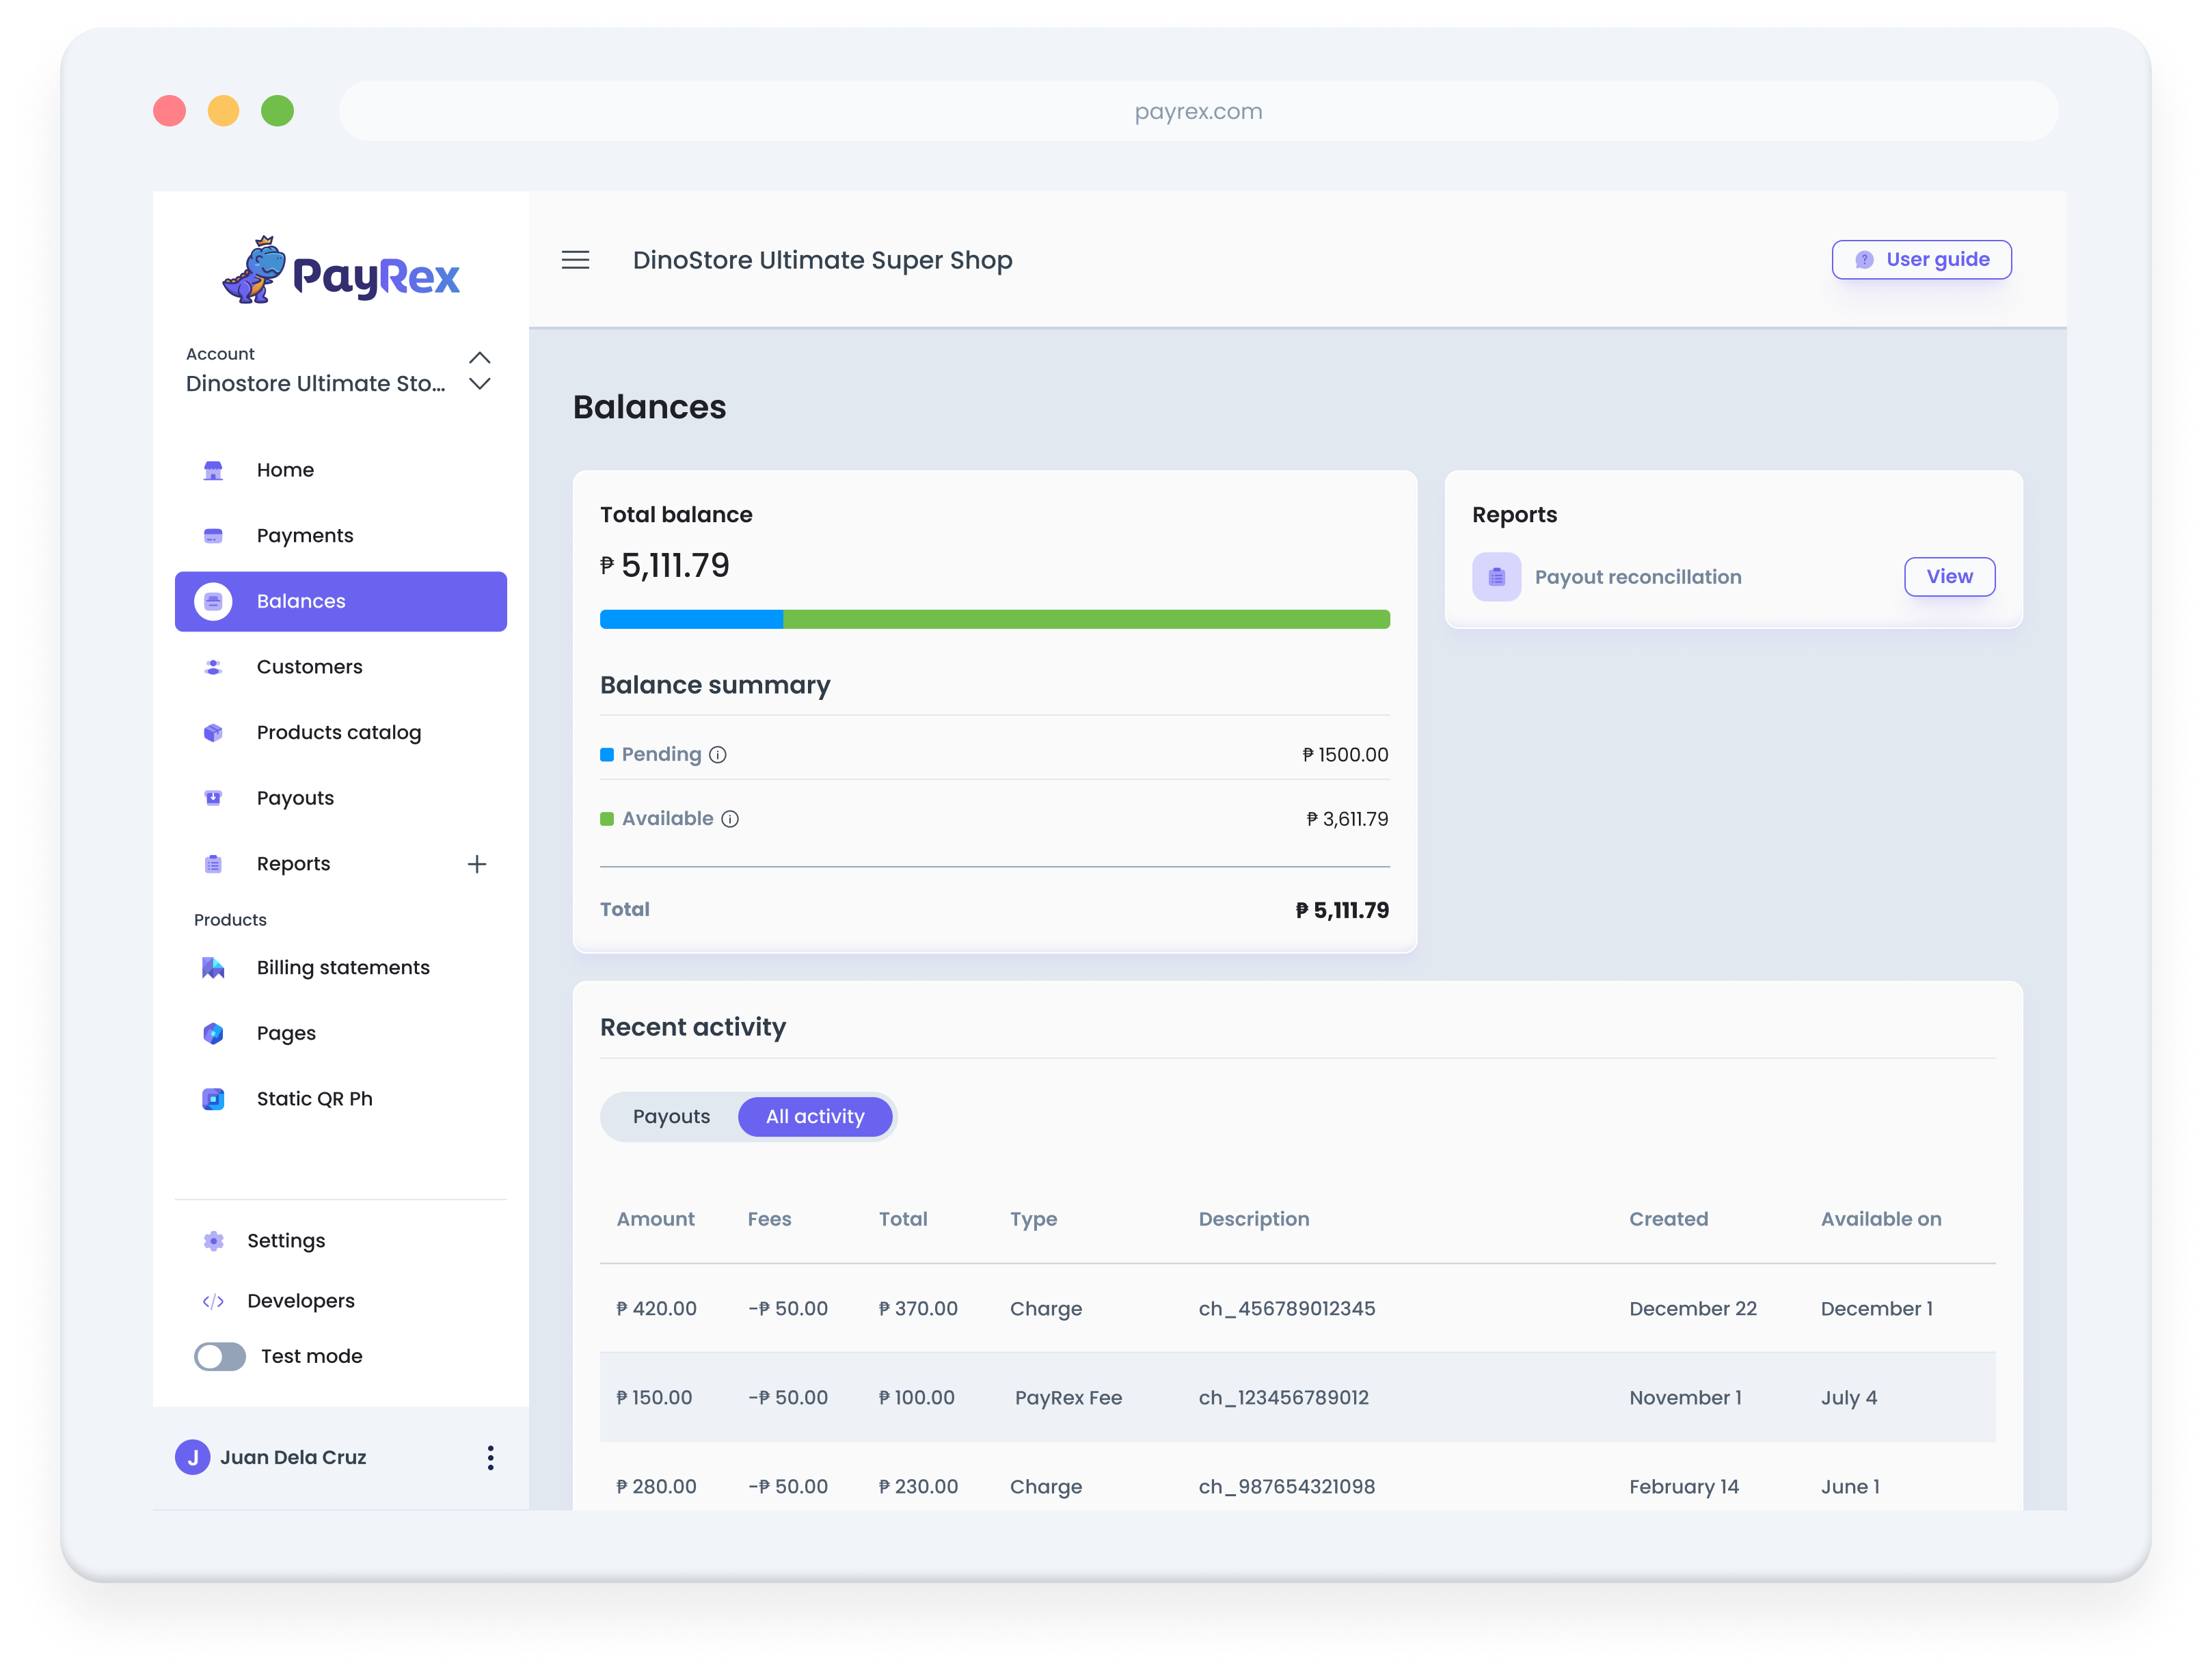
If you check the balance module from the PayRex Dashboard, you will see that the balance summary shows pending and available amounts.
When a customer pays you through PayRex, a paid payment is recorded to your PayRex merchant account, and a balance transaction with type payment is also created. This balance transaction will appear as `pending` in your balance. Once the payment is cleared based on your clearing period schedule, the balance transaction transitions to `available`, and prepared to be part of your [next payout](https://help.payrex.com/en/articles/10614167-when-will-i-receive-my-payout).
For successful refunds, the amount will be added to your `available` balance and deducted from your next payout.
Whenever a payout is generated, a balance transaction will also be created and part of your `available` balance. This is deducted from your balance, as PayRex will deposit the net payout amount to your nominated bank account.
## Balance Transactions
Balance transactions are represented as line items to help you monitor your PayRex merchant account's balance activity. Every time money is credited or debited from your PayRex merchant account balance, a balance transaction is created.
| Balance Transaction Type | Description |
| ------------------------ | ------------------------------------------------------------ |
| payment | Created when a payment is successful. |
| refund | Created when a refund is successful. |
| adjustment | Created when PayRex created either a debit/credit adjustment |
| payout | Created when a payout is generated |
---
# PayRex In-Person Payments
Source: https://docs.payrex.com/docs/guide/payments/in_person_payments
Path: docs/guide/payments/in_person_payments/index.mdx
# In-Person Payments
This section will guide you to use PayRex to accept in-person payments no matter where your business is located in the Philippines.
---
# Manage static QR Ph codes via Dashboard
Source: https://docs.payrex.com/docs/guide/payments/in_person_payments/static_qr_ph/dashboard
Path: docs/guide/payments/in_person_payments/static_qr_ph/dashboard.mdx
# Manage metadata via Dashboard
This section will teach you how to view and manage static QR Ph codes on your PayRex dashboard.
Manage your static QR Ph on your dashboard, whether you're collecting payments on your main branch, on an event pop-up, or on a rolling food truck.
Learn more about how our static QR Ph product through this [guide](/docs/guide/payments/in_person_payments/static_qr_ph/overview).
Ready to receive in-person payments? Follow the steps to create and manage your static QR Ph codes:
## 1. Create a static QR code
1. After logging in on your dashboard, go to the **Static QR Ph** resource.
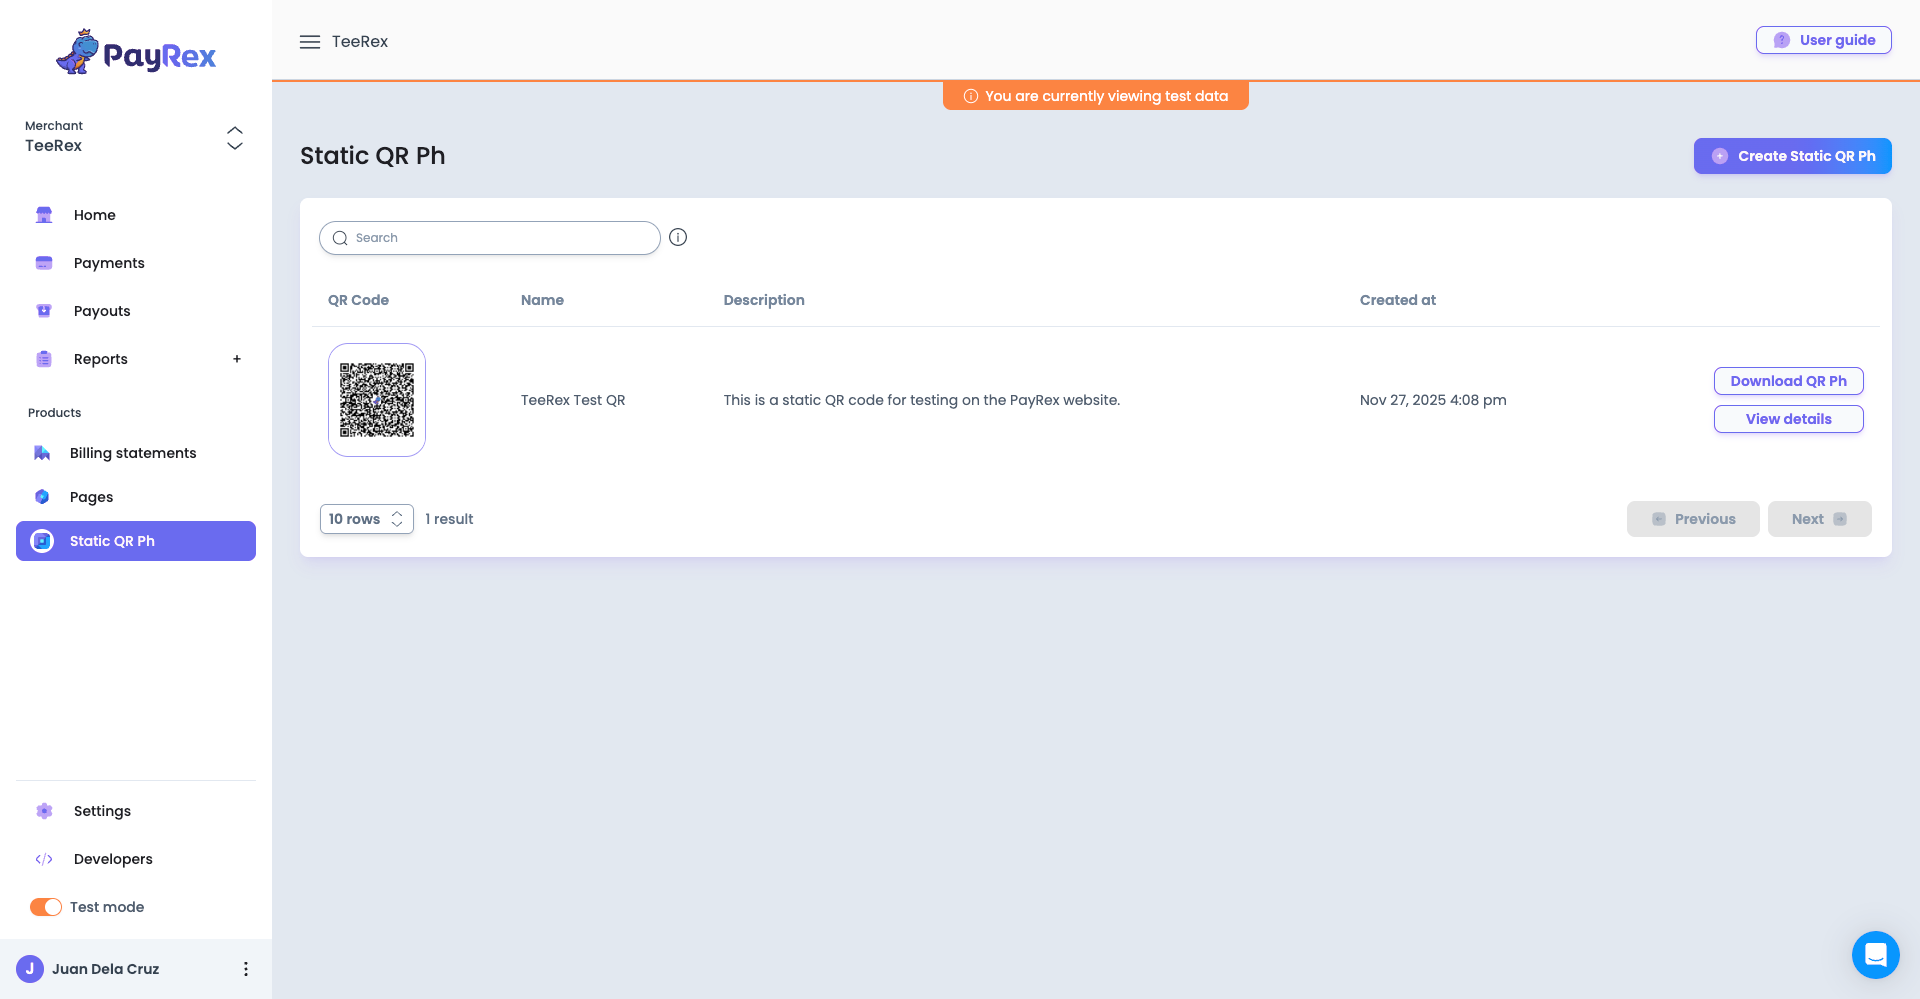
2. Click the **Create Static QR Ph** button and fill up the fields.
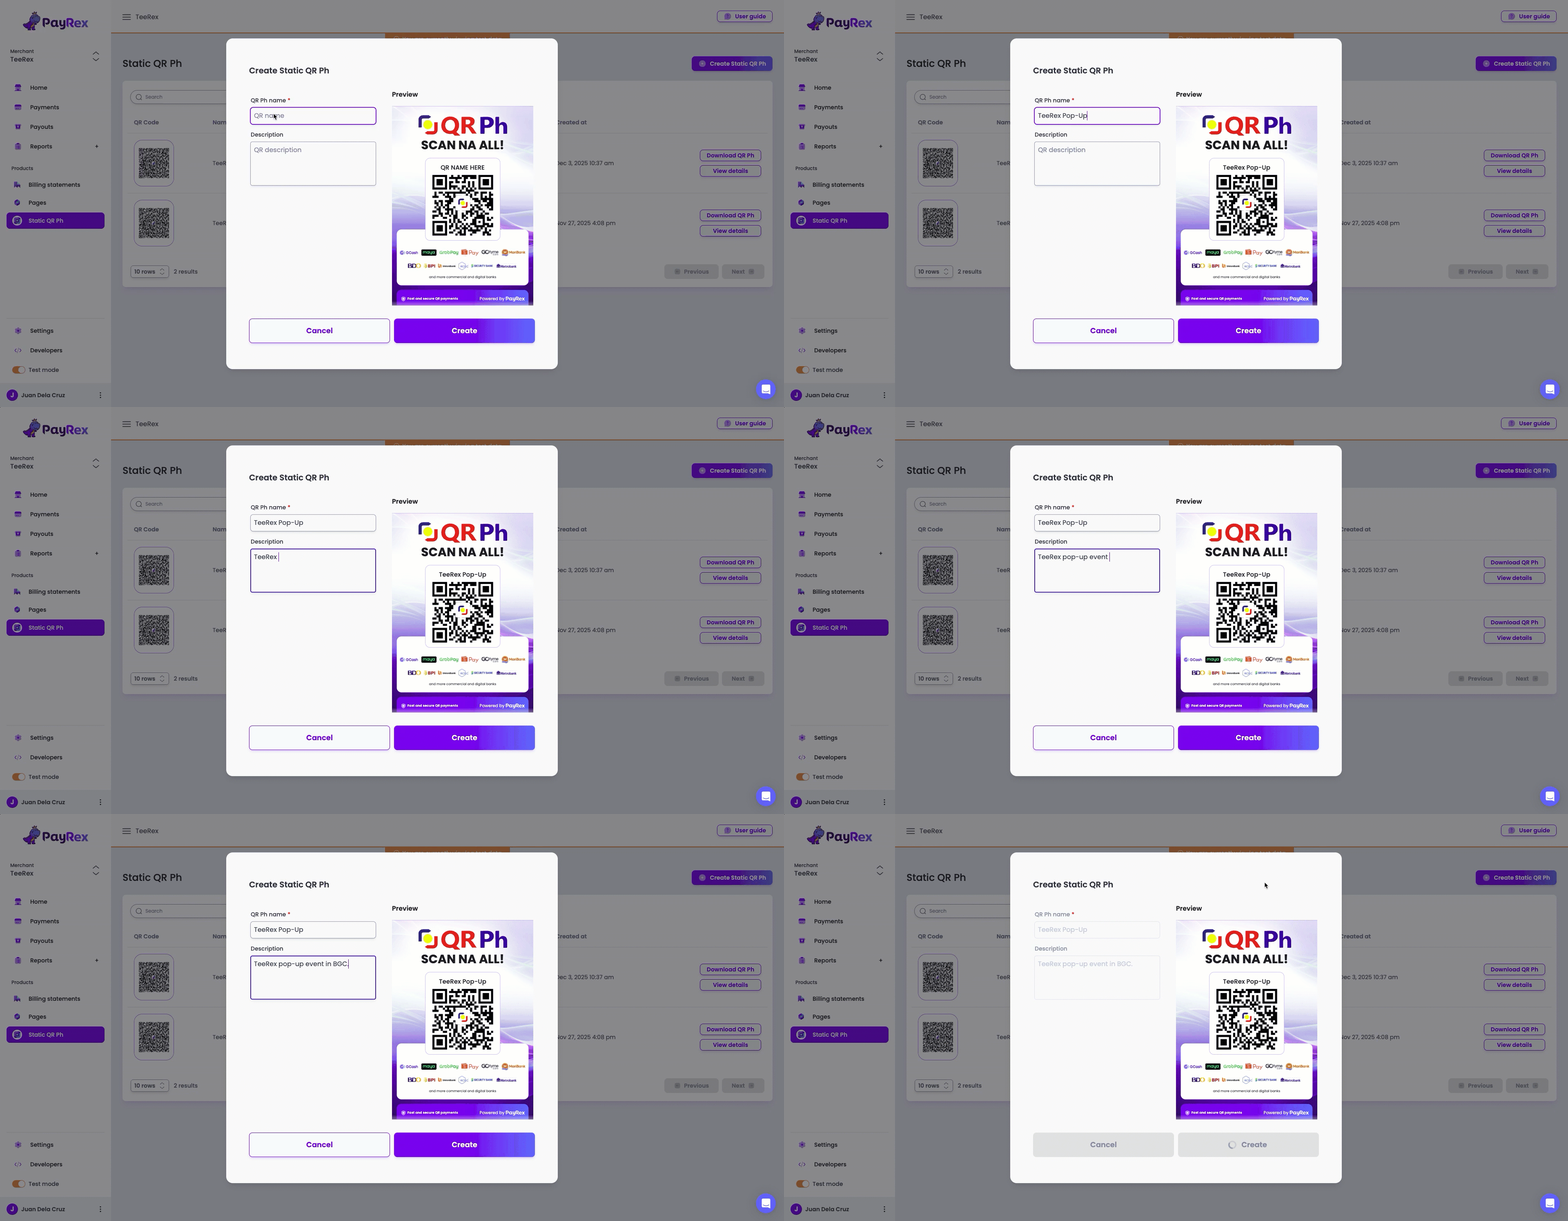
> **INFO**
- Give your QR codes a short, descriptive **name**. This will also be displayed on the layout that you will eventually print out later on.
- Add other supporting details on the **description** field to better identify the purpose of the QR Ph code.
3. After you create the static QR Ph code, you will be redirected to its details page where you can update its fields.
### Details
These are the primary information about a specific static QR Ph code:
- **Name**: This is the label of the QR Ph code, which will also be displayed on the downloadable image for printing.
- **Description**: This is a high-level information about the QR Ph code and is not visible to your customers.
- **Created at**: This is when you created the static QR Ph code.
- **ID**: This is a unique identifier of the static QR Ph code.
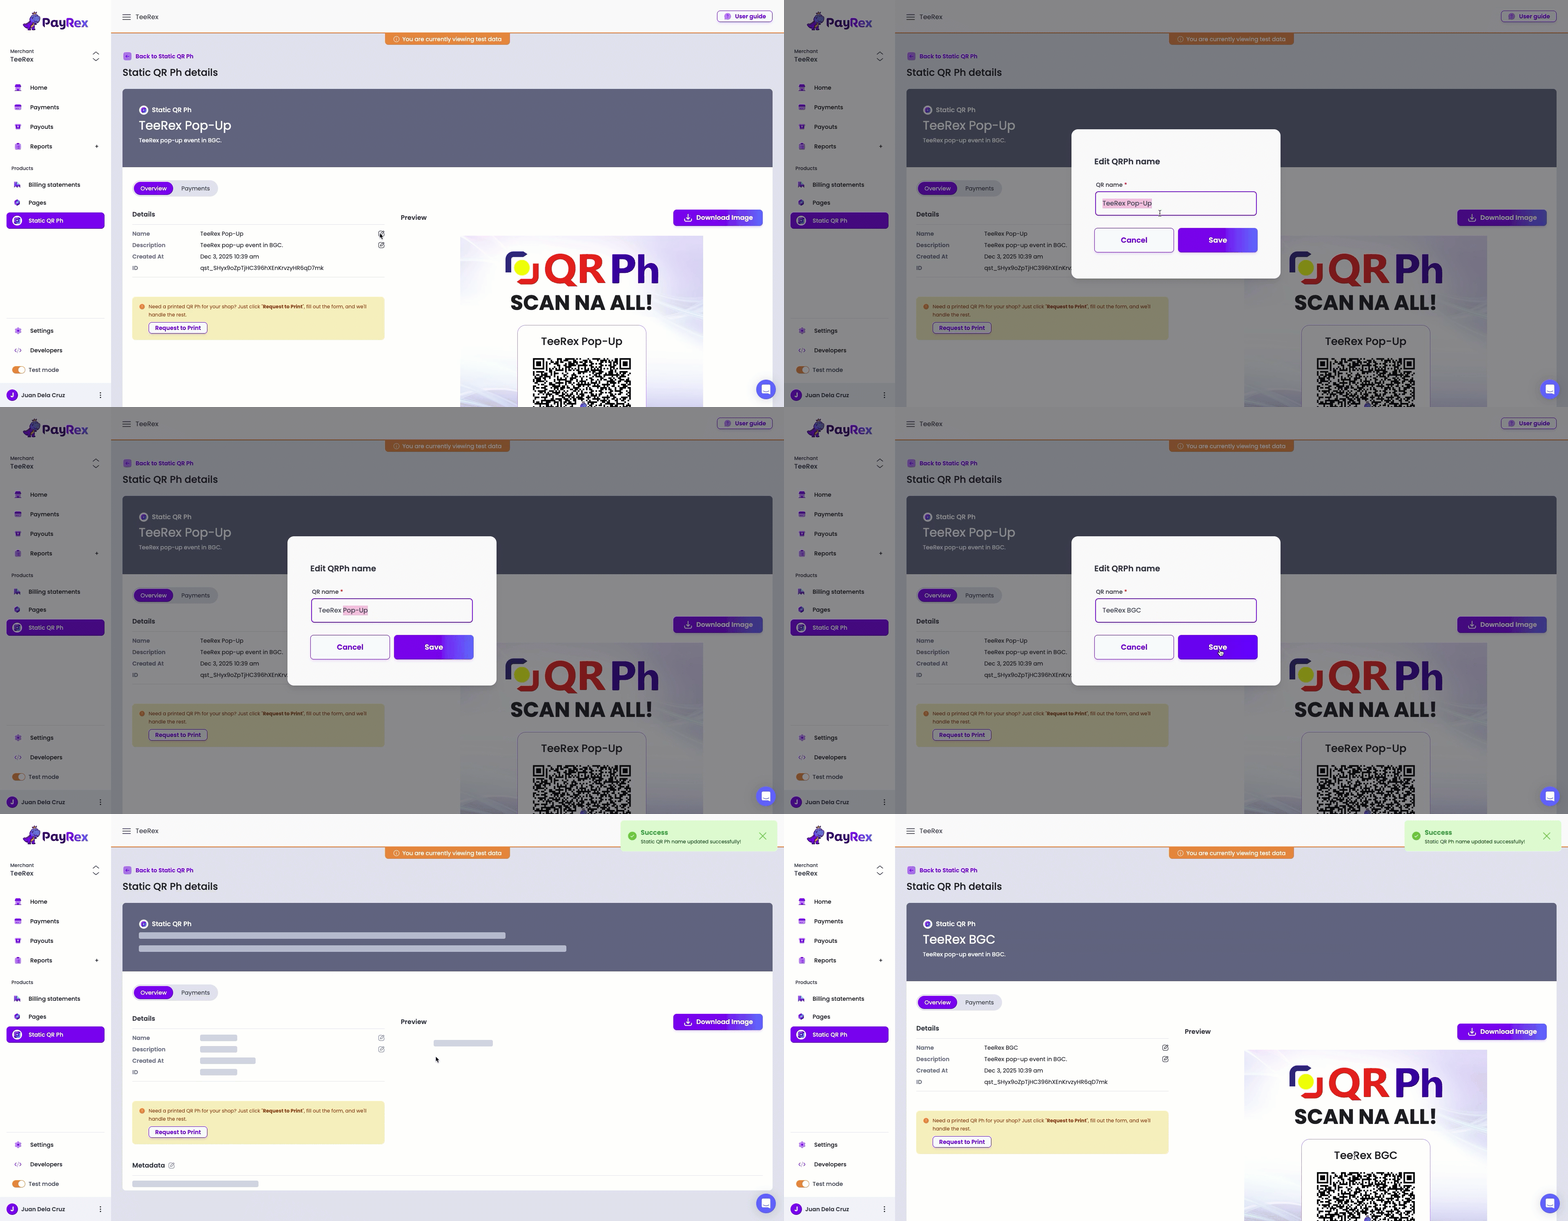
### Metadata
The metadata section is where you can note important information that only you and your team members can view.
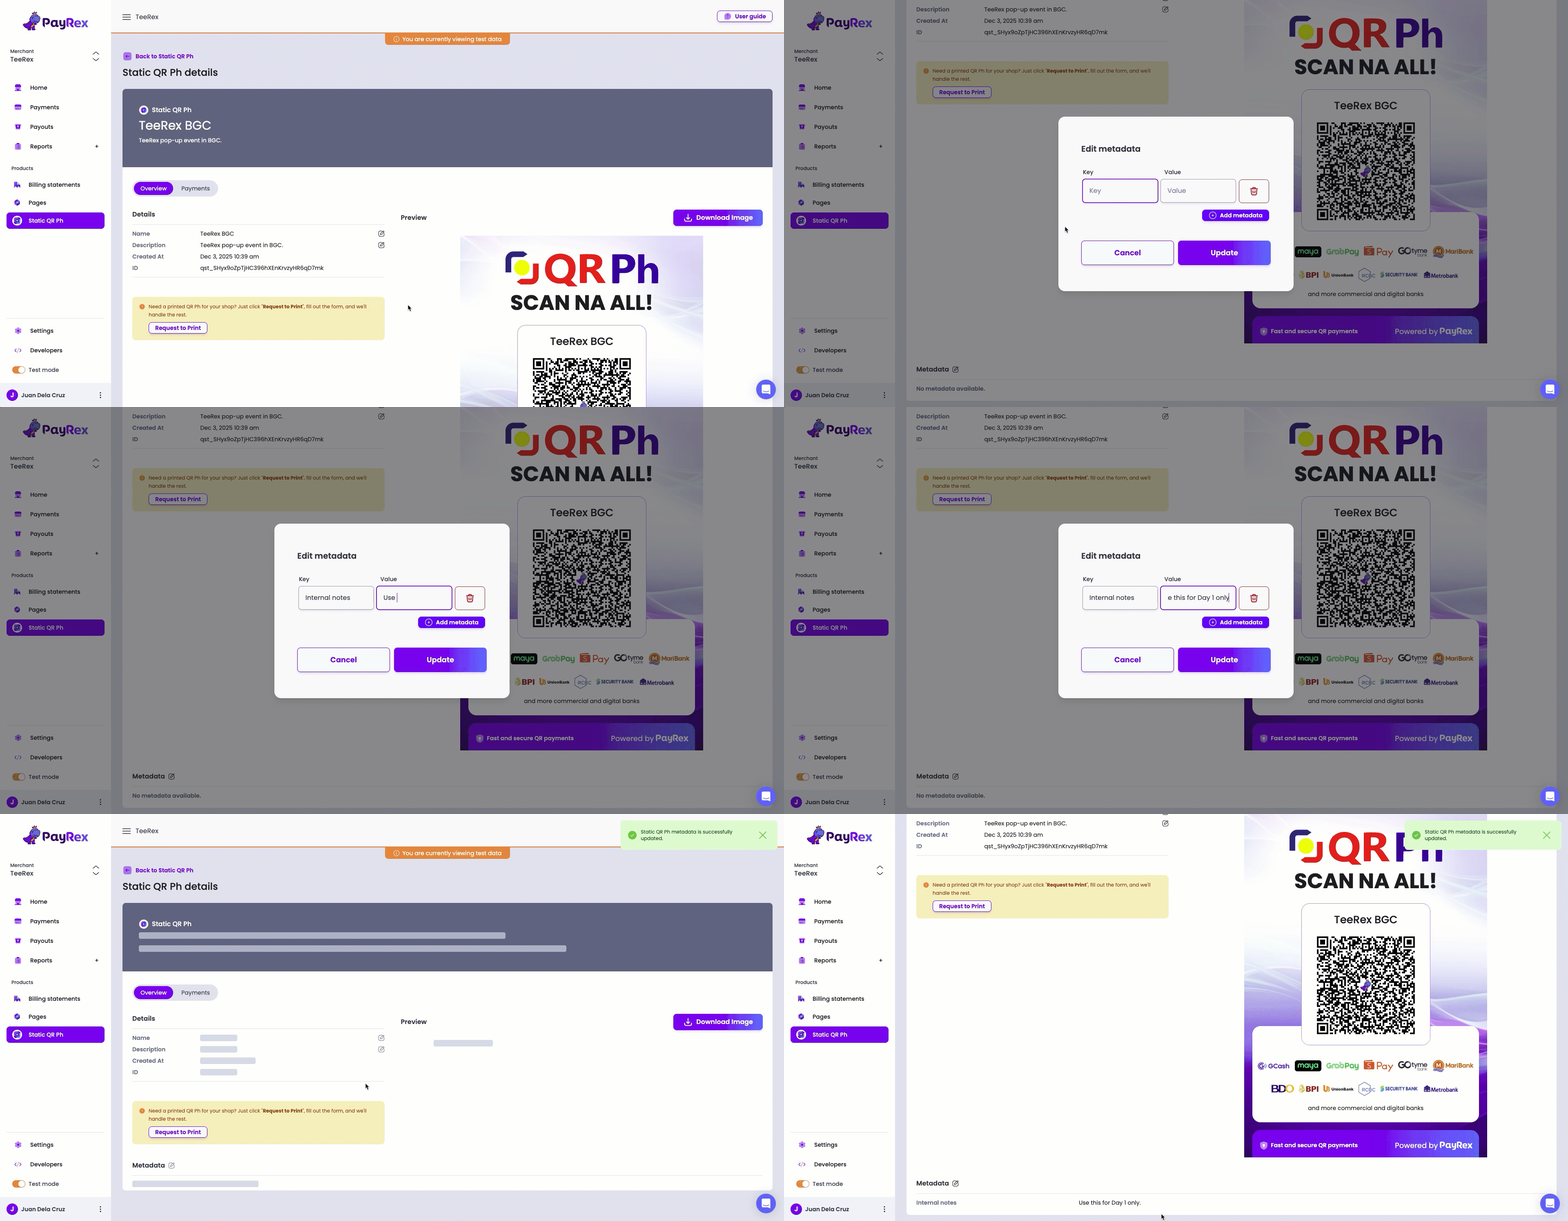
Learn more about how you can incorporate metadata in your business [here](docs/guide/finance_automation/metadata/overview.mdx).
## 2. Download and print your Static QR Ph code
If you are satisfied with the displayed name on the **preview** pane, you can download the high-resolution image that you can display in your payment points.
1. Click on the **Download Image** button, do final checks on the image, and download the file.
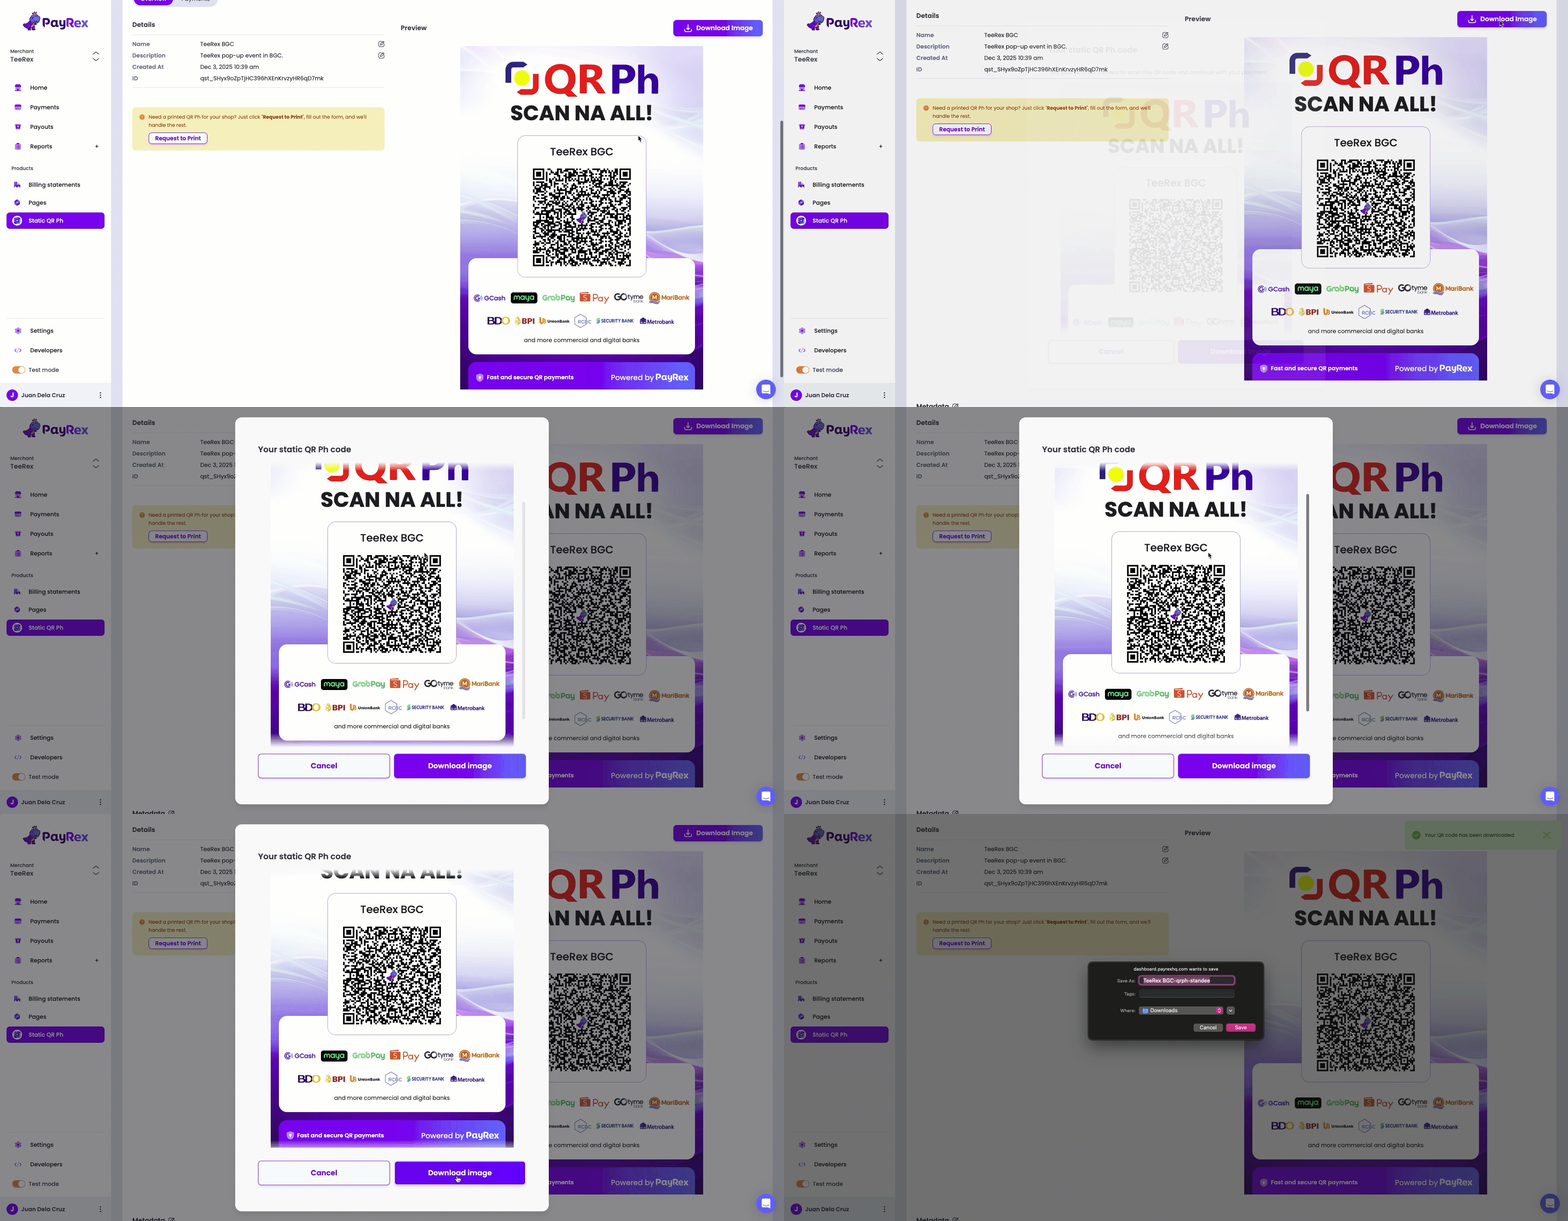
2. Print the downloaded image on a high-quality paper of your choosing or on a sintra board to make it into a standee.
> **INFO**
- While our layout is designed based on the QR Ph standee standards, some printer settings may modify it.
- After printing your QR Ph code, try it out first with your [participating](https://www.bsp.gov.ph/PaymentAndSettlement/QR%20Ph%20P2M%20Participants.pdf) bank or e-wallet app to check its scannability and readability.
- This is to avoid any inconveniences when receiving actual payments from your customers.
### Get your FREE static QR Ph standee
1. On the QR Ph details page, click on the **Request to Print** button.
2. Our Intercom chat box will open. Click the messages option and input your request, including standee size preferences if you have any.
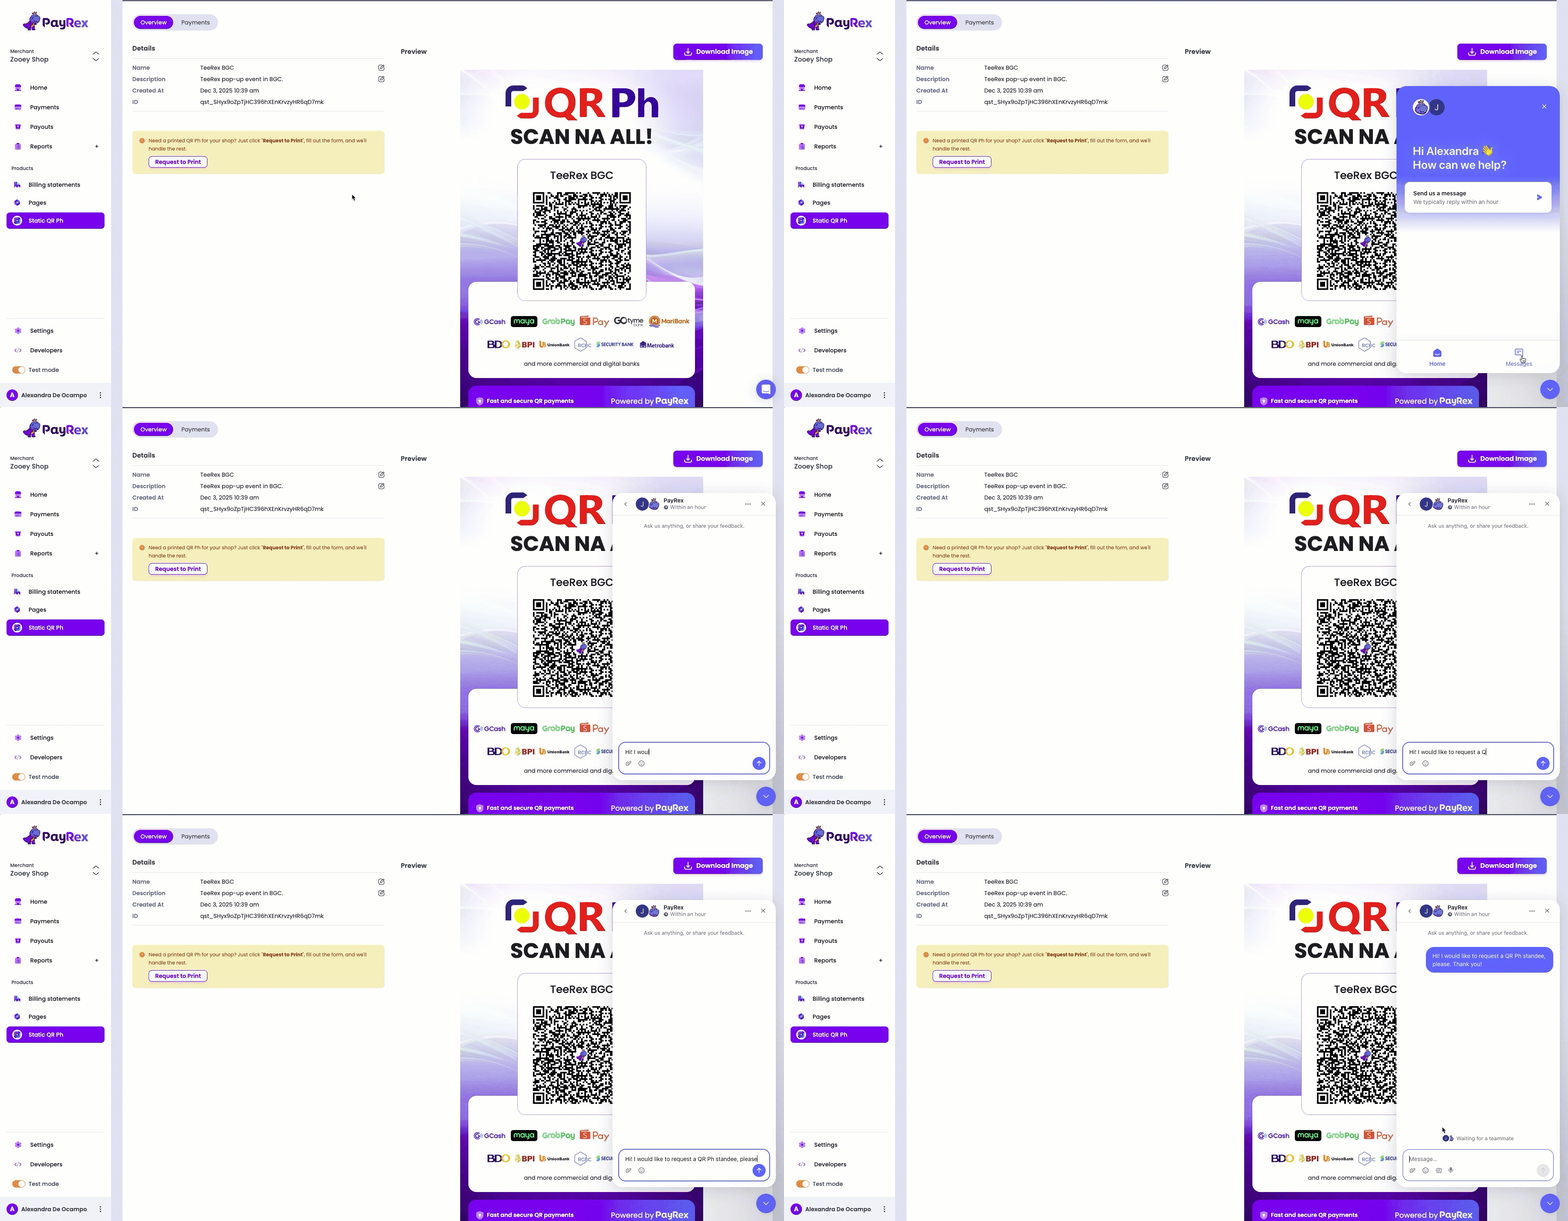
You can also request for your static QR Ph standee [here](https://www.payrexhq.com/request-static-qr-ph) and we'll print it for you, free of charge.
## 3. Allow your customers to scan the QR Ph code and complete their payments.
> **WARNING**
Scan a test mode static QR Ph using your phone's camera. This only simulates a test payment. In a real or live mode static QR Ph, you must use your e-wallet or mobile banking app to complete a payment.
After your customer pays via your static QR Ph code, you can check the payment status on your PayRex dashboard.
1. On the Static QR Ph resource, select the QR Ph code that your customer used to pay. Click on the **payments** tab and verify the transaction details.
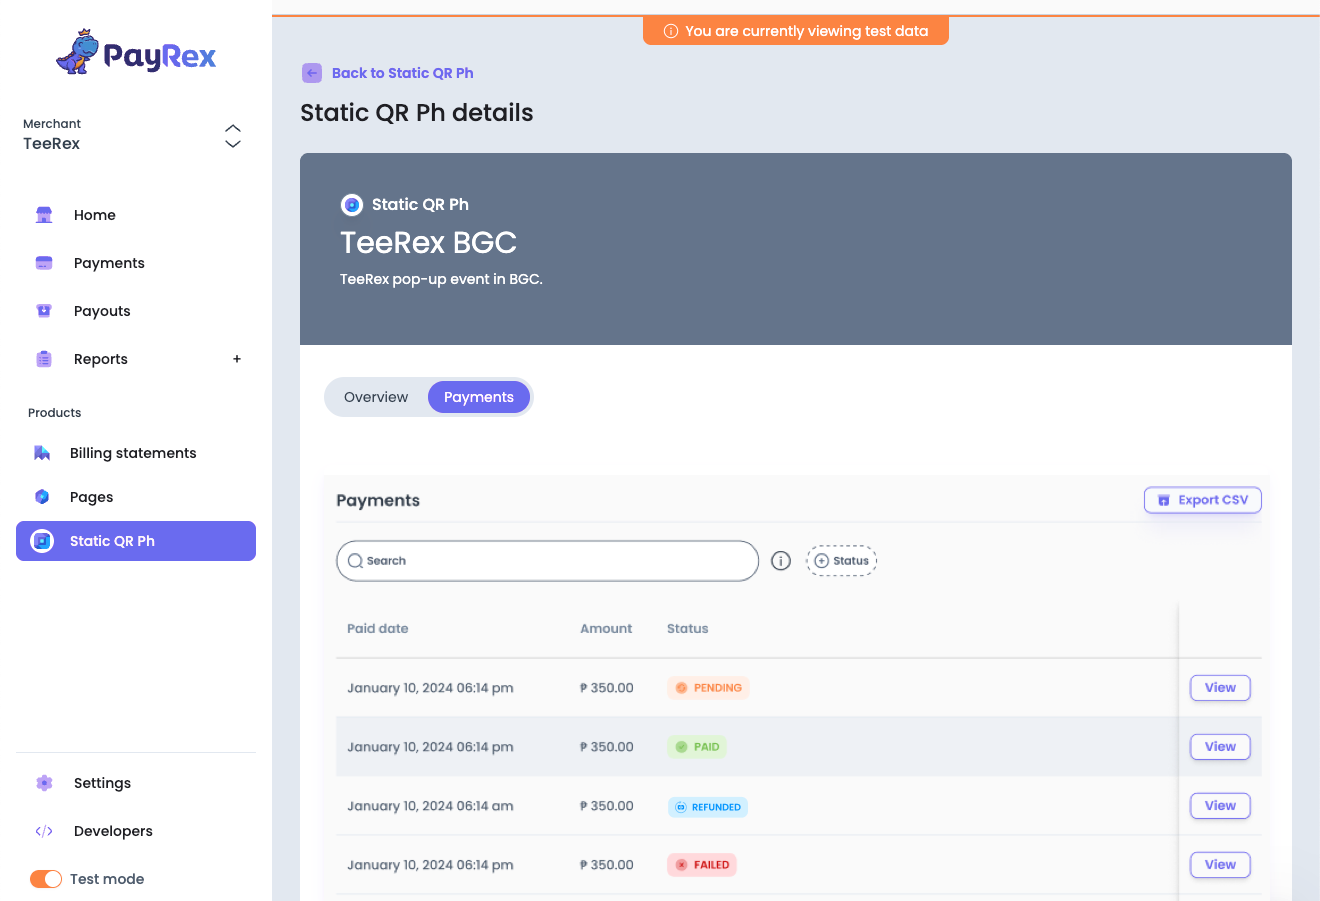
> **INFO**
- Each QR Ph code has a dedicated **payments tab** that lists all the transactions made using that specific code. This makes your verification and reconcilliation more organized.
- If you need to check all of the payments that you received via PayRex regardless of payment method, you can do so on the **[payments](docs/guide/getting_started/using_the_dashboard/core_resources/payments.mdx) resource**.
---
# Static QR Ph
Source: https://docs.payrex.com/docs/guide/payments/in_person_payments/static_qr_ph
Path: docs/guide/payments/in_person_payments/static_qr_ph/index.mdx
# Static QR Ph
This section will guide you about Static QR Ph, PayRex's first payment method designed for in-person transactions.
---
# Static QR Ph Overview
Source: https://docs.payrex.com/docs/guide/payments/in_person_payments/static_qr_ph/overview
Path: docs/guide/payments/in_person_payments/static_qr_ph/overview.mdx
# Static QR Ph Overview
QR Ph is designed to be a universal payment solution, allowing users to pay from any [participating bank or e-wallet](https://www.bsp.gov.ph/PaymentAndSettlement/QR%20Ph%20P2M%20Participants.pdf) using a single QR code. Its core benefit is often described as "One QR for All Payments" or the more notable “Scan na all!” tagline, emphasizing its universal compatibility and convenience.
With PayRex's static QR Ph feature, you can accept payments in person, track every transaction and simplify reconciliation, no matter where your business operates in the Philippines.
## Key features
### Multiple QR codes
Using PayRex's static QR code feature allows you to create QR codes customized for different business situations, such as organizing payments by location. Whether it's your primary store, branches, or pop-up shops, facilitating in-person payments becomes effortless.
Alongside our other standard features like [metadata](/docs/guide/finance_automation/metadata/overview) and [reports](/docs/guide/getting_started/using_the_dashboard/core_resources/#reports), our static QR code product will simplify and enhance the accuracy of your reconciliation process.
### Ready-to-print downloadable QR codes
When you create a static QR code, you can also generate an image that you can download, print, and display on your cashiers, tables, stalls, or kiosks.
While the generated image is already designed to match the standard specifications of QR Ph standees, please make sure to test the scannability and readabilty of your printed QR Ph codes first before allowing your in-person customers to pay through it.
### Real-time tracking of payments
With every static QR Ph code, your team can track the payments associated with that code. As soon as a customer makes a payment using your static QR Ph code, you can confirm it through your dashboard in real-time. This eliminates the delay of waiting for the SMS transaction confirmation to be received or asking for a screenshot proof.
On your PayRex dashboard, you can verify the amount of each payment, its status, and the date it was paid if it matches the payment details of your customer. You can also keep track of payments across your other business locations without needing to be there in person, allowing you more time to focus on your other business priorities.
### Try it out before launching it
> **WARNING**
Scan a test mode static QR Ph using your phone's camera. This only simulates a test payment. In a real or live mode static QR Ph, you must use your e-wallet or mobile banking app to complete a payment.
As with many of our features, you have the opportunity to test our static QR Ph feature before incorporating it into your business operations.
Create a QR code in test mode first, do a dry run of the payment process, and adjust your logistics accordingly.
When you are ready to offer this payment method to your customers, you can create the live mode version of the QR code, generate and print it on a sintra board or any high-quality paper, and showcase it at your payment locations to effortlessly accept payments from your in-person customers.
This division simplifies integration and validation without affecting actual customer funds.
### Secured access
Only users with authorized roles can see and manage static QR Ph codes in varying access. This ensures that the management of your static QR codes is secure and protected from any potential misuse. You can check which [roles](/docs/guide/getting_started/managing_users/user_roles) are allowed to view and manage your QR codes before assigning them to your team members.
Furthermore, your PayRex dashboard logs all actions taken on it, including the Static QR Ph resource. This enhances both audit compliance and accountability for your team. The following actions are currently being recorded:
- View list of Static QR Ph
- Create Static QR Ph
- Update QR Ph
- View payments associated to the Static QR Ph
- Export payments of the Static QR Ph
### Get your FREE static QR Ph standee
Ready for seamless in-person transactions? Request for your FREE static QR Ph standee [here](https://www.payrexhq.com/request-static-qr-ph).
> **INFO**
- While you can also generate a QR code through [PayRex Pages](/docs/guide/payments/pages/overview), please note that it is different from Static QR Ph.
- Both QR codes can be used in-person, but **static QR Ph** provides a more straight-forward way to receive payments as it only requires inputting the amount on the [participating](https://www.bsp.gov.ph/PaymentAndSettlement/QR%20Ph%20P2M%20Participants.pdf) bank or e-wallet app.
- If you need to provide additional information to your customers, capture their billing details, or inquire about specific aspects of a product or service, you can easily accomplish this with our [**Pages**](/docs/guide/payments/pages/overview) product.
Use the feature comparison below to determine which QR code product best fits your business needs:
| Feature | Static QR Ph | PayRex Pages QR Code |
| ----------------------------------------------------------| -------------------------|--------------------------|
| Collect custom amount | :heavy_check_mark: | :heavy_check_mark: |
| Collect fixed amount | :heavy_multiplication_x: | :heavy_check_mark: |
| Display more information about your business/cause | :heavy_multiplication_x: | :heavy_check_mark: |
| Record billing details | :heavy_multiplication_x: | :heavy_check_mark: |
| Allow customers to select products/services to be availed | :heavy_multiplication_x: | :heavy_check_mark: |
| Access via phone's camera app | :heavy_multiplication_x: | :heavy_check_mark: |
| Access via [participating](https://www.bsp.gov.ph/PaymentAndSettlement/QR%20Ph%20P2M%20Participants.pdf) bank or e-wallet's scanner | :heavy_check_mark: | :heavy_check_mark: via dynamic QR Ph |
---
# PayRex Payments
Source: https://docs.payrex.com/docs/guide/payments
Path: docs/guide/payments/index.mdx
# Payments
This section will guide you about everything related to payments
---
# Manage PayRex pages via Dashboard
Source: https://docs.payrex.com/docs/guide/payments/pages/dashboard
Path: docs/guide/payments/pages/dashboard.mdx
# Manage Pages via Dashboard
On this section, you will learn how to create and manage your pages via Dashboard.
Managing pages via Dashboard is a quick way to test and try pages. This approach is a no-code tool; you don't need to write code to use pages.
If you want to learn about the general overview of pages, you can refer to this [link](/docs/guide/payments/pages/overview).
## 1. Create a PayRex Page
Go through the following steps to create a page:
1. Once you log in via Dashboard, go to the Pages module and click the **Create Page** button.
2. Choose a page template that best fits your payment acceptance needs.
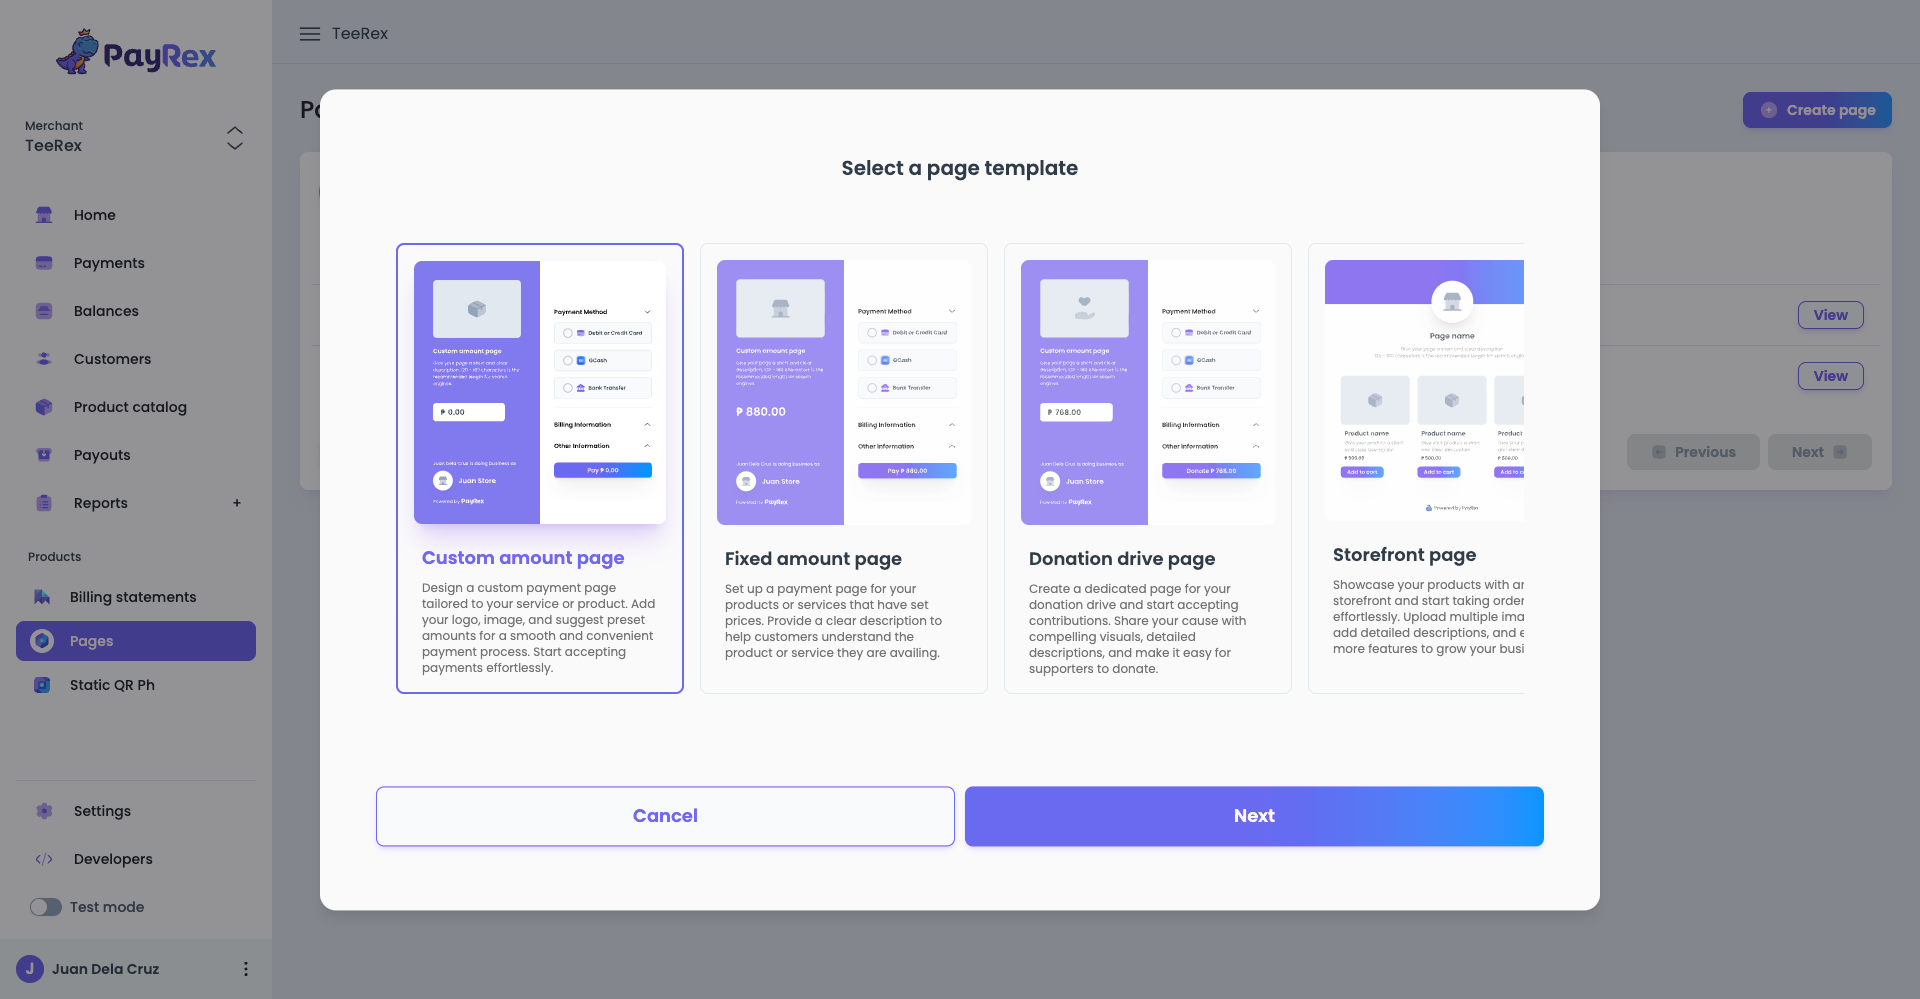
Read more about our page templates [here](/docs/guide/payments/pages/overview#pages-templates).
3. Fill out the following fields to create your page:
- **Name**: The label to identify the page you are creating.
- **Amount**: The fixed value you want to collect from your customers. This is only applicable for templates with fixed amount.
- **Description**: A short summary of the purpose of the page you are creating.
- **Handle**: A unique identifier for your page that will be part of its generated URL..
- **Payment methods**: Select the payment methods that you want to allow your customers to use for their payments.
When you update the fields, the **preview pane** will reflect those changes:
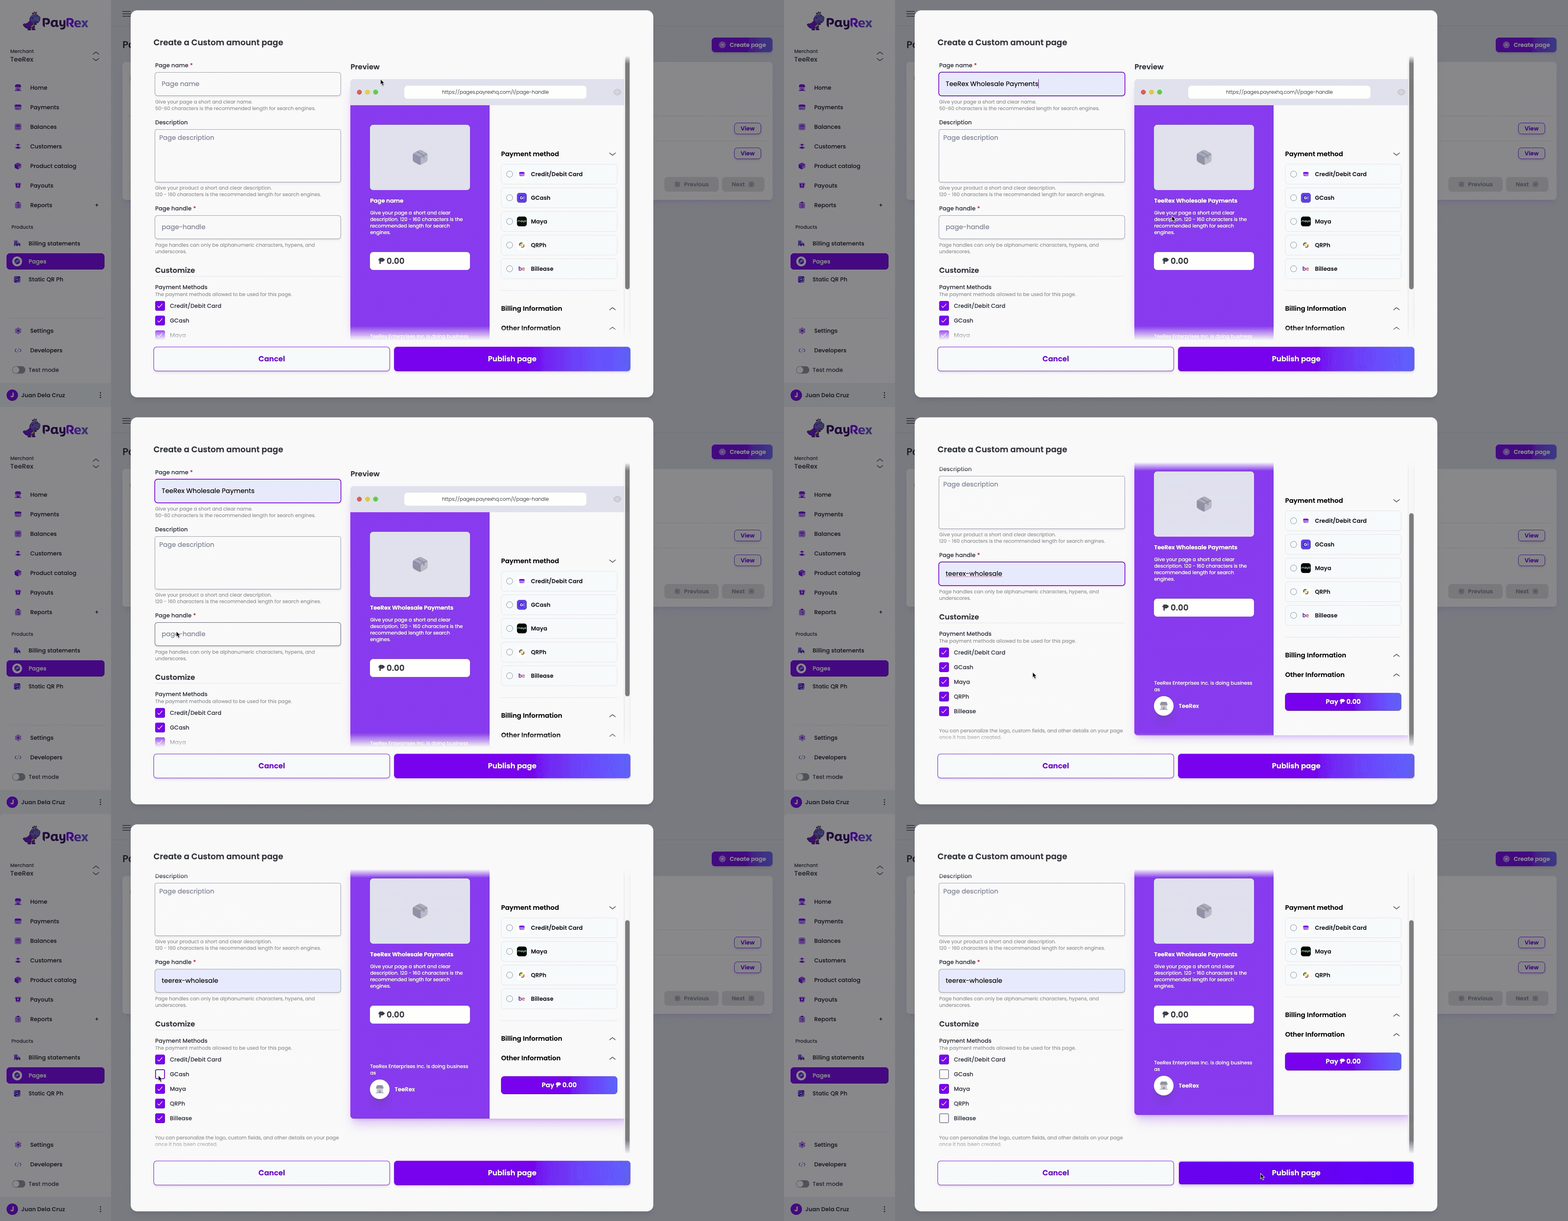
> **INFO**
You can personalize the logo, custom fields, and other details on your page once it has been created.
4. After you create the page, you will be redirected to its details page where you can add or update its fields.
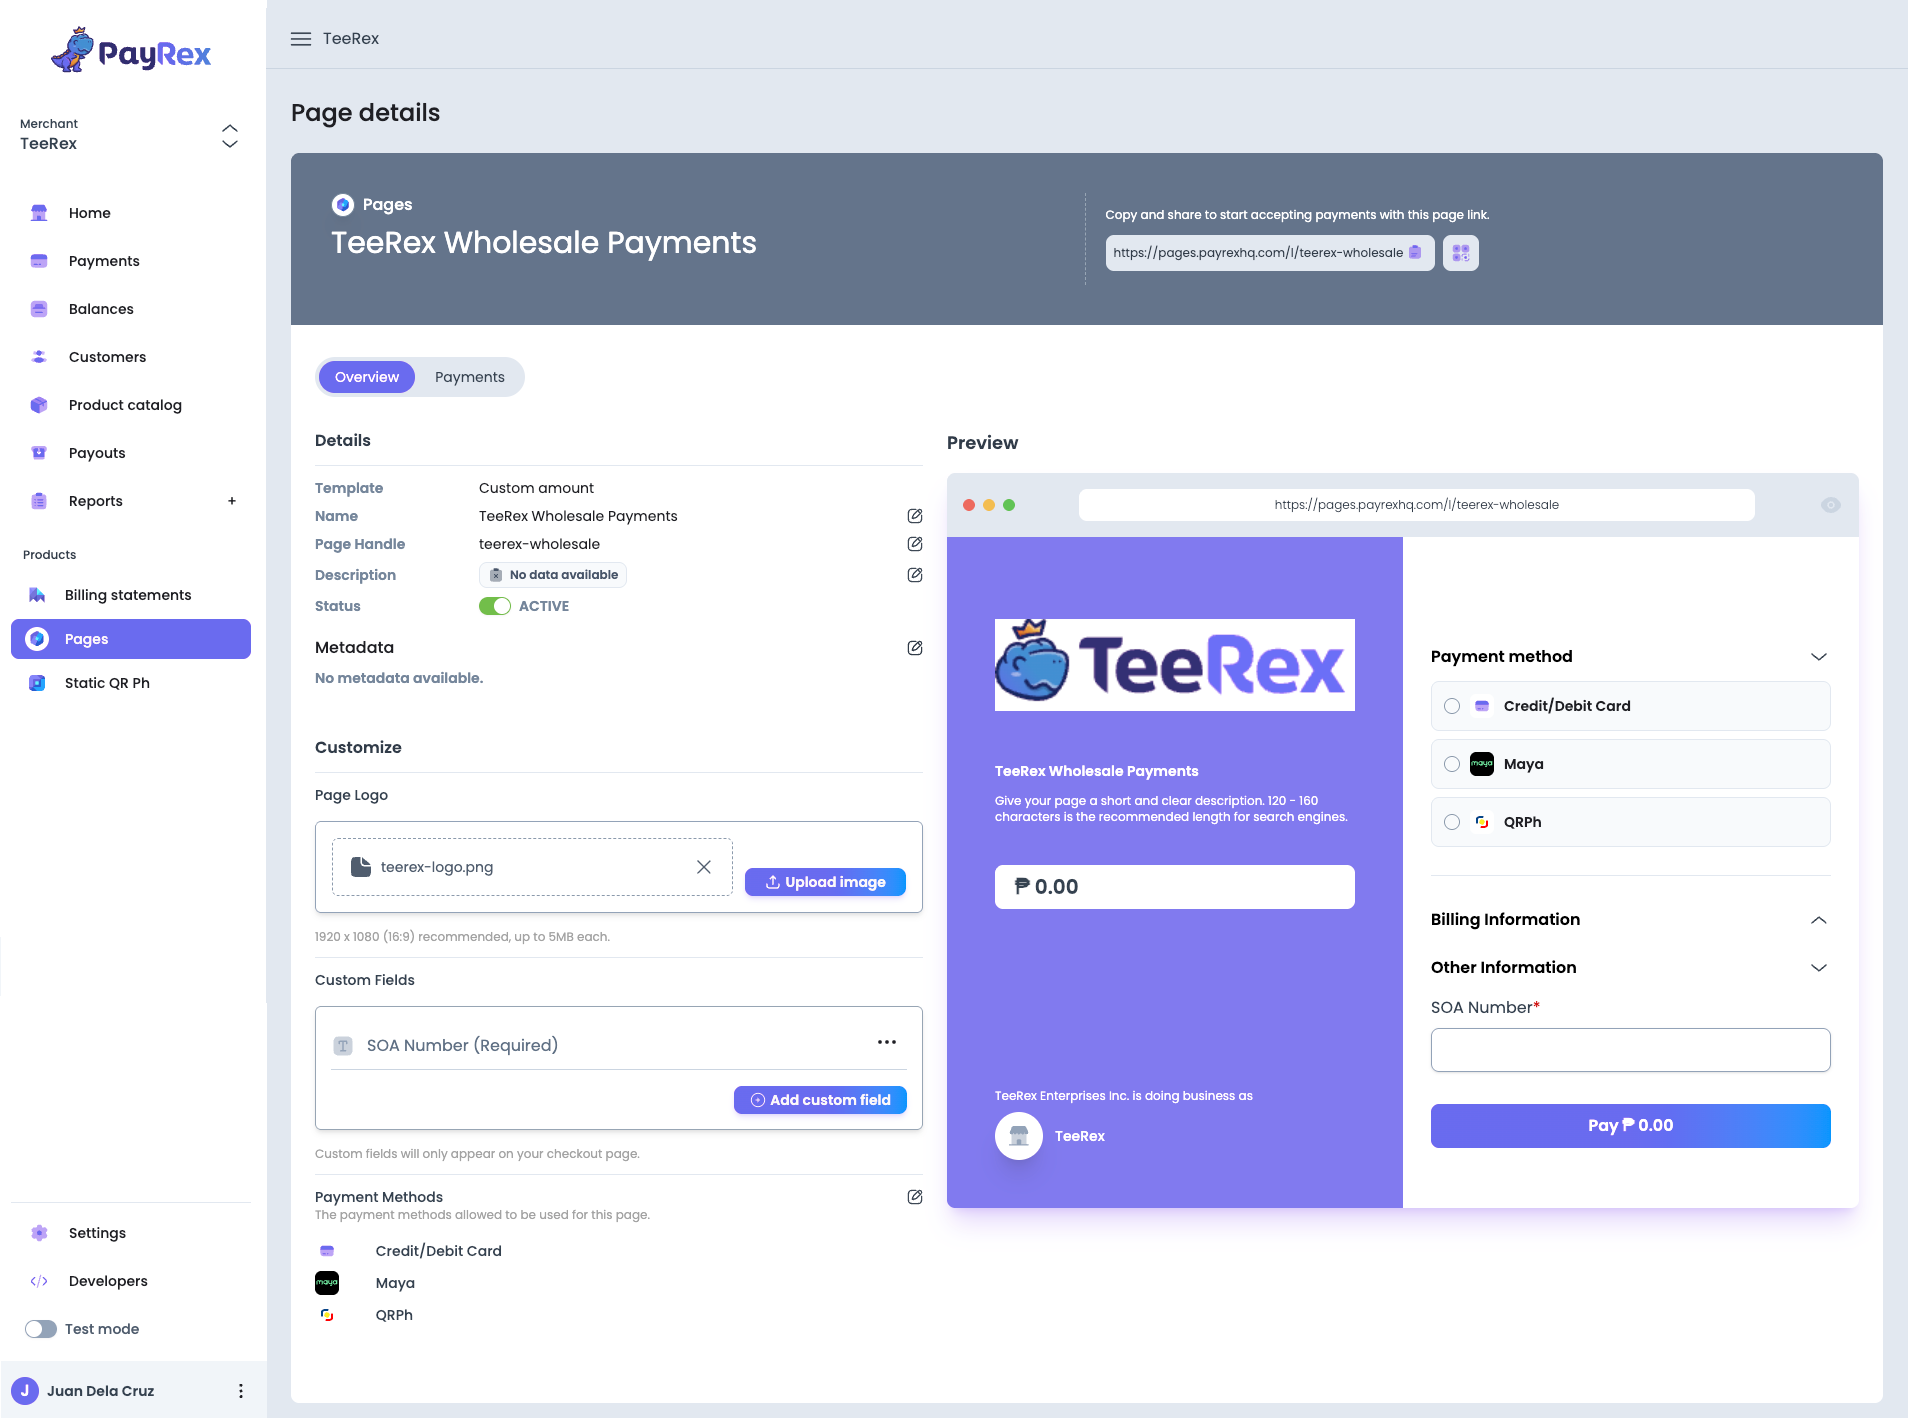
These are the available fields per template:
| Template | Page name | Amount | Description | Handle | Logo | Custom fields | Payment methods | Products |
| --------------- | -------------------|--------------------------|--------------------|--------------------|--------------------|--------------------|--------------------|--------------------------|
| Fixed amount | :heavy_check_mark: | :heavy_check_mark: | :heavy_check_mark: | :heavy_check_mark: | :heavy_check_mark: | :heavy_check_mark: | :heavy_check_mark: | :heavy_multiplication_x: |
| Custom amount | :heavy_check_mark: | :heavy_multiplication_x: | :heavy_check_mark: | :heavy_check_mark: | :heavy_check_mark: | :heavy_check_mark: | :heavy_check_mark: | :heavy_multiplication_x: |
| Donation | :heavy_check_mark: | :heavy_multiplication_x: | :heavy_check_mark: | :heavy_check_mark: | :heavy_check_mark: | :heavy_check_mark: | :heavy_check_mark: | :heavy_multiplication_x: |
| Storefront | :heavy_check_mark: | _based on each product_ | :heavy_check_mark: | :heavy_check_mark: | :heavy_check_mark: | :heavy_check_mark: | :heavy_check_mark: | :heavy_check_mark: |
| Ticket selling* | :heavy_check_mark: | _based on each product_ | :heavy_check_mark: | :heavy_check_mark: | :heavy_check_mark: | :heavy_check_mark: | :heavy_check_mark: | :heavy_check_mark: |
_* coming soon_
> **WARNING**
While it is still possible to update most of the page details, changing the selected template is not allowed once you created the page. If you need to use another template, feel free to create a new page.
## 2. Share your page to your customers
By default, the page you create will be set to active. This means that your customers can access the page right away once they have the link to it.
1. Copy the page URL and send it to your customer via email or IMs such as Viber, Messenger, etc.
> **INFO**
- If you need to make further changes to your page, you can temporarily set its status to inactive so that it can be inaccessible until you are satisfied with its details.
- Don't forget to re-activate the page so that your customers can access it again to pay for your products or services.
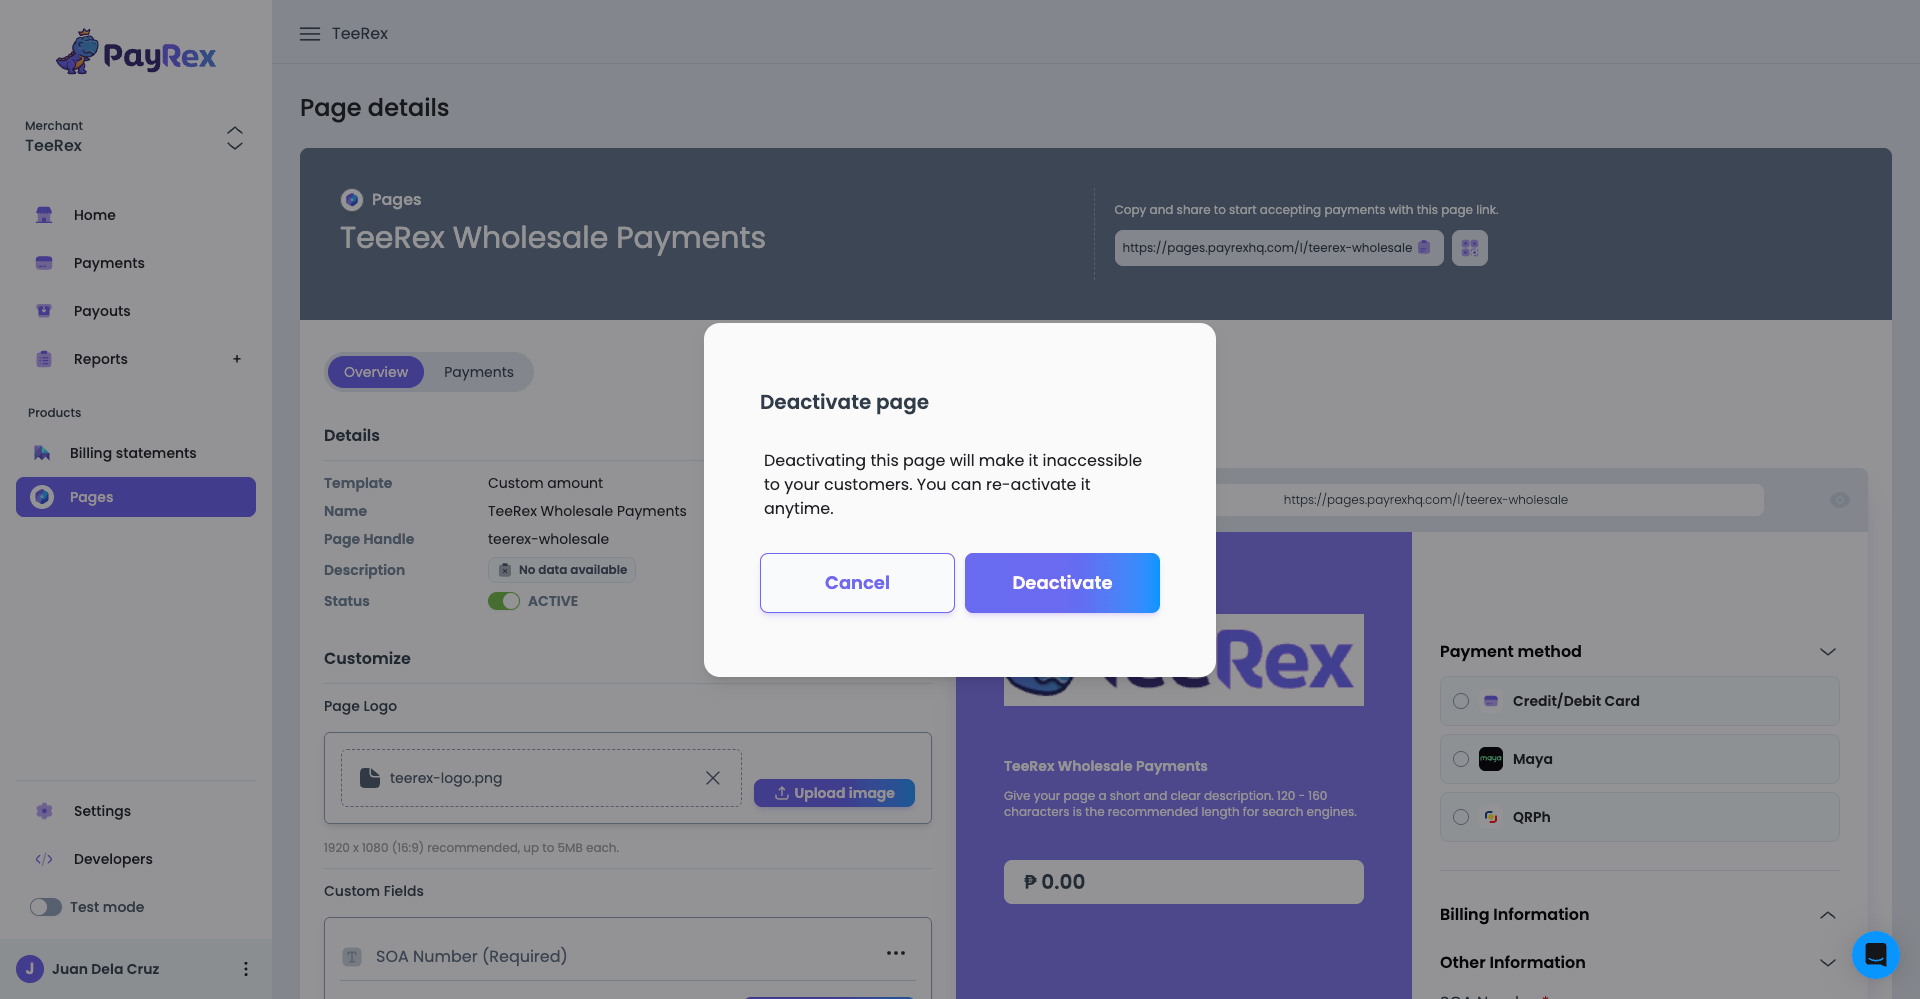
2. PayRex also provides a QR code that your customers can scan with their phone's camera so that they can easily access your page.
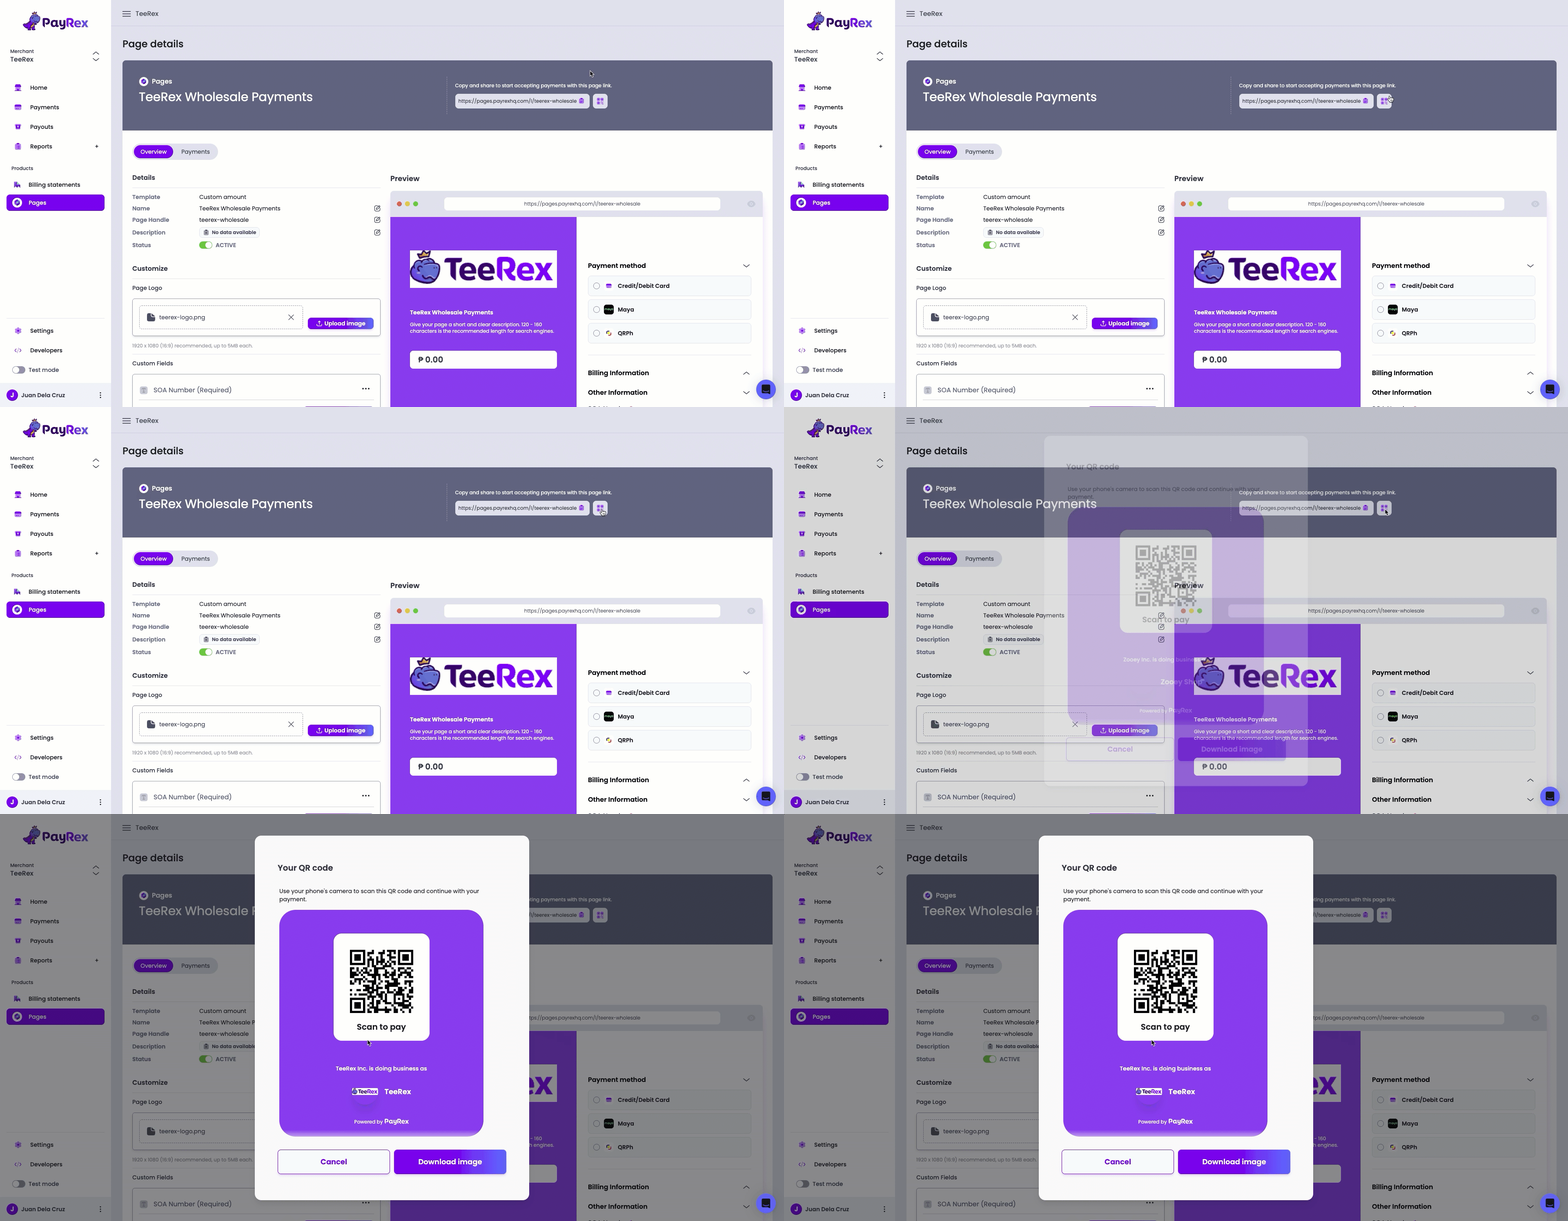
> **INFO**
- Download the generated QR code so you can post it on your online business profiles.
- Alternatively, you can print a hard copy of the QR code and display it at your physical store so that your walk-in customers can easily access your payment page.
## 3. Wait until your customers complete their payments
Unlike [billing statements](/docs/guide/finance_automation/billing_statements/), Pages are reusable and can receive payments from different customers. Once your customer accesses the URL, they can complete their payment. Both successful and failed payments made through the payment page will be displayed in real-time on the Payments tab.
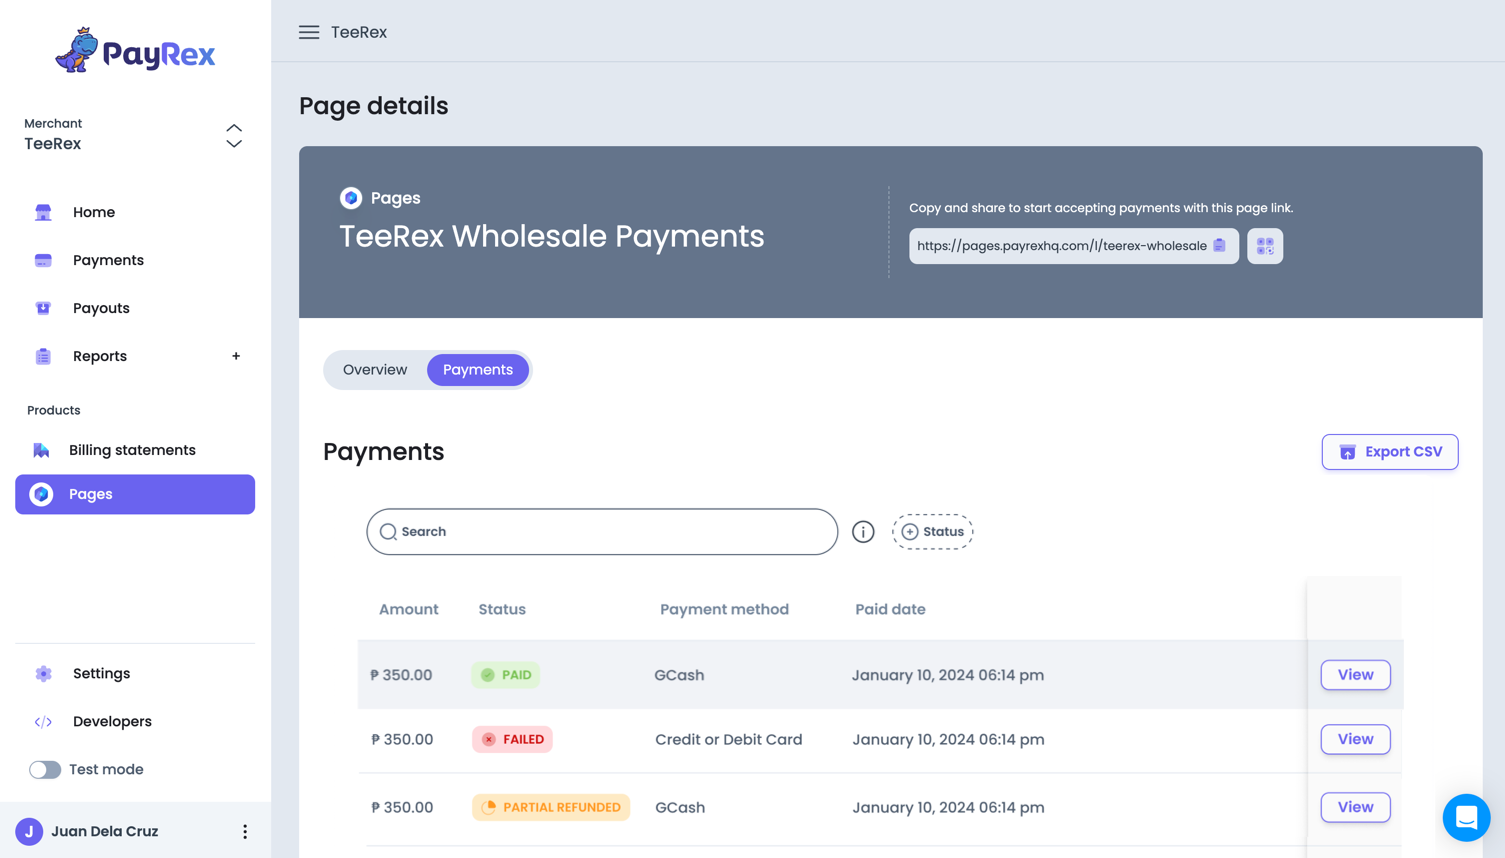
---
# PayRex Pages
Source: https://docs.payrex.com/docs/guide/payments/pages
Path: docs/guide/payments/pages/index.mdx
# Pages
This section will guide you to create and manage pages to receive payments from your customers.
---
# Pages Overview
Source: https://docs.payrex.com/docs/guide/payments/pages/overview
Path: docs/guide/payments/pages/overview.mdx
# Pages Overview
PayRex Pages are always-on payment pages that your customers can access any time to pay for your products and services. With Pages, you can receive payments right away without building a website.
Our pages product offers customizations to fit your business requirements. You can:
- Choose from our ready-made templates depending on your sale, cause, or event
- Personalize the branding by adding your logo
- Add custom fields to gather more input from your customers
- Select which payment methods to offer your customers
You can use the [Dashboard guide](/docs/guide/payments/pages/dashboard) to know more about creating and managing your pages.
## Pages Templates
PayRex Pages offer various templates tailored to different use cases for selling your products and services.
### Custom Amount
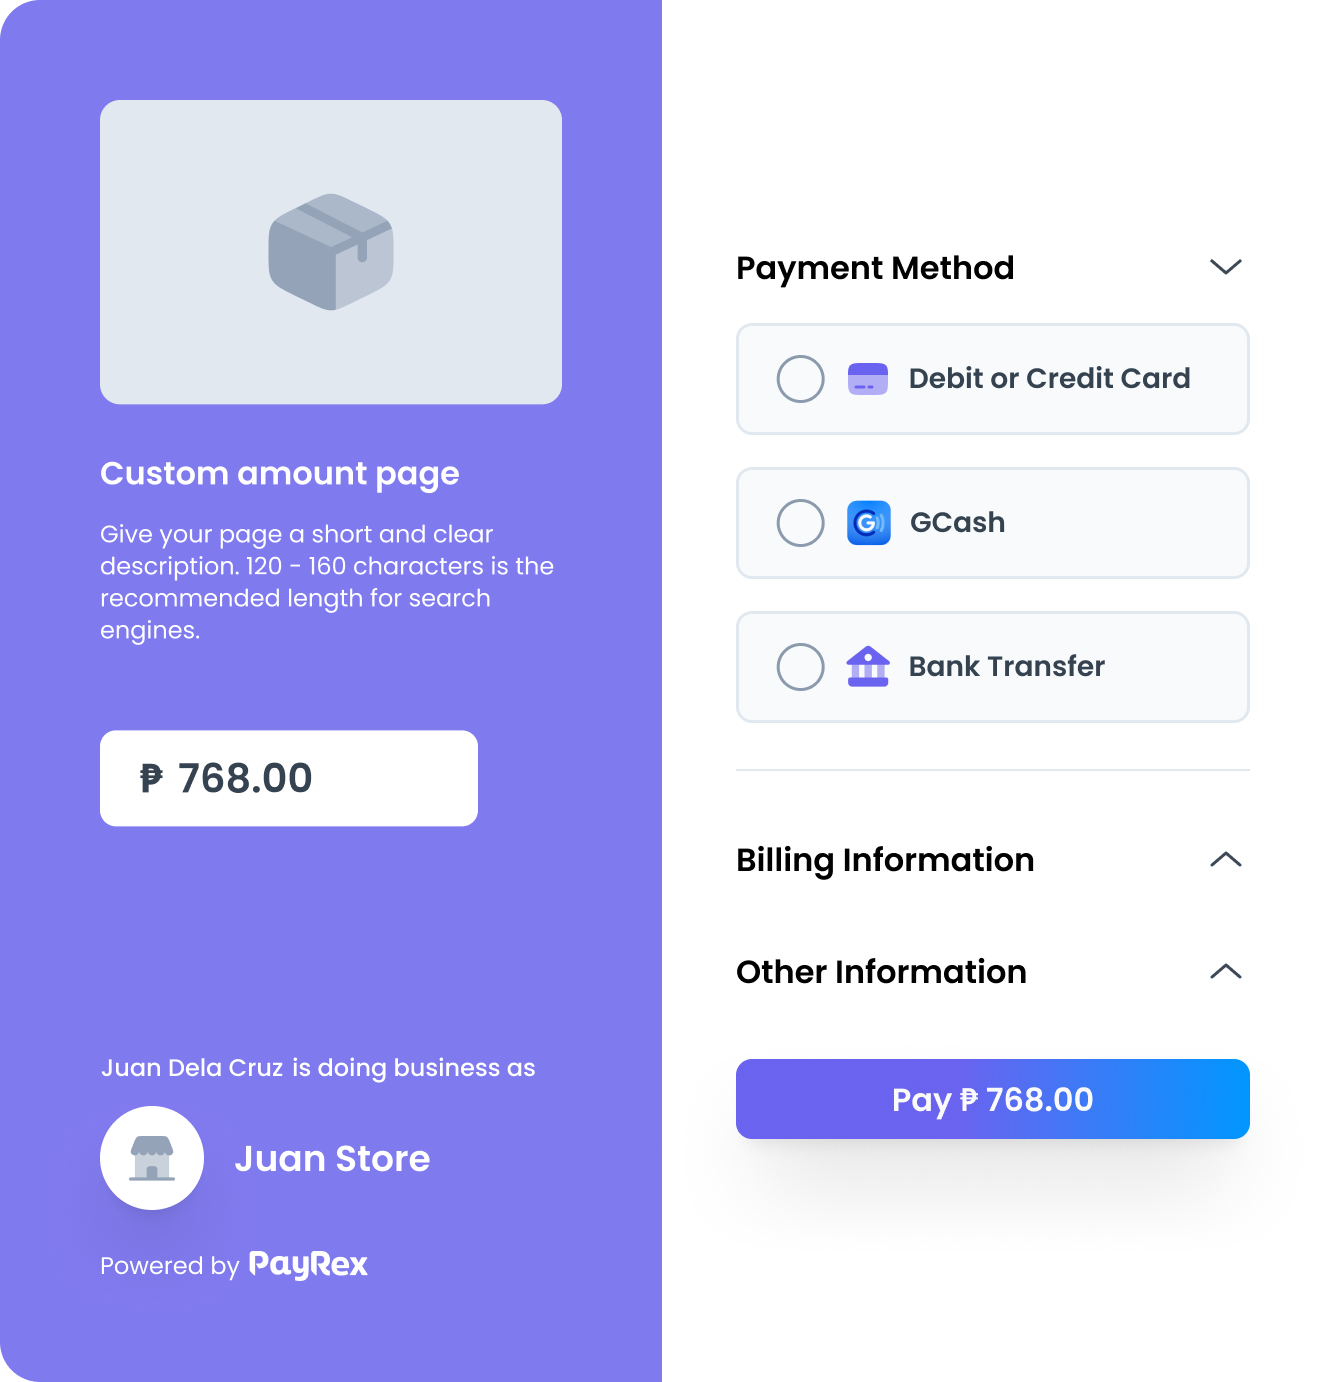 The custom amount template allows your customers to input the specific amount when completing a payment.
**Best for:** collecting partial payments such as downpayment for bulk or wholesale orders or leeway for rent.
### Fixed Amount
The custom amount template allows your customers to input the specific amount when completing a payment.
**Best for:** collecting partial payments such as downpayment for bulk or wholesale orders or leeway for rent.
### Fixed Amount
 The fixed amount template allows you to control the amount your customers can pay.
**Best for:** receiving payments for merchandise or services with fixed prices
### Donation
The fixed amount template allows you to control the amount your customers can pay.
**Best for:** receiving payments for merchandise or services with fixed prices
### Donation
 The donation template provides your sponsors/donors with a means to contribute financially to your organization. Share your cause using compelling images to make it easy to donate.
**Best for:** fundraising events, donation drives, and other causes
### Storefront
The donation template provides your sponsors/donors with a means to contribute financially to your organization. Share your cause using compelling images to make it easy to donate.
**Best for:** fundraising events, donation drives, and other causes
### Storefront
 The storefront template showcases your products and services, enabling customers to add several items to their cart and complete their purchase in a single transaction. It is a personalized online store without the overhead cost of maintaining a website or subscribing to e-commerce platforms.
**Best for:** offering a variety of products and services
### Ticket selling (coming soon!)
The storefront template showcases your products and services, enabling customers to add several items to their cart and complete their purchase in a single transaction. It is a personalized online store without the overhead cost of maintaining a website or subscribing to e-commerce platforms.
**Best for:** offering a variety of products and services
### Ticket selling (coming soon!)
 The ticket selling template allows you to easily sell tickets for events and activities. Highlight event details, include engaging visuals, and enable a seamless ticket purchasing experience for your audience.
**Best for:** social gatherings such as musical concerts, theatrical plays, academic and professional conferences, and sporting events
Have other template ideas in mind? [Talk to us](https://www.payrex.com/contact).
---
# PayRex Payouts
Source: https://docs.payrex.com/docs/guide/payouts
Path: docs/guide/payouts/index.mdx
# Payouts
This section will guide you on how and when you will receive your payouts in your bank account
---
# Payouts Overview
Source: https://docs.payrex.com/docs/guide/payouts/overview
Path: docs/guide/payouts/overview.mdx
# Payouts Overview
You receive your customers' payments when PayRex makes payouts settled to your nominated bank account.
To learn more about the payouts module in the PayRex dashboard, you can refer to this [guide](/docs/guide/getting_started/using_the_dashboard/core_resources/payouts).
### Nominating your bank account
The bank account where PayRex will settle your payouts can be added during your [account activation](/docs/guide/getting_started/activate_your_account). When testing PayRex in [test mode](/docs/guide/developer_handbook/testing/testmode), you don't need to nominate a bank account, as test payments do not involve real money.
### Support bank accounts
As of this writing, PayRex only settles to Philippine Peso (PHP) bank accounts opened in the Philippines. To learn more about the supported bank accounts, see this [help article](https://help.payrex.com/en/articles/9258678-what-bank-accounts-can-i-use-to-receive-my-payouts).
### Payout Schedule
PayRex generates payouts for a merchant during banking days. Only the **cleared** payments will be covered by every payout. To learn more about how cleared payments and payout schedules work, check this [support article](https://help.payrex.com/en/articles/10614167-when-will-i-receive-my-payout).
### Minimum payout amount
The minimum balance required to generate a payout is ₱ 20.00. If your balance is below the minimum amount due due to insufficient payments or negative balances from refunds, no payout will be generated.
### Failure to settle to your bank account
If your bank account cannot receive a payout for any reason, your bank returns the amount to us. You can reach out to support@payrex.com or use the chat support if you encounter any delays or failures in your payouts within your Dashboard.
### Payout fees
There is no additional charge or fee when PayRex settles into your bank account.
---
# Bank Reconciliation
Source: https://docs.payrex.com/docs/guide/reports/bank_reconciliation
Path: docs/guide/reports/bank_reconciliation.mdx
# Bank Reconciliation
You can reconcile the money settled to your nominated bank account and your PayRex merchant account's transactions by checking the Payouts listing or through Payout details.
### List of Payouts

If you access the Payouts module in your PayRex Dashboard, you should see the list of payouts created in your PayRex merchant account. Every payout represents a deposited cash to your nominated bank account.
To learn more about payouts, you can refer to this [guide](/docs/guide/payouts/overview).
To learn more about the payouts module in the PayRex dashboard, you can refer to this [guide](/docs/guide/getting_started/using_the_dashboard/core_resources/payouts).
### Payout Details
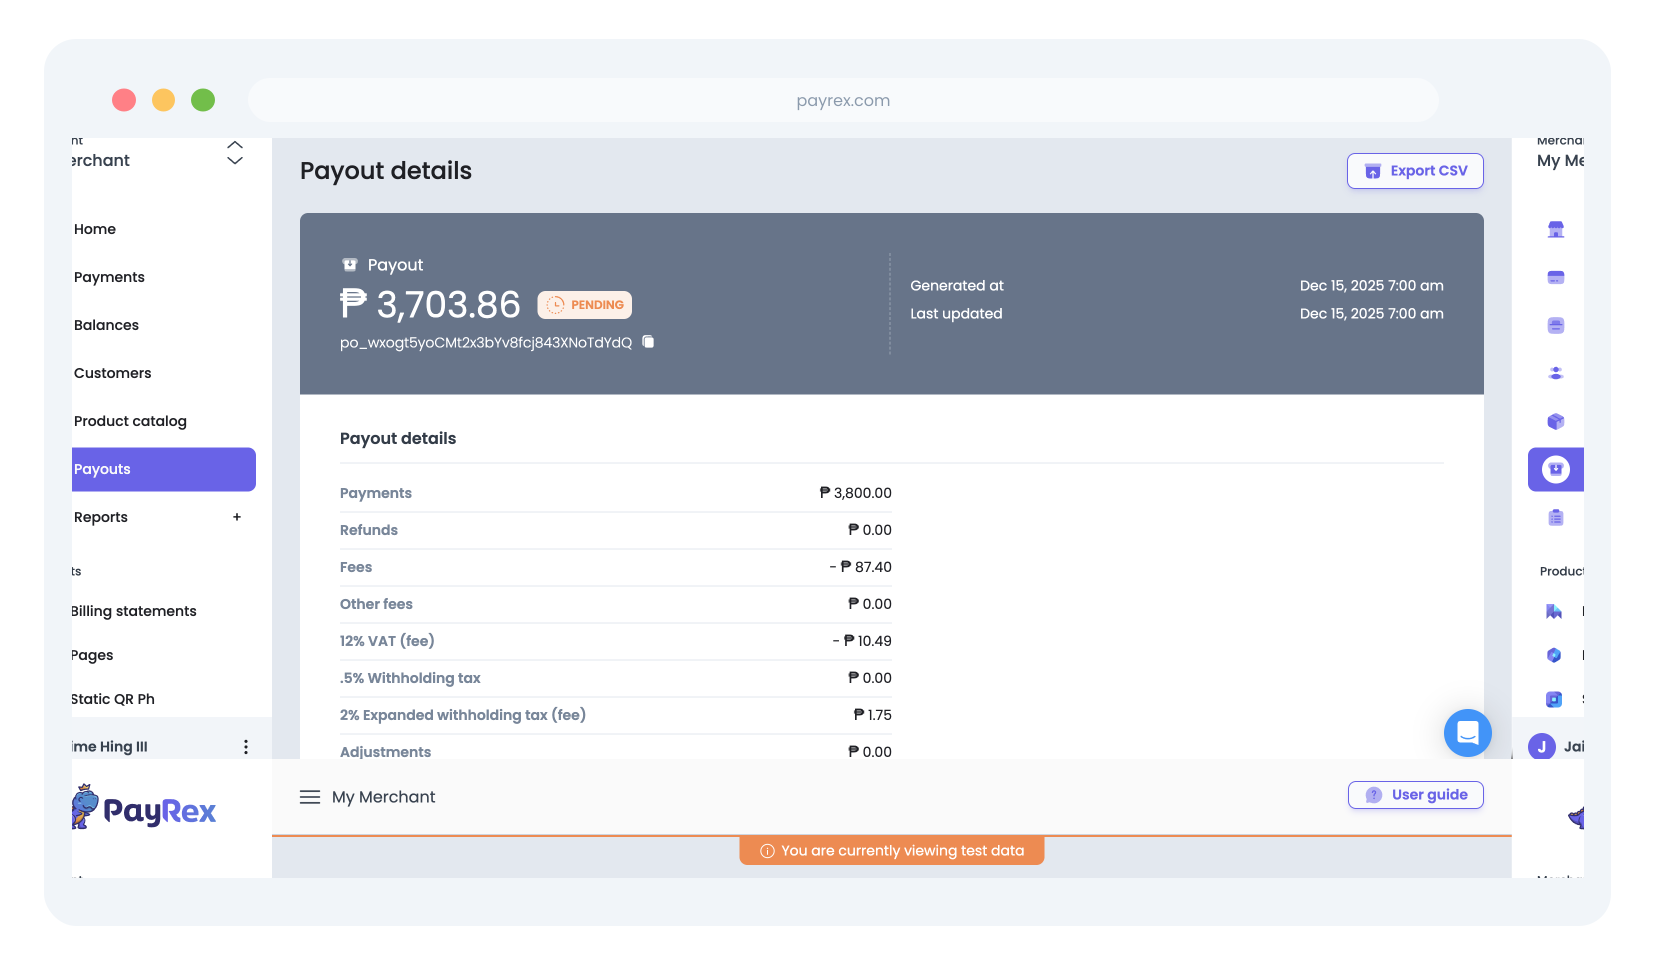
While you can view the list of payments and its refunds through the payments module of the PayRex Dashboard, it is more efficient to reconcile the transactions for every payout through the payout details module. View a particular payout from the payouts listing and you can reconcile the transactions
---
# PayRex Reports
Source: https://docs.payrex.com/docs/guide/reports
Path: docs/guide/reports/index.mdx
# Reports
This section will guide you on how and when you will receive your payouts in your bank account
---
# Payout Reconciliation
Source: https://docs.payrex.com/docs/guide/reports/payout_reconciliation
Path: docs/guide/reports/payout_reconciliation.mdx
# Payout Reconciliation
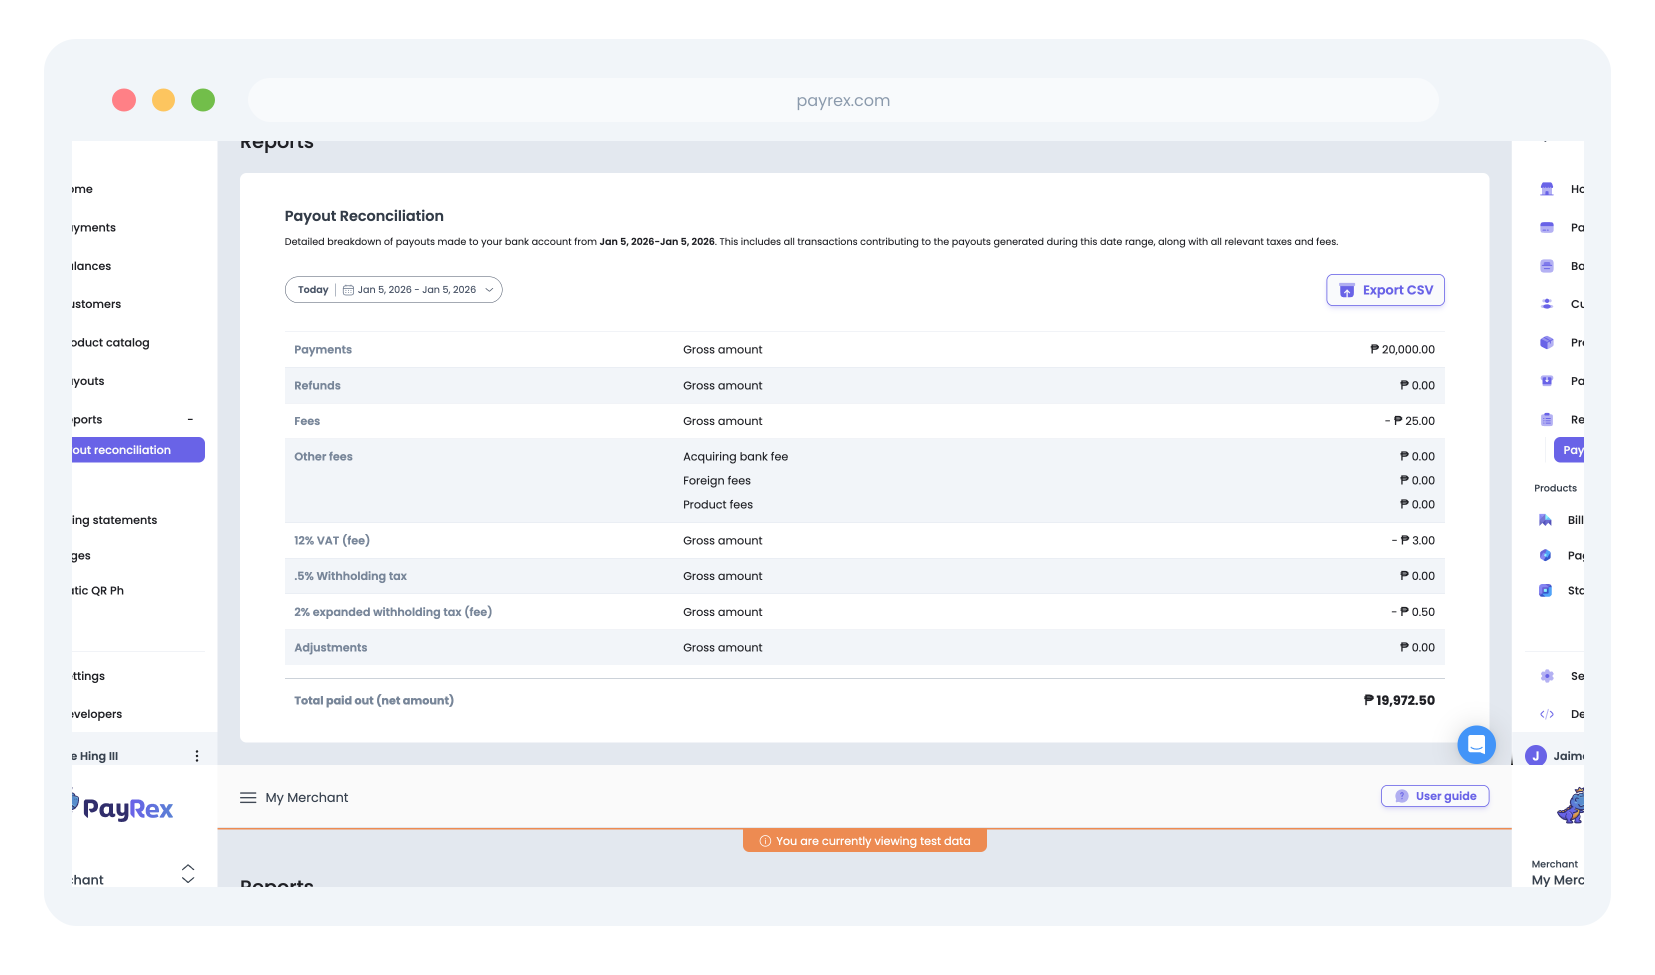
The payout reconciliation report helps you summarize a batch of payouts for a specified date range. For example, if you want to get the summary of last week's payouts, you can filter the date range to last week and the payout reconciliation report will provide you a summary.
To learn more about payouts, you can refer to this [guide](/docs/guide/payouts/overview).
This report shows the summary of your PayRex merchant account's transactions across all the payouts for a particular date range:
- Total Payments
- Refunds
- Fees
- Taxes
- Adjustments
- Net amount
All payouts generated on the date range you selected will determine the scope of the report. You can also export the report as a CSV file. The file will contain the exact payout transaction totals, but broken down further by every payout. Furthermore, you can also control which columns will be included or excluded from the exported file.
---
# Third-Party Plugins
Source: https://docs.payrex.com/docs/guide/third_party_plugins
Path: docs/guide/third_party_plugins/index.mdx
# Third-Party Plugins
This section will teach you how to use PayRex's Official Third-Party Plugins.
---
# Shopify
Source: https://docs.payrex.com/docs/guide/third_party_plugins/shopify
Path: docs/guide/third_party_plugins/shopify/index.mdx
# Shopify Plugin
This section will teach you how to install and manage PayRex's Shopify plugin.
---
# Shopify
Source: https://docs.payrex.com/docs/guide/third_party_plugins/shopify/install
Path: docs/guide/third_party_plugins/shopify/install.mdx
# Install Shopify Plugin
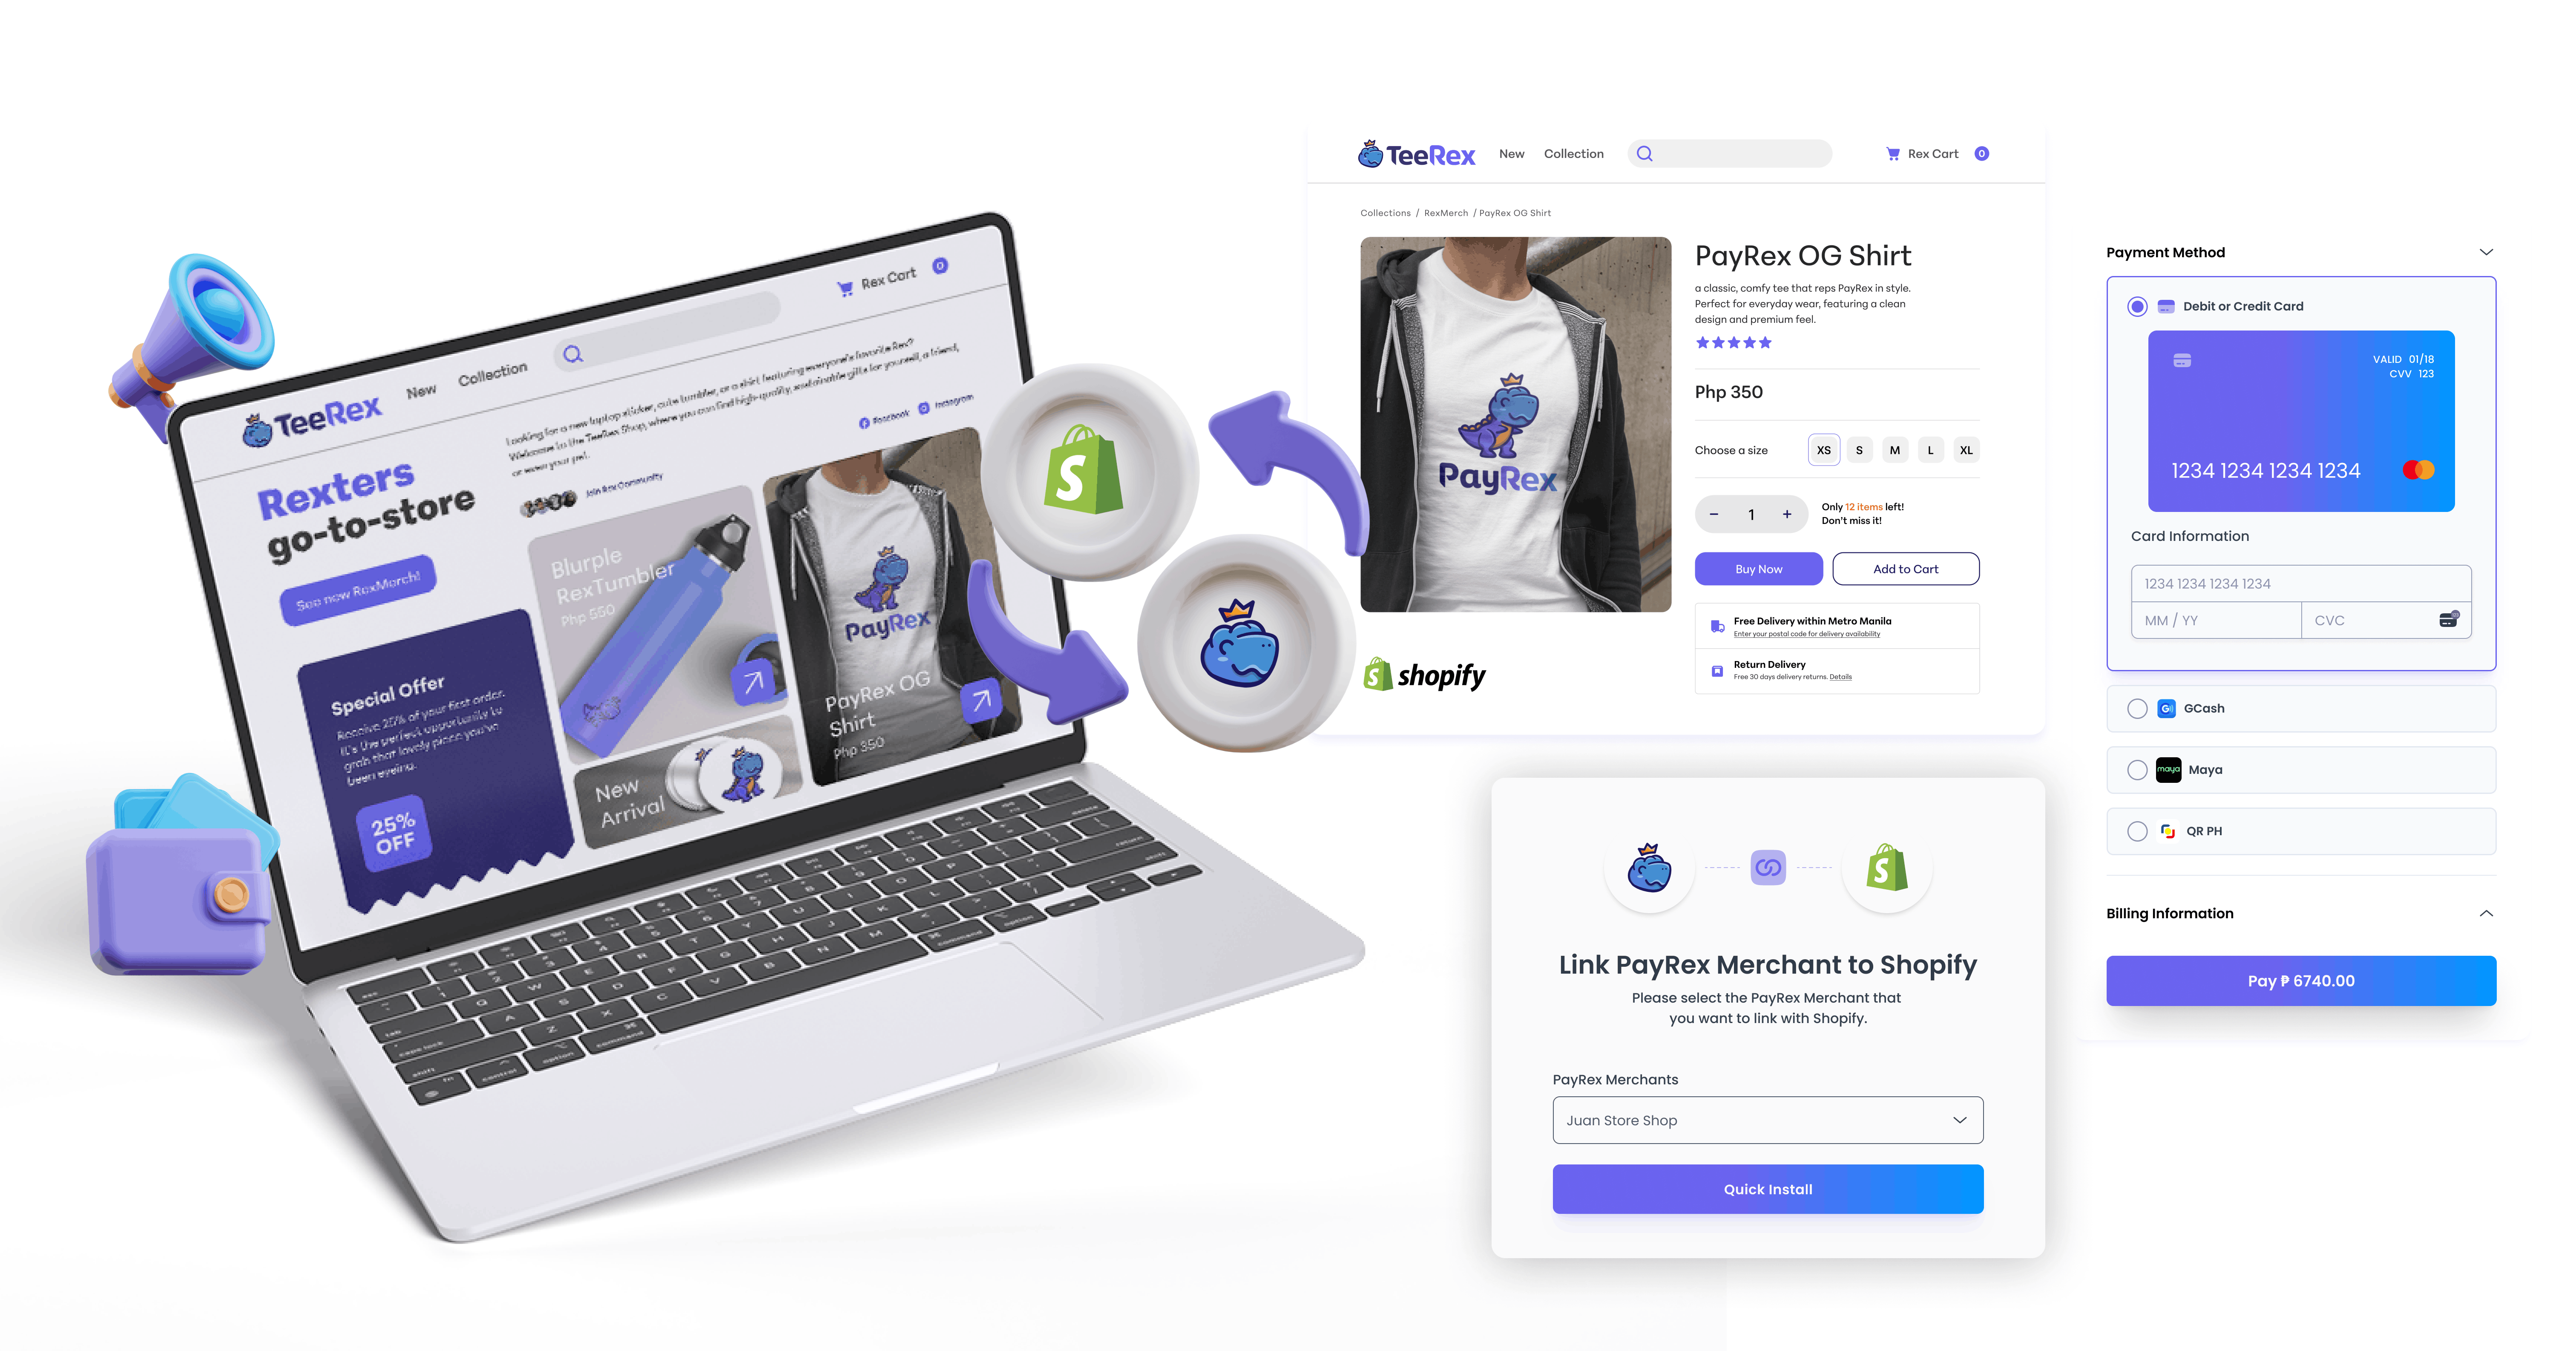
This guide provides step-by-step instructions on installing and configuring PayRex's Shopify plugin on your Shopify store.
[Shopify](https://www.shopify.com) is a commerce platform that allows individuals and businesses to create online stores and sell products and services. It is one of the most commonly used commerce platforms in the Philippines.
## Prerequisites
Before proceeding, ensure that you have the following:
- A Shopify store
- A Shopify user account with access to installing a third-party payment provider
- A PayRex merchant account. If you don't have access to a PayRex merchant, check this [guide](/docs/guide/getting_started/creating_an_account) first. If you should be part of an existing PayRex merchant account, please ask your administrator to invite you.
### Step 1: Install PayRex's Payment App Plugin
1. Open the plugin's installation [link](https://apps.shopify.com/payrex-payments).
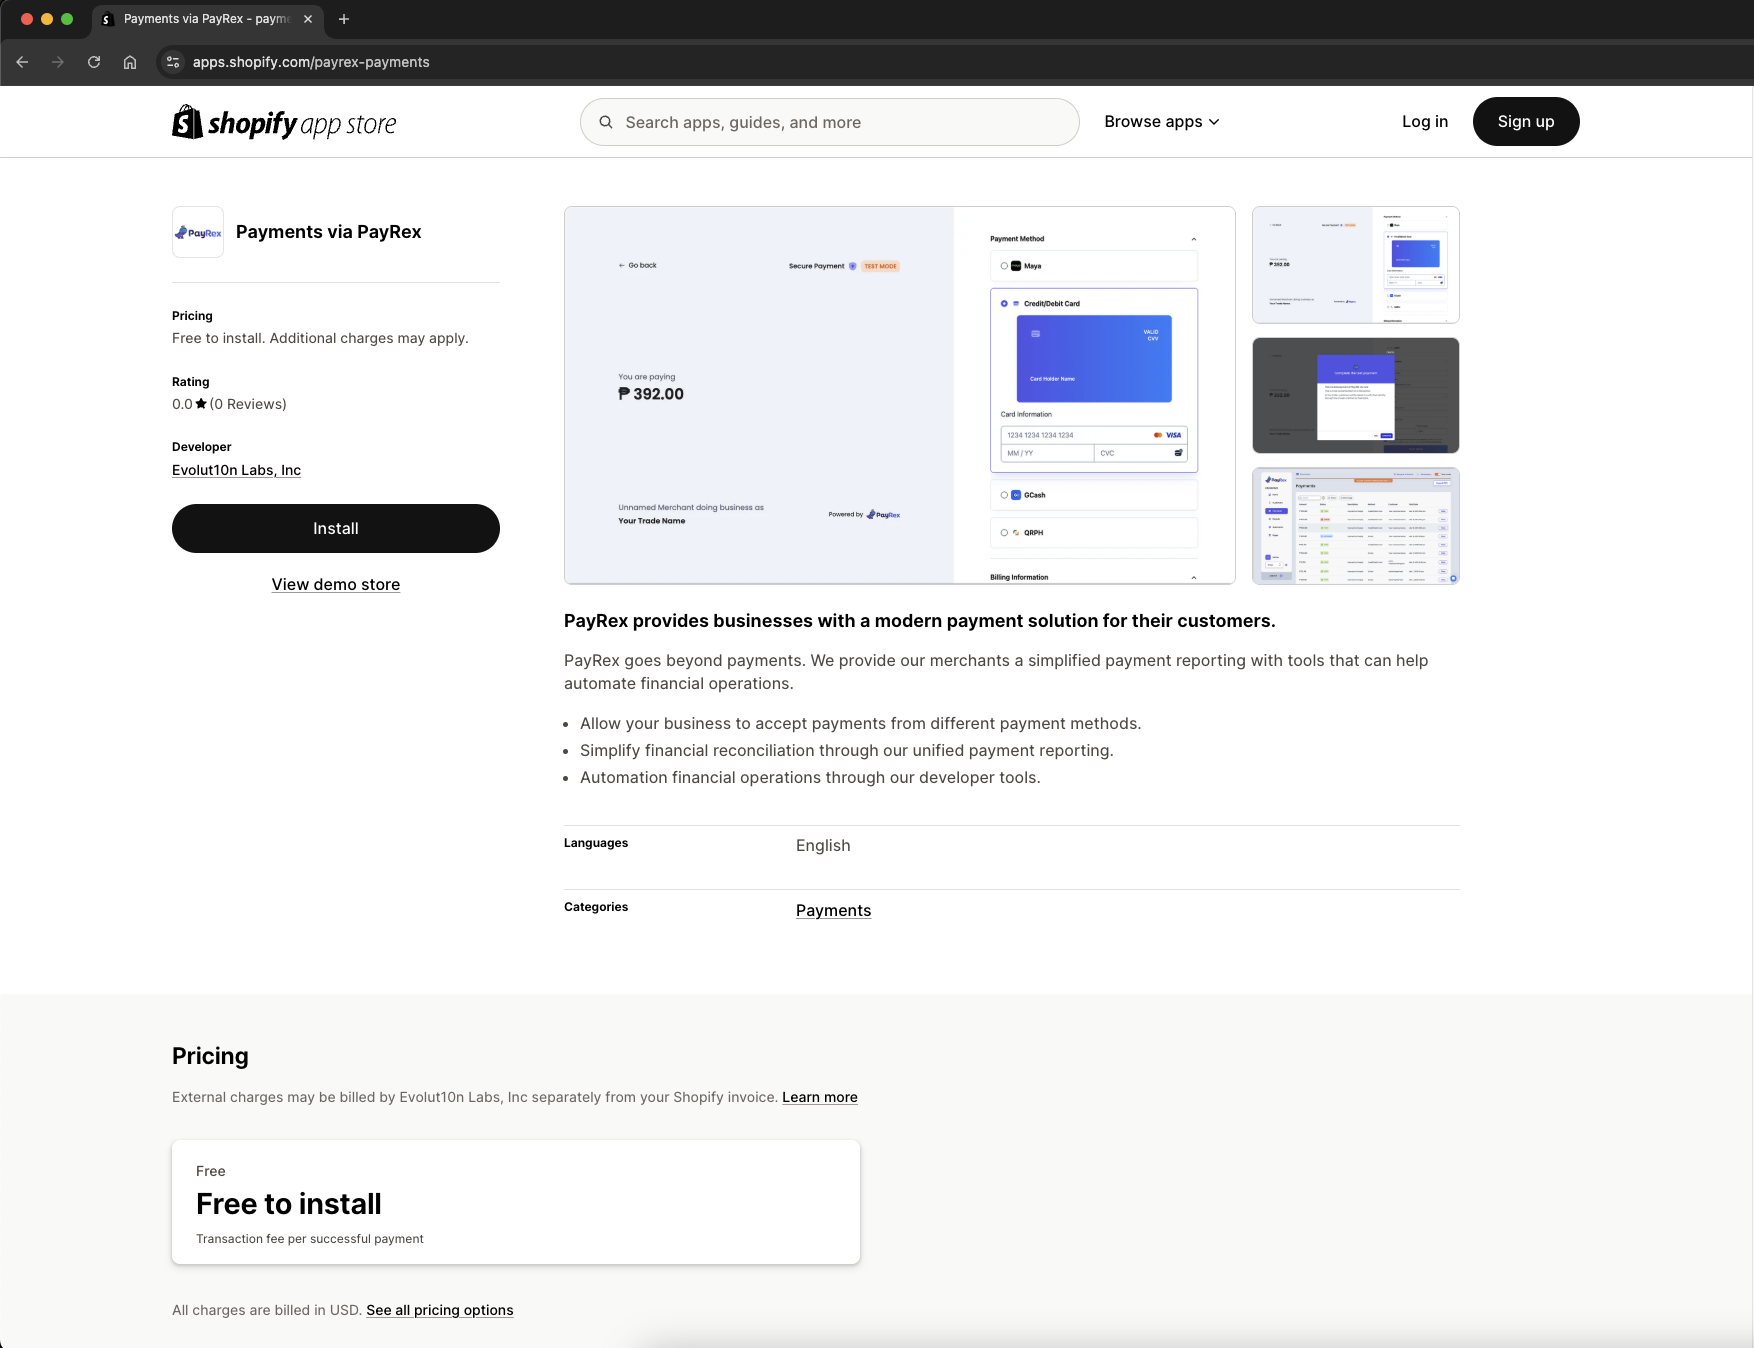
2. Click the Install button to start linking your Shopify store.
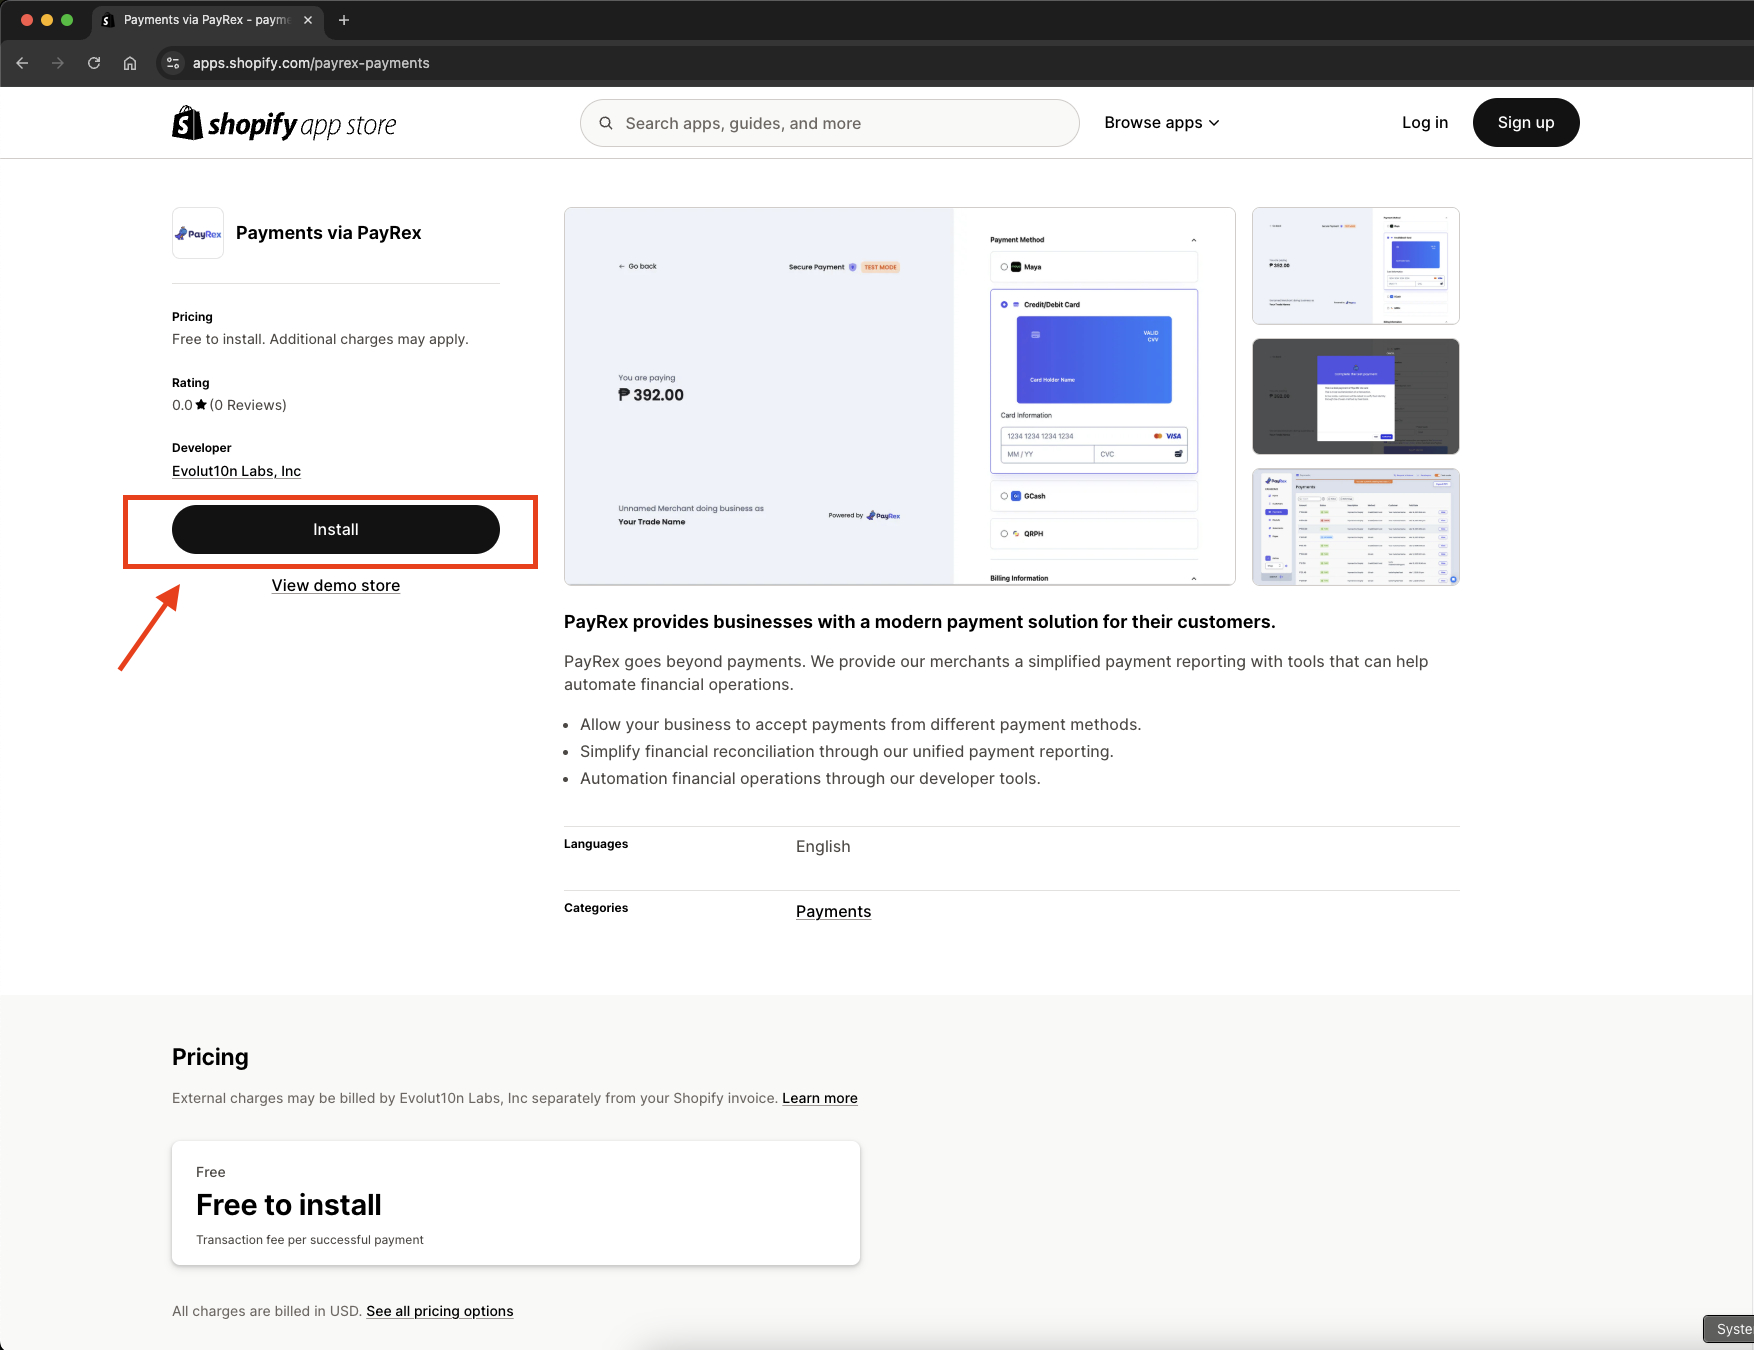
3. If prompted, log in to your Shopify admin account. After logging in, Shopify will ask you to grant the PayRex plugin permission to process your payments on your behalf. Approve the necessary permissions to proceed.
### Step 2: Configure and enable the plugin
1. You will be redirected to PayRex's installation page after you click the Install button. Log in to your PayRex user account to continue.
2. Choose the PayRex merchant account you want to link to your Shopify store after successfully logging in to your PayRex user account.
3. You will be redirected to the Shopify admin panel to configure further the payment settings after you confirm the PayRex's merchant account that you want to link.
4. Configure the payment methods allowed in your **Shopify** store.
There are two things that you have to do to configure further the payment methods used by our plugin in your Shopify store:
#### 4.a - Manage what your customers will see from Shopify
1. Enable the payment methods that your customers will see from your Shopify store. These payment methods will only reflect within Shopify Checkout. You should manage separately the enabled payment methods within the PayRex Checkout page via the PayRex Dashboard. Proceed to [4.b](/docs/guide/third_party_plugins/shopify/install#4b---manage-what-your-customers-will-see-from-payrexs-checkout-page) to configure what your customers will see once they are redirected to PayRex's checkout page.
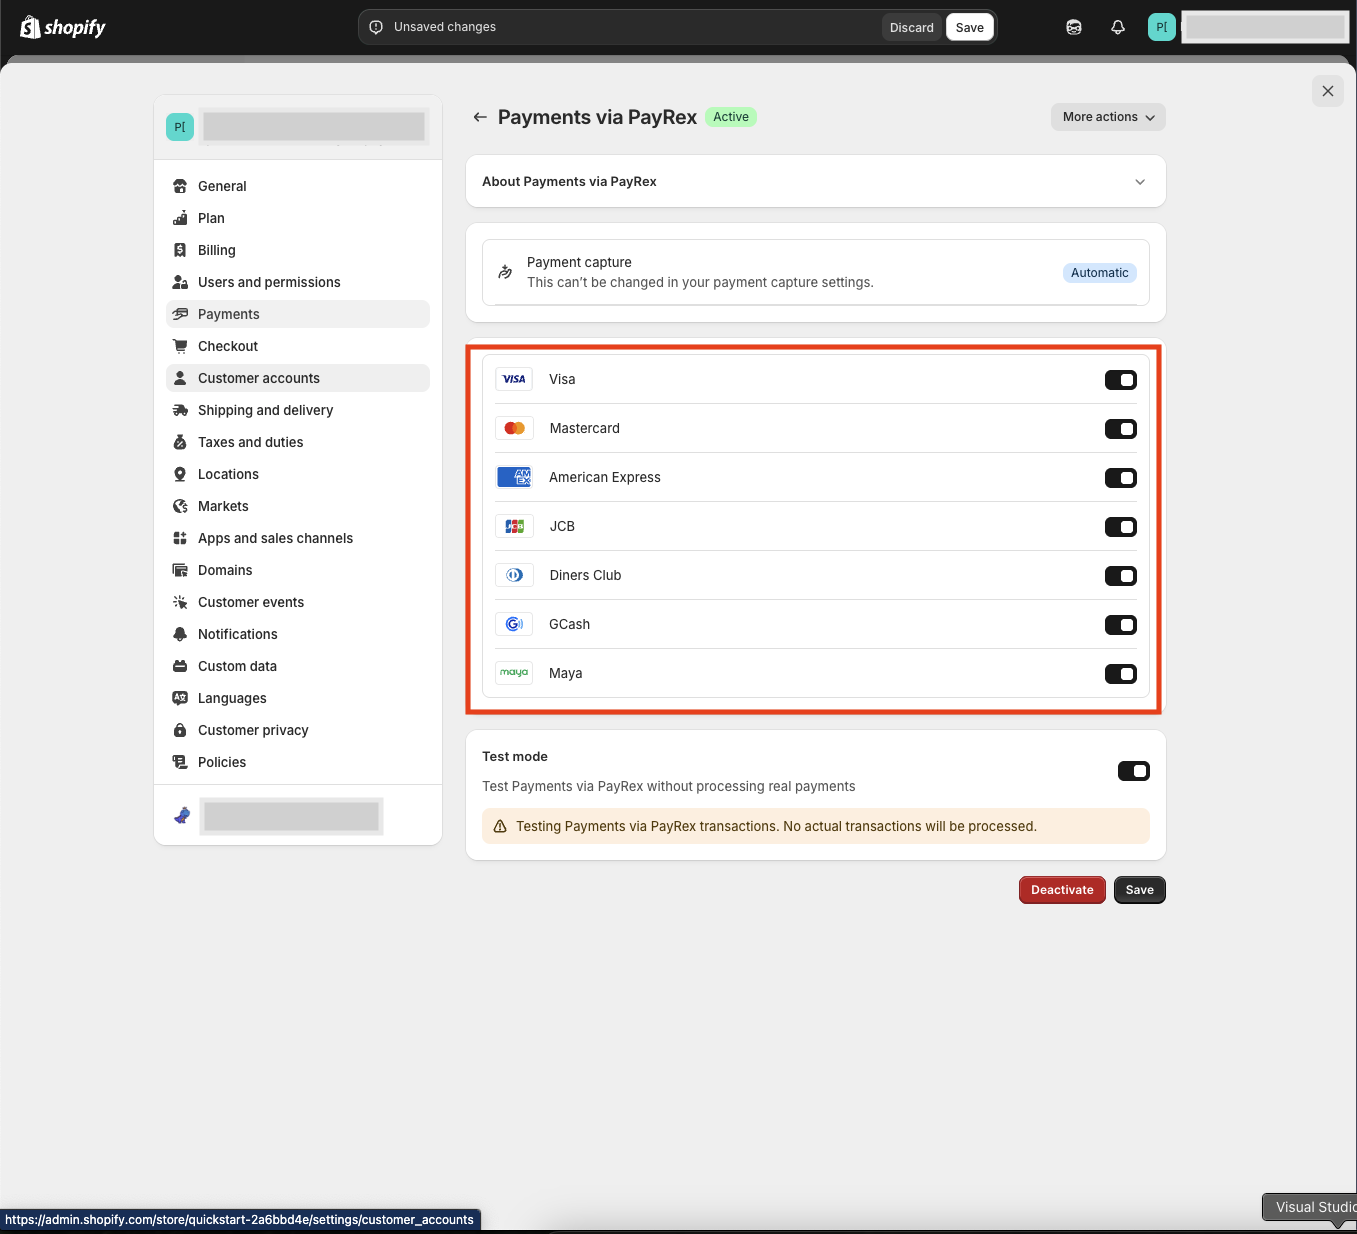
#### 4.b - Manage what your customers will see from PayRex's Checkout Page
1. Access the PayRex's Dashboard, then go to Settings > Shopify Payment Methods.
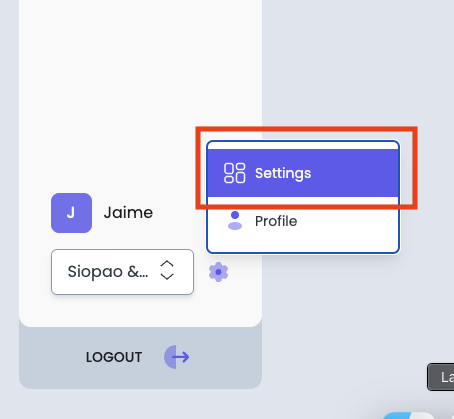
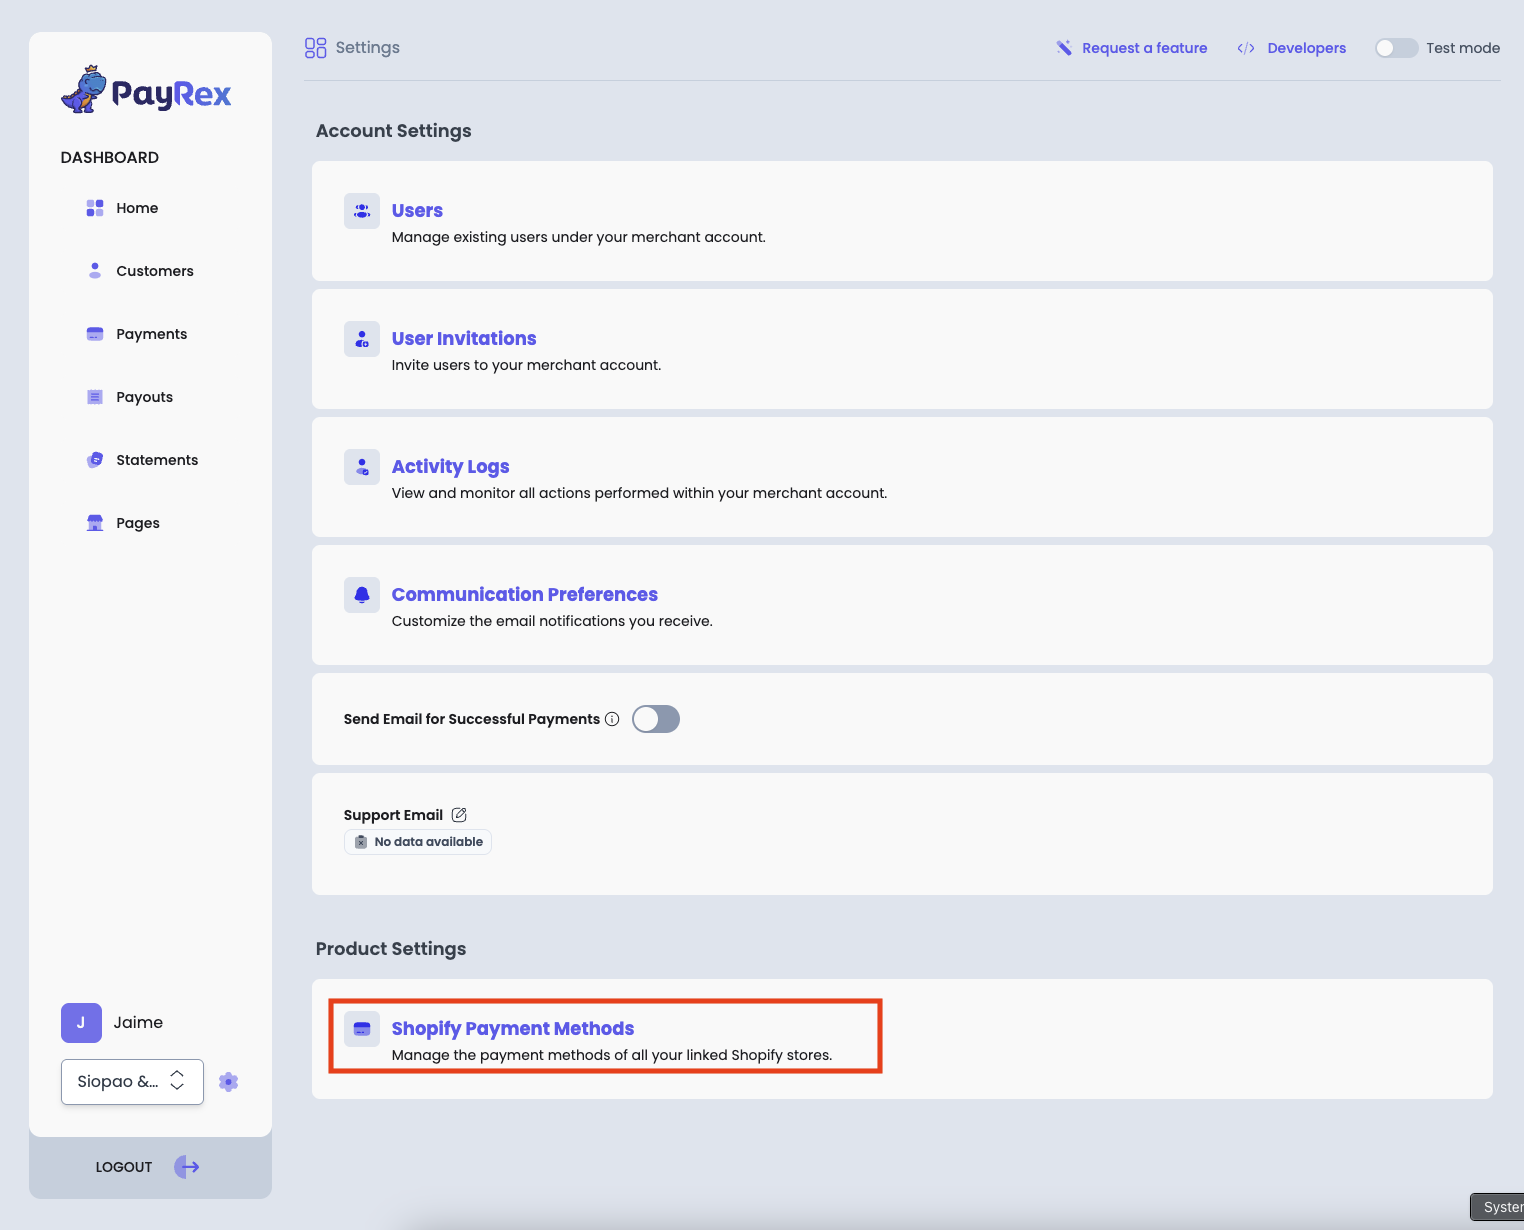
2. If you manage multiple Shopify stores, select the store for which you want to configure the allowed payment methods. Manage the payment methods of the selected store. The payment methods you will enable should usually align with the payment methods you enabled from step [4.a](/docs/guide/third_party_plugins/shopify/install#4a---manage-what-your-customers-will-see-from-shopify). If there are more payment methods available within our settings, you can still enable them.
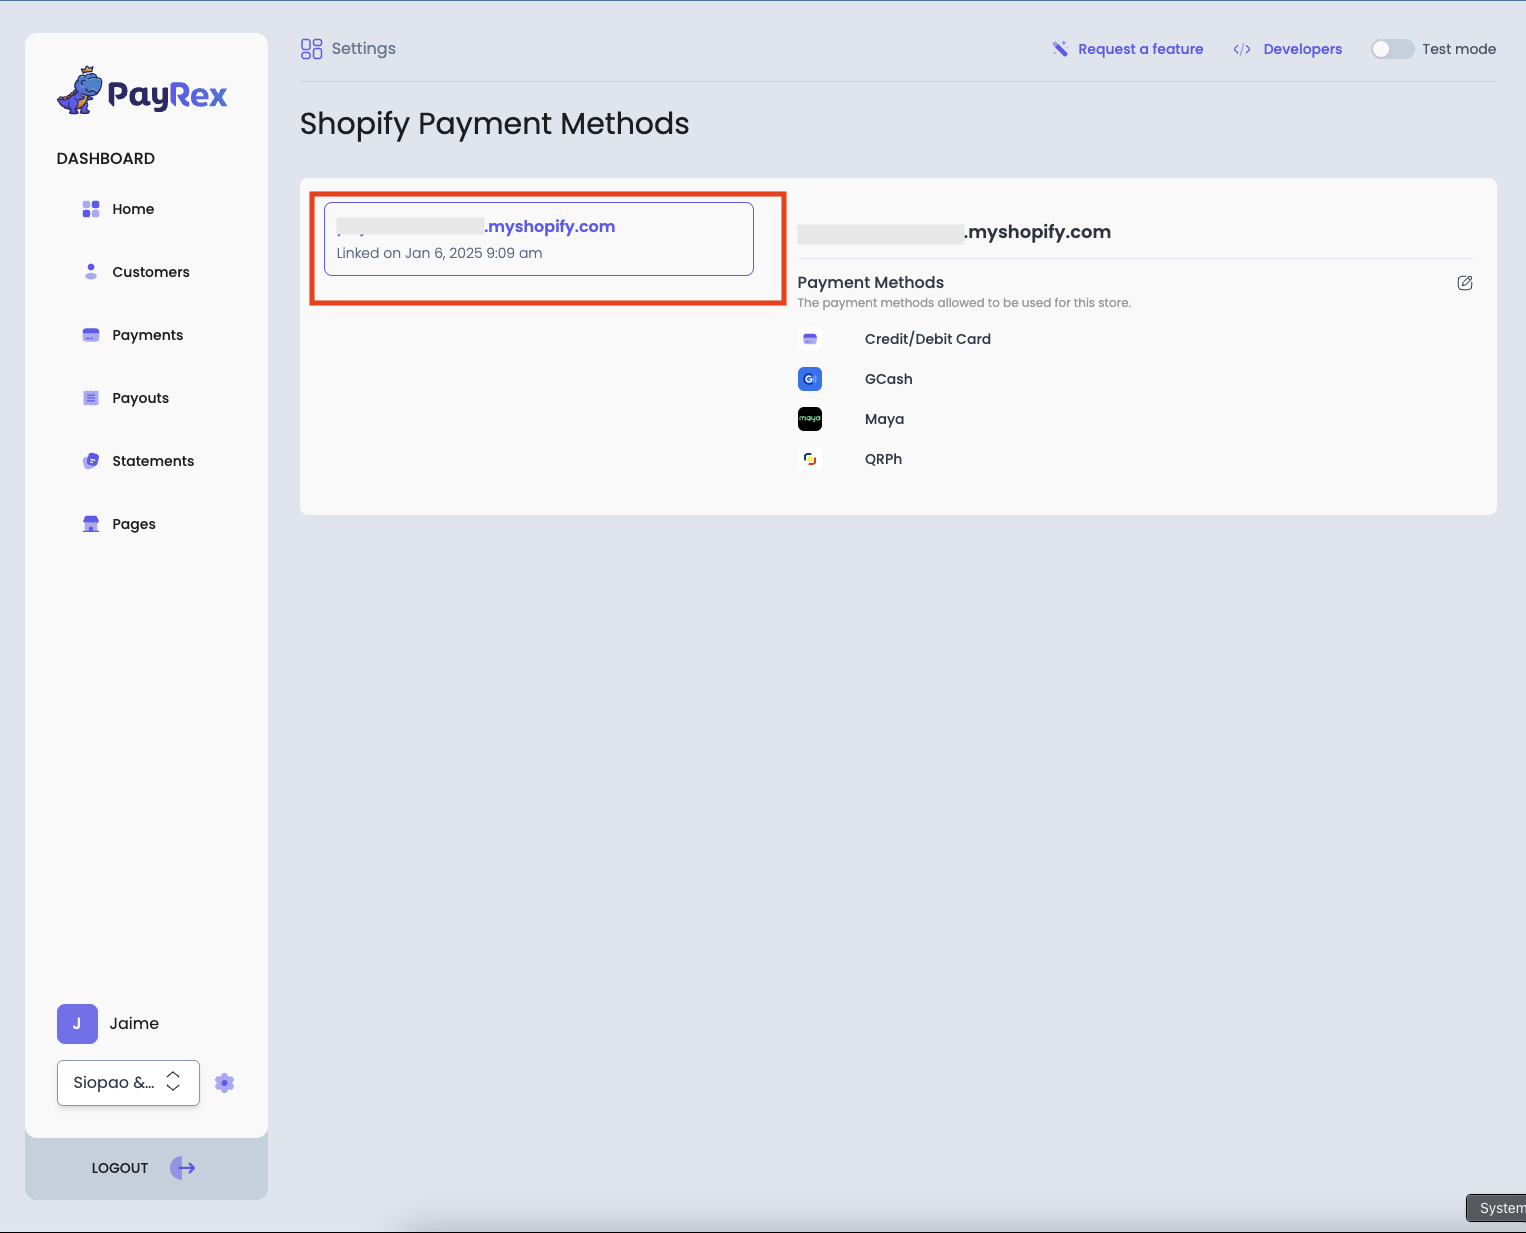
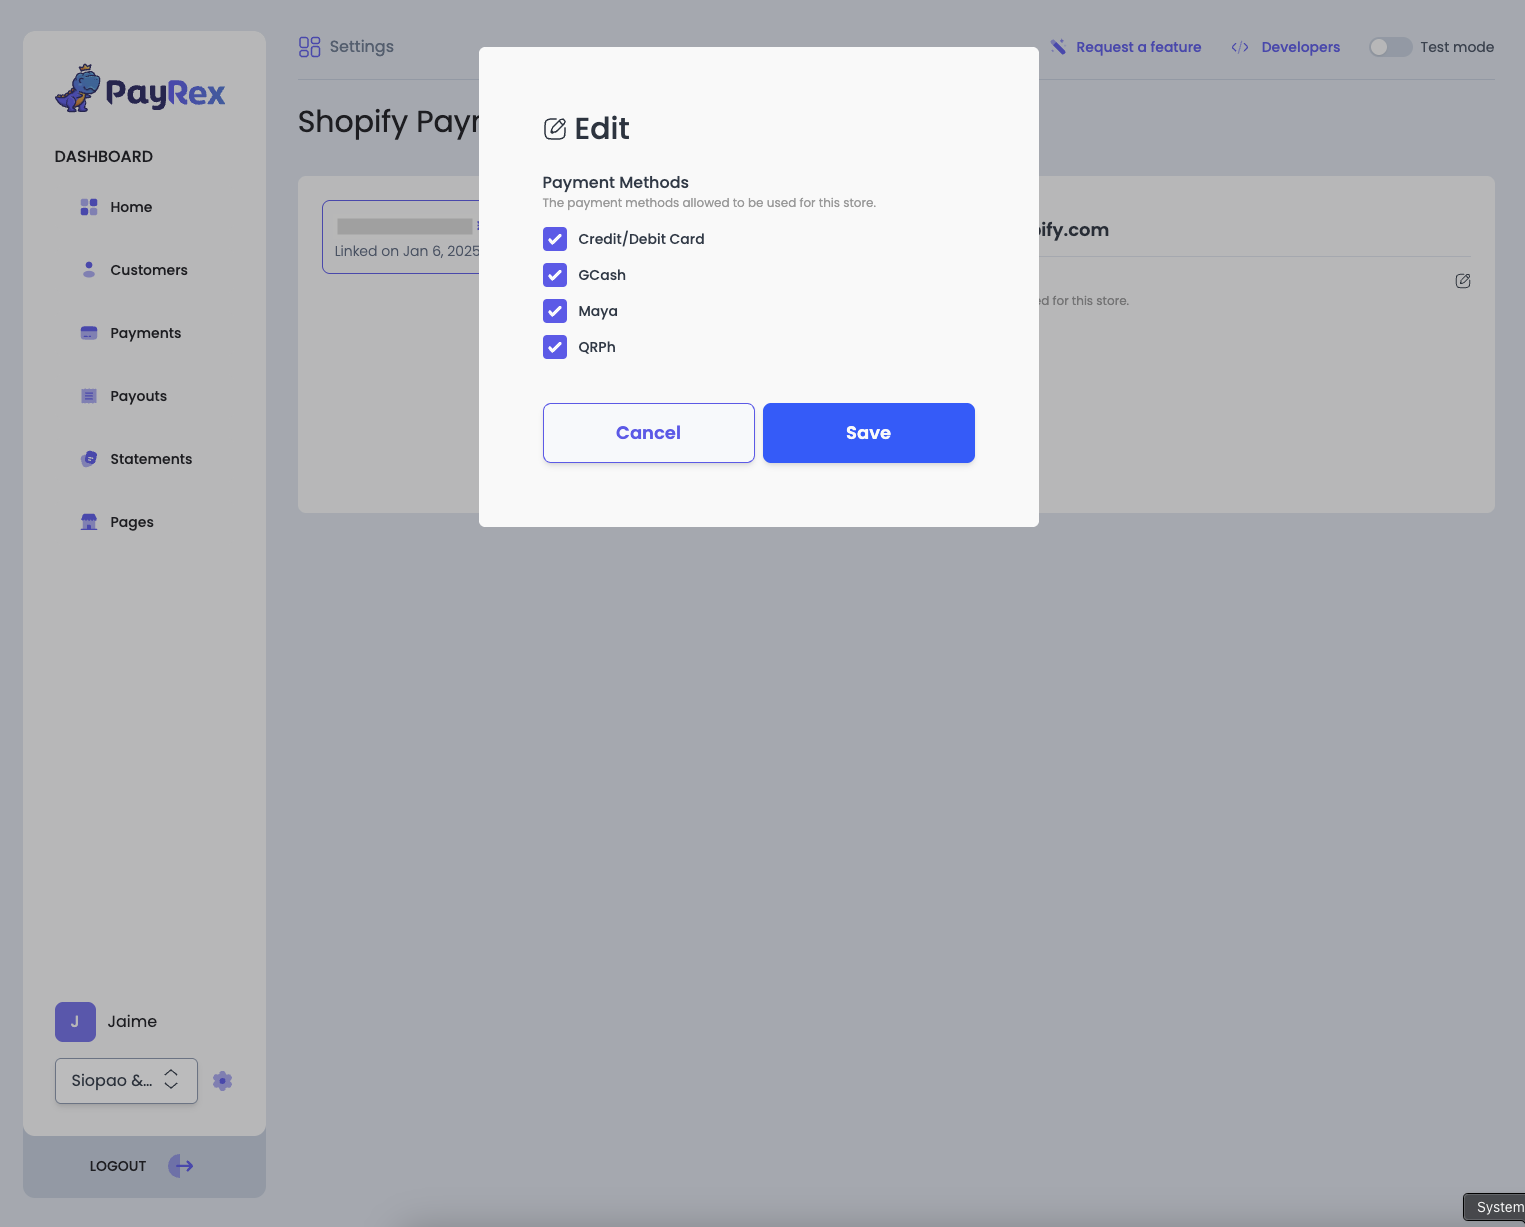
### Step 3. Test payments through test mode
> **WARNING**
Do not proceed with step 3 if your Shopify store already has transacting customers. Once the plugin is installed, your customers will see PayRex at the checkout, so you must turn off test mode from the Shopify payment settings. You can already proceed with step 4.
If your Shopify store is still not live, we highly recommend completing a test payment to see the end-to-end payment processing flow. If you already have a live Shopify store and want to process live payments, proceed to [Step 4](/docs/guide/third_party_plugins/shopify/install#step-4-go-live).
1. To start with your test transaction, enable the Test Mode in Shopify payment gateway settings.
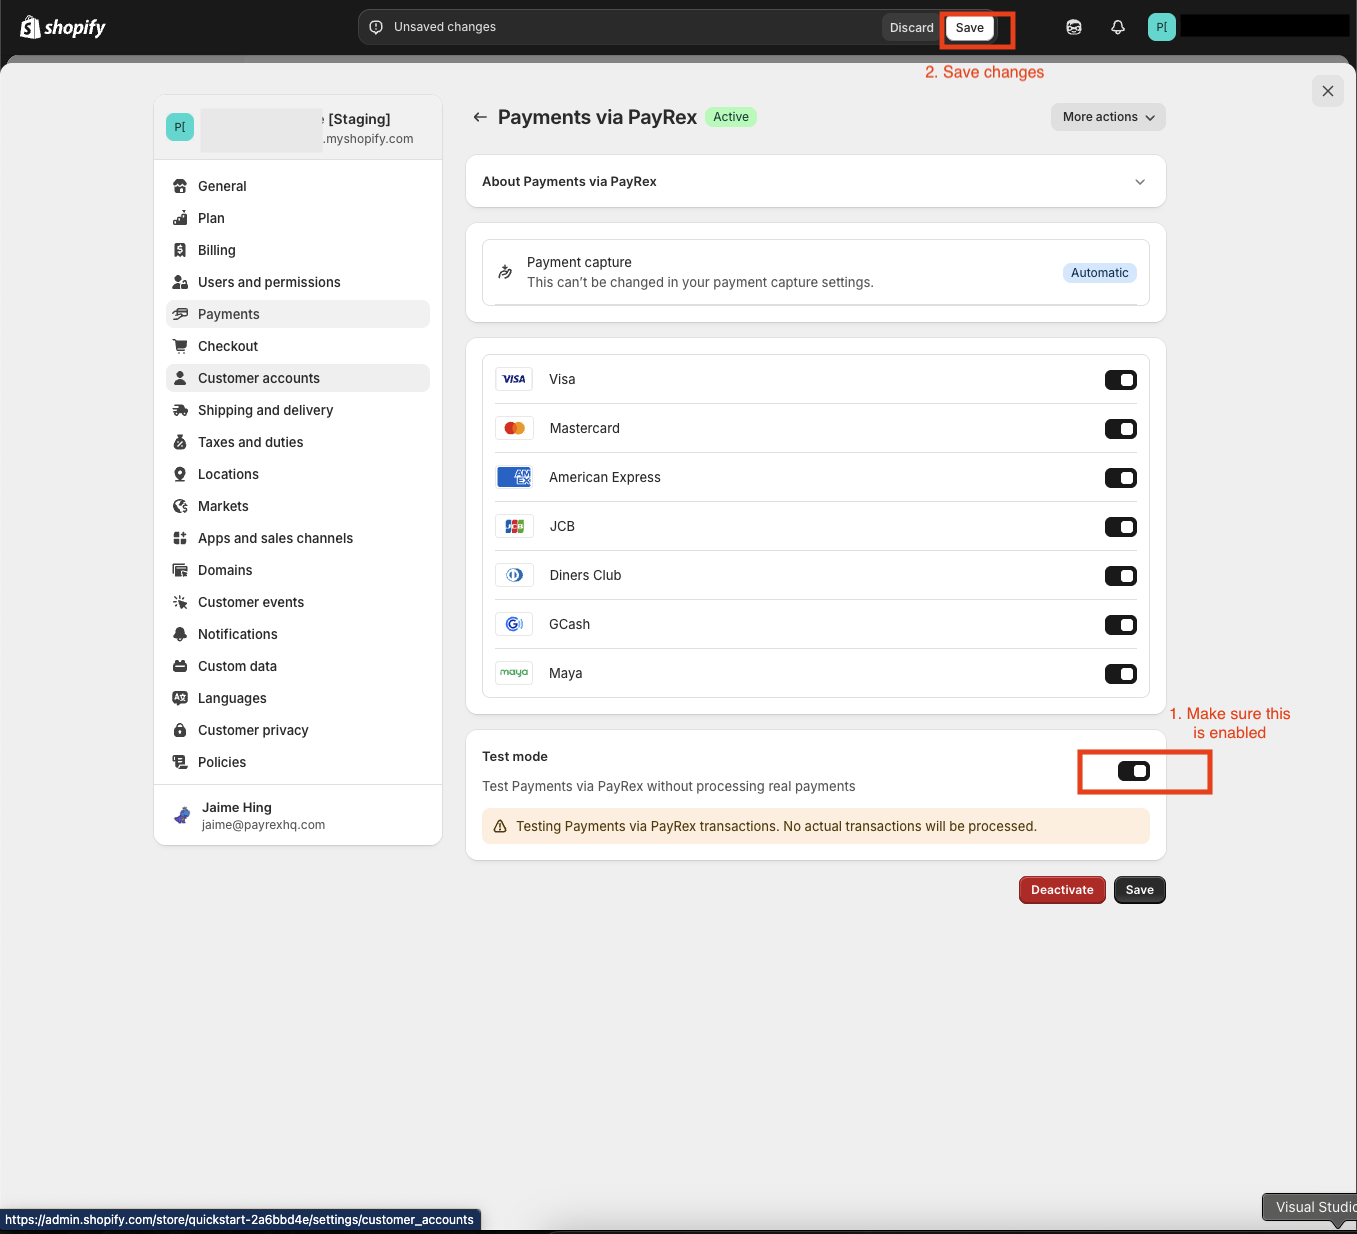
2. Place a test order on your Shopify store. If you want to test a card payment, please refer to our [list](/docs/guide/developer_handbook/testing/testing_your_integration) of test cards.
3. After completing the test transaction, verify that the paid order appears in the Shopify Dashboard.
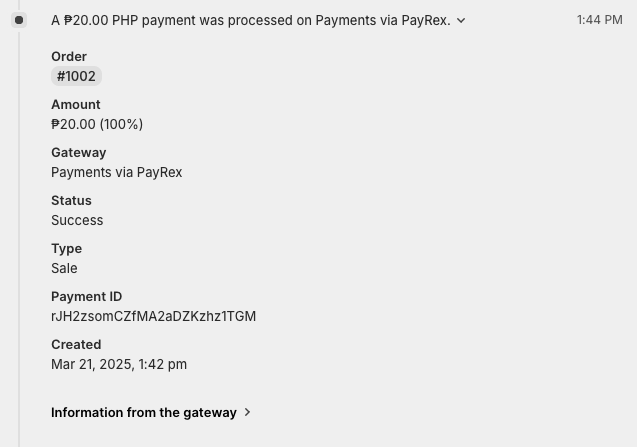
4. Check if a test paid payment is also created within the PayRex dashboard, proceed to the [Payments](https://dashboard.payrexhq.com/t/payments) module of PayRex Dashboard and look for the test payment from the list. Ensure that the test mode toggle is turned on.
> **INFO**
The Shopify Payment ID should match the ID from PayRex's payment description. You can also search the listing via the Shopify Payment ID.
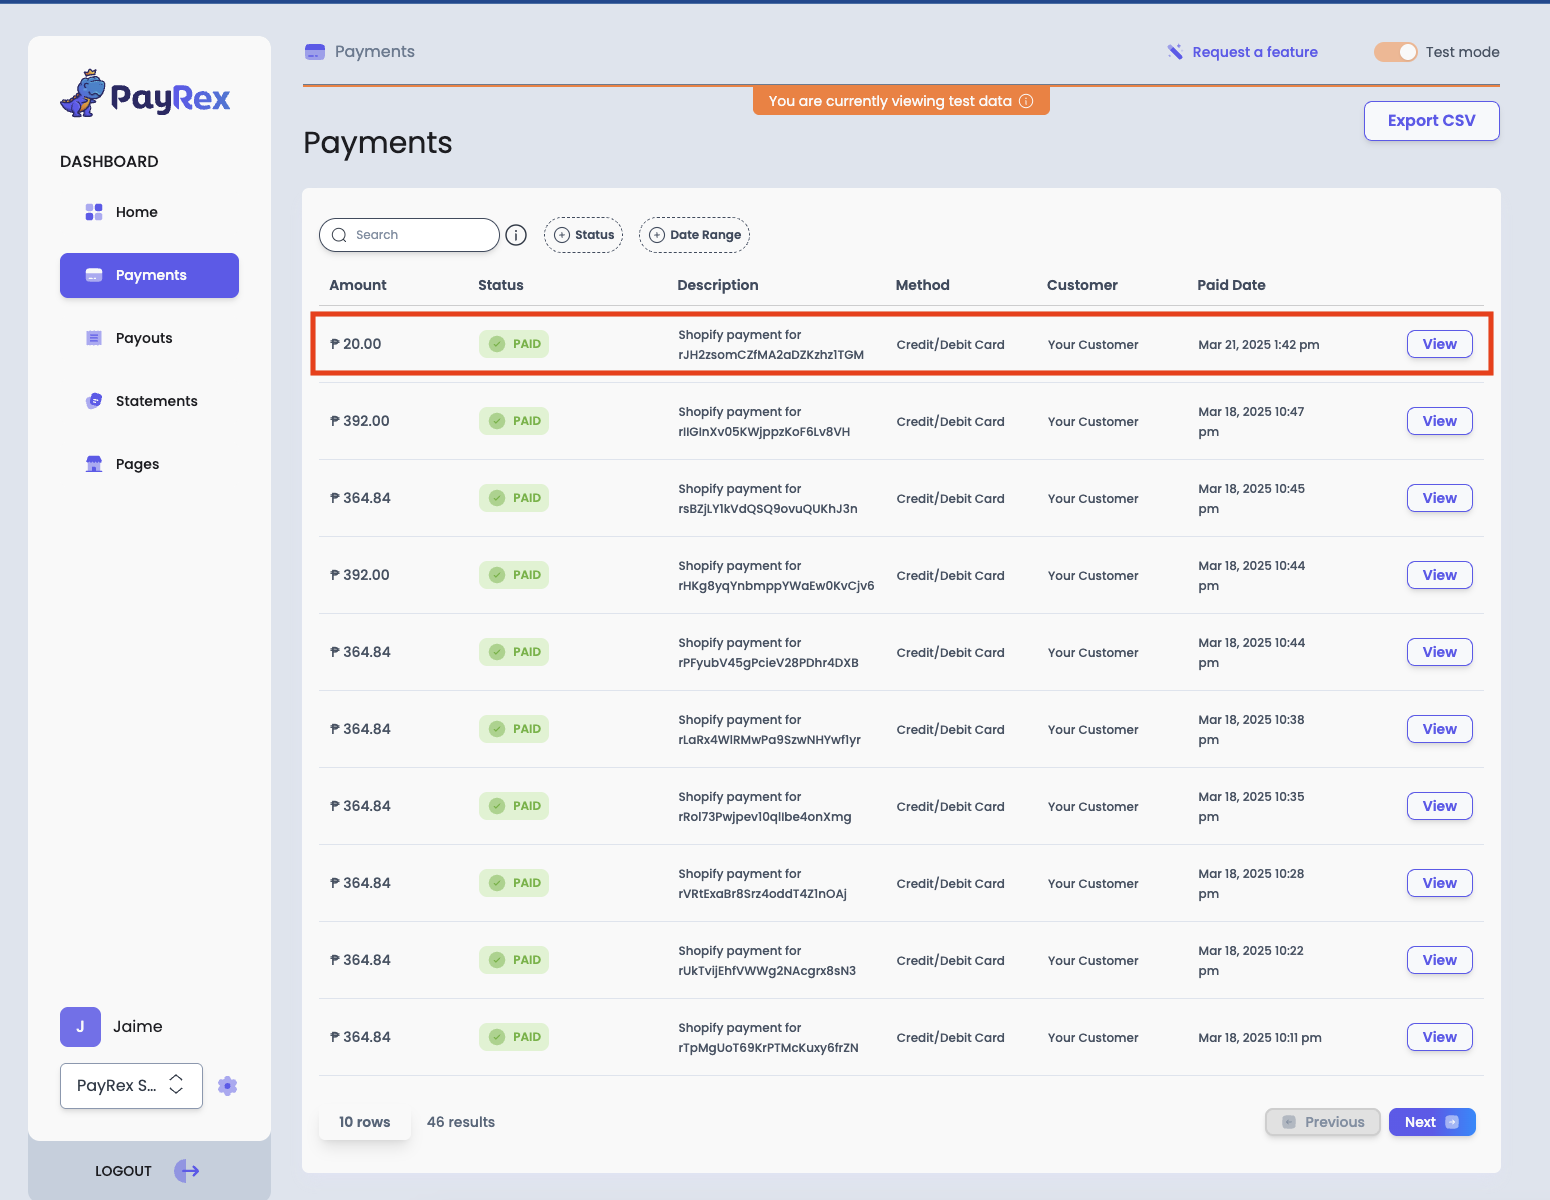
5. If you have successfully completed the steps above, you can now proceed with going live by disabling the Test Mode from the Shopify gateway settings.
### Step 4: Go Live
1. Go to the Shopify's payment settings and check if the Enabled test mode is disabled.
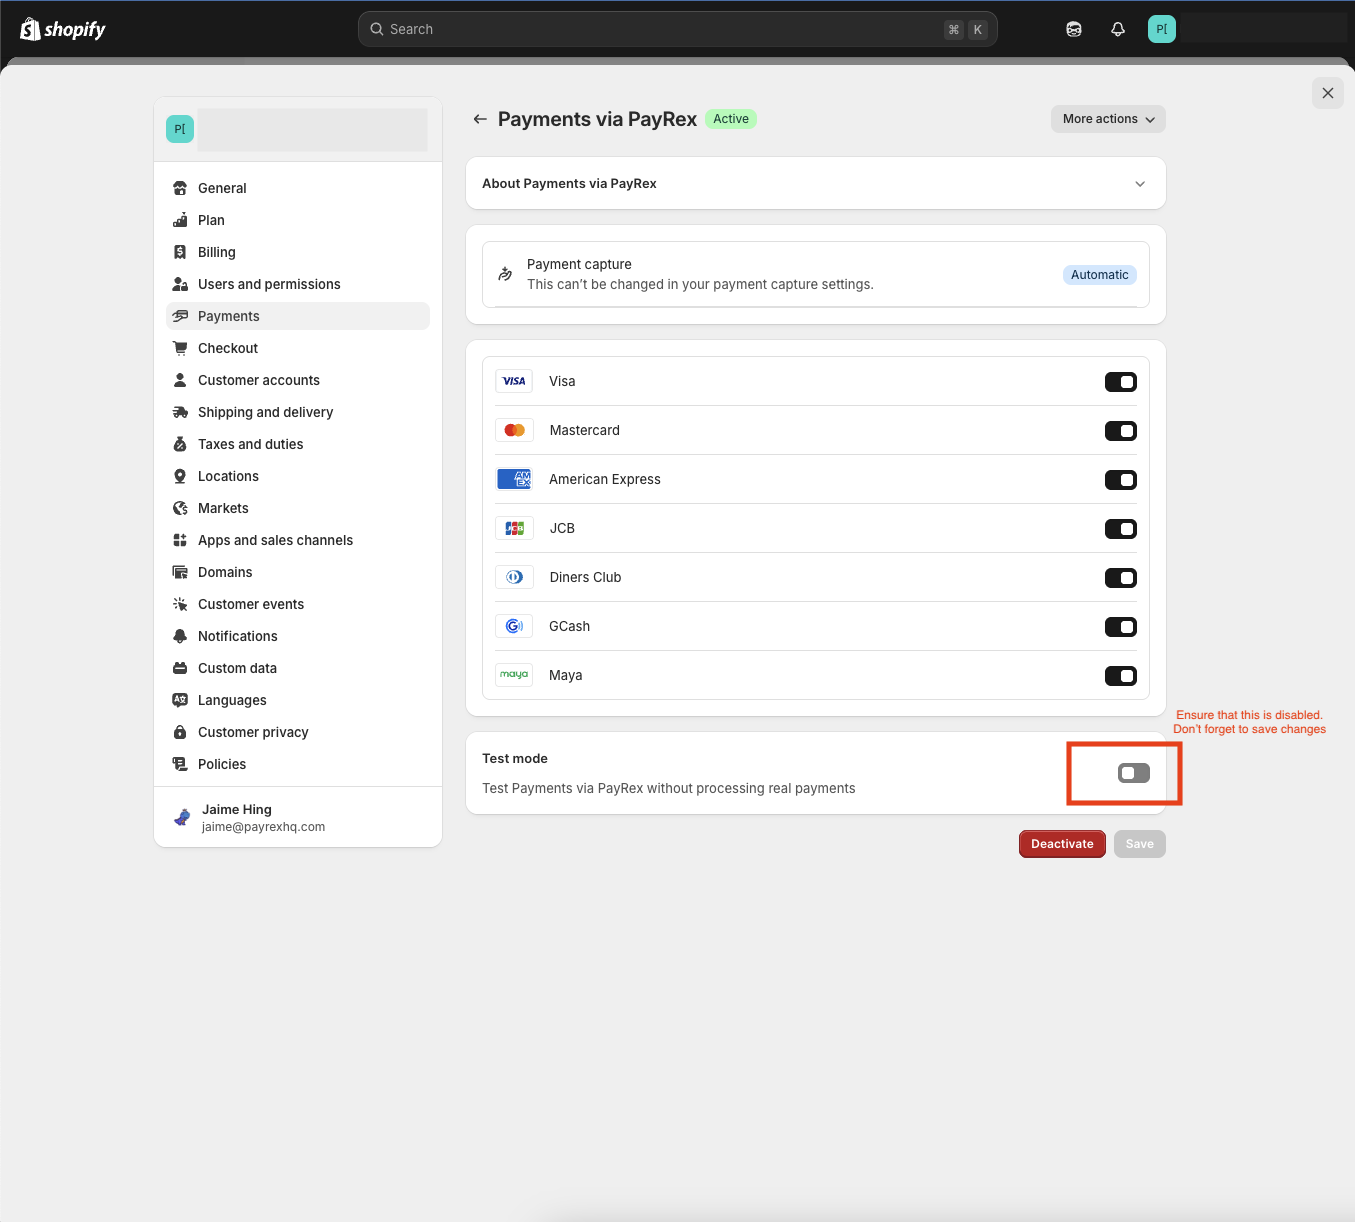
2. Perform a live transaction to confirm successful processing. You must use an actual payment method to complete a live transaction.
3. After completing the live transaction, verify that the paid order appears in the Shopify Dashboard. Ensure that the Test attribute is either false or does not exist. If you can still see that the Test attribute in Shopify dashboard is set to True, then your payment settings is still in test mode.
4. Check if the live paid payment is also created within the PayRex dashboard, head over to the [Payments](https://dashboard.payrexhq.com/l/payments) module of PayRex Dashboard and look for the live payment from the payment listing. Ensure that the test mode toggle is turned off.
### FAQs
## Support
For further assistance, contact PayRex support through our chat feature or email us at support@payrex.com.
---
# WooCommerce
Source: https://docs.payrex.com/docs/guide/third_party_plugins/woocommerce
Path: docs/guide/third_party_plugins/woocommerce/index.mdx
# WooCommerce Plugin
This section will teach you how to install and manage PayRex's WooCommerce plugin.
---
# WooCommerce
Source: https://docs.payrex.com/docs/guide/third_party_plugins/woocommerce/install
Path: docs/guide/third_party_plugins/woocommerce/install.mdx
# Install WooCommerce Plugin
This guide provides step-by-step instructions on installing and configuring PayRex's WooCommerce plugin on your WooCommerce store.
[WooCommerce](https://woocommerce.com/) is an open-source e-commerce plugin for WordPress that lets businesses create and manage online stores. It supports product listings, payments, shipping, taxes, and extensions, making it flexible for small to large online sellers.
## Prerequisites
Before proceeding, ensure that you have the following:
- A WooCommerce store
- A PayRex merchant account. If you don't have access to a PayRex merchant, check this [guide](/docs/guide/getting_started/creating_an_account) first. If you should be part of an existing PayRex merchant account, please ask your administrator to invite you.
## Installation
### Installation through Wordpress Plugins module
> **WARNING**
If you can still see this card, you cannot search our plugin via WordPress plugins yet. The plugin is still pending approval from the WordPress team. We will update this section once you can search our plugin. In the meantime, manually install our plugin.
### Manual Installation
The manual installation method involves downloading our plugin and uploading it to your web server.
1. Download the zip file version of our plugin. Click this [link](/payments-via-payrex-for-woocommerce.zip) to download
2. Access to your wp-admin and click Plugins from the sidebar.
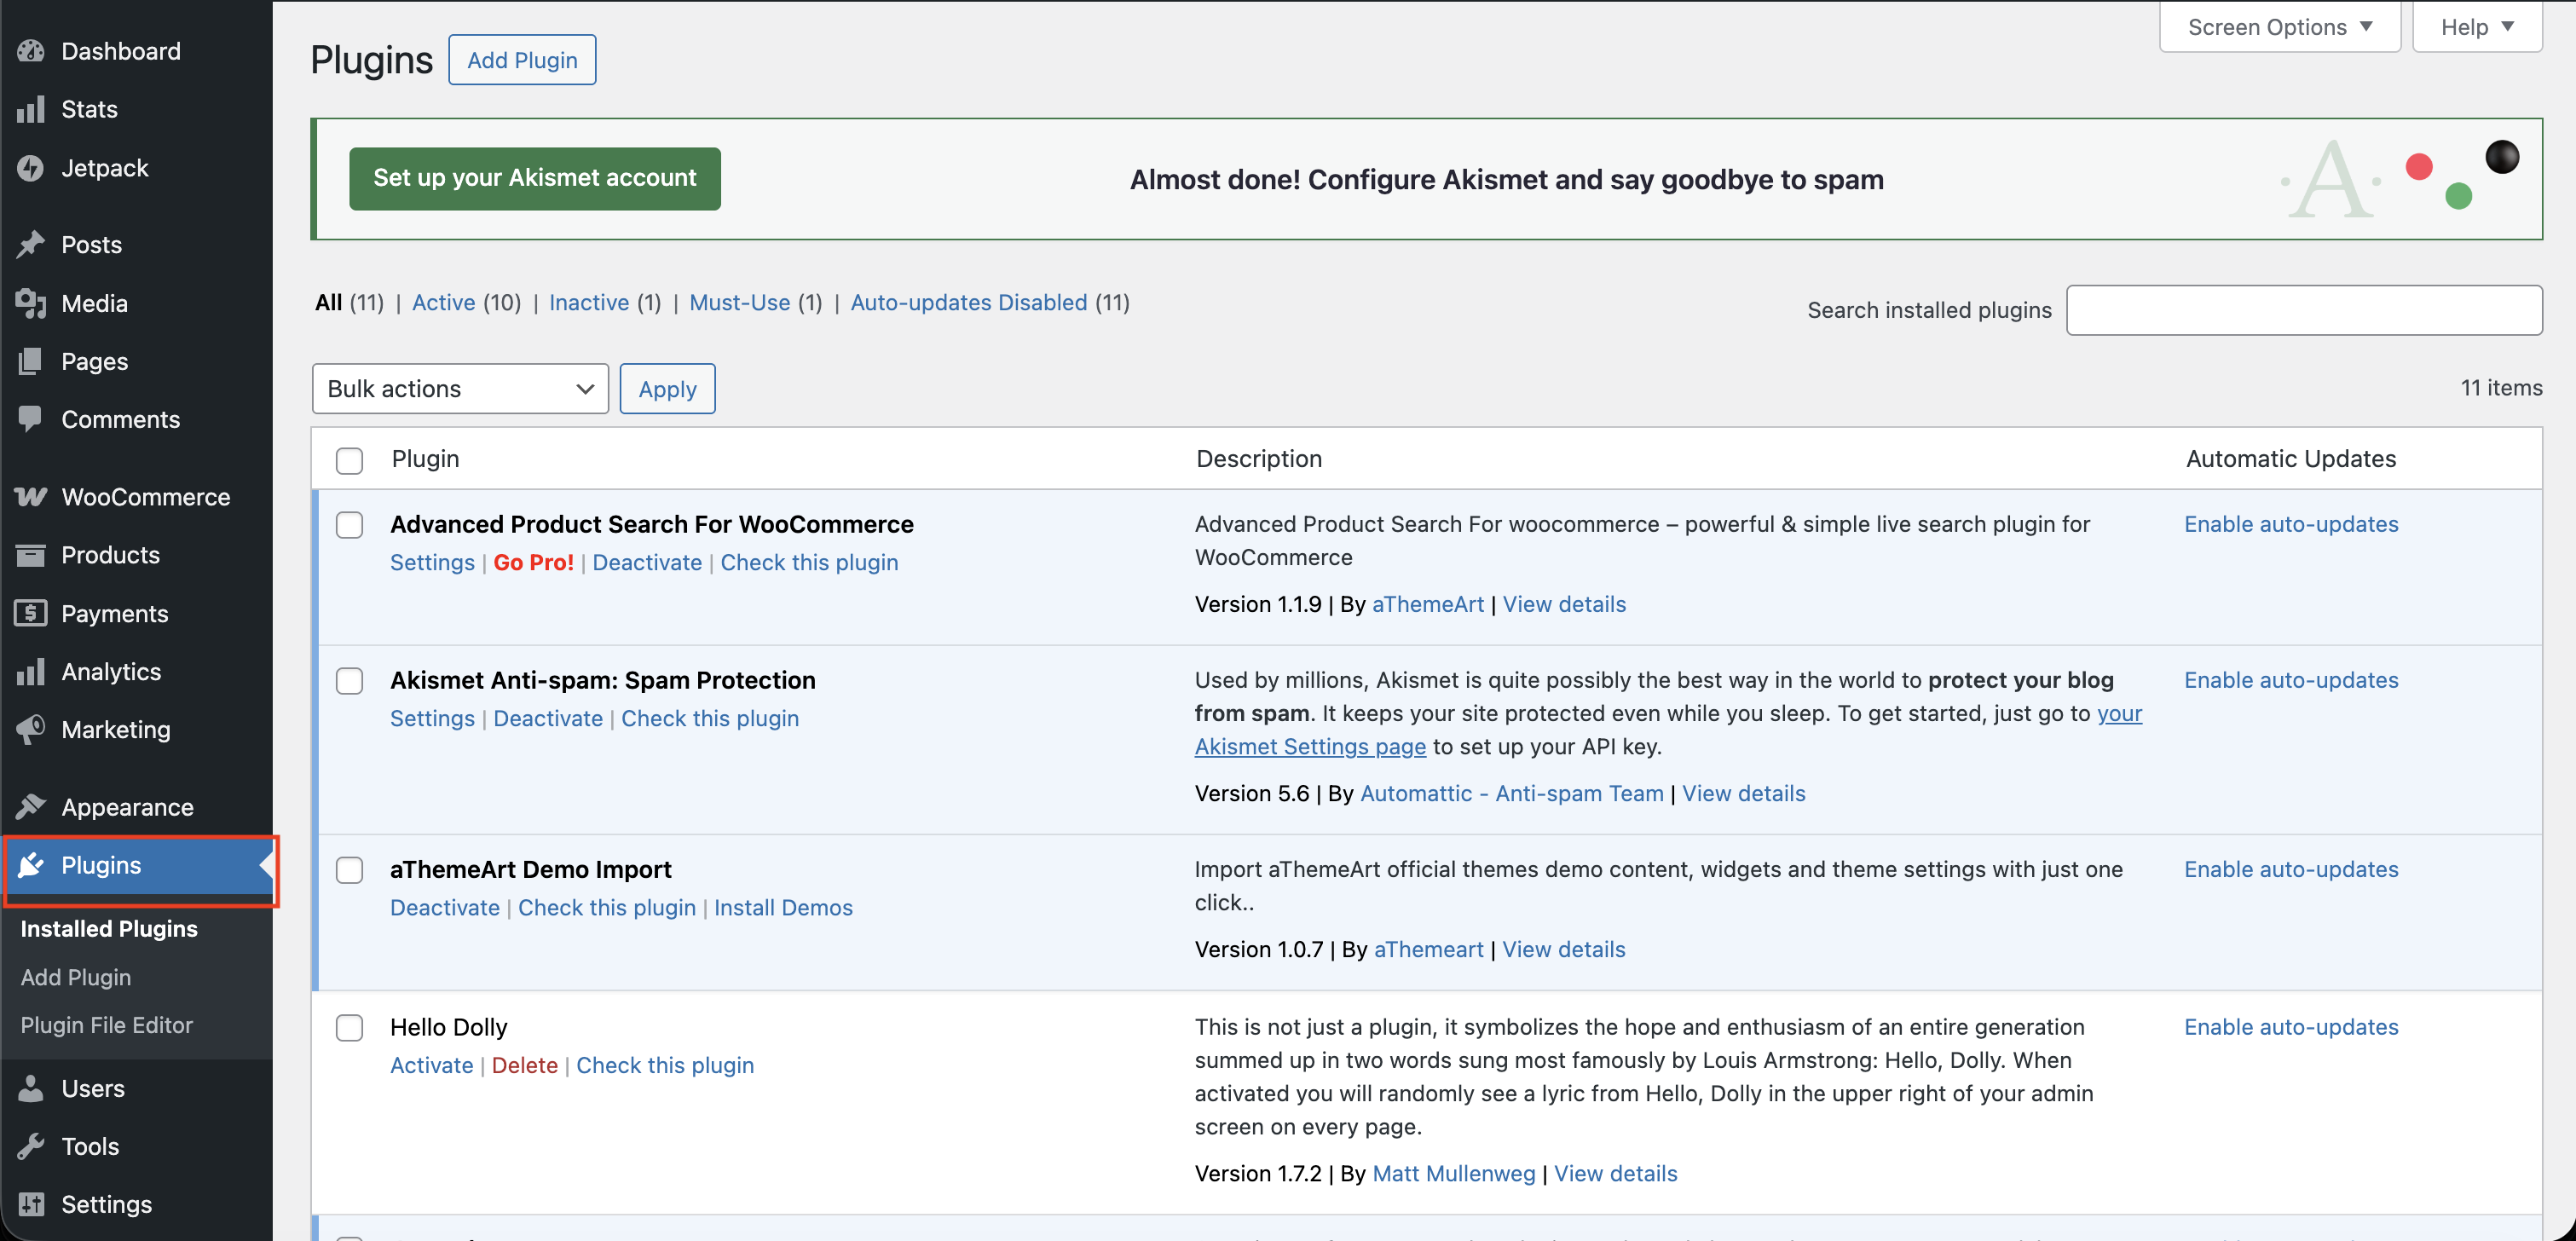
3. From the plugins module, click Add Plugin.
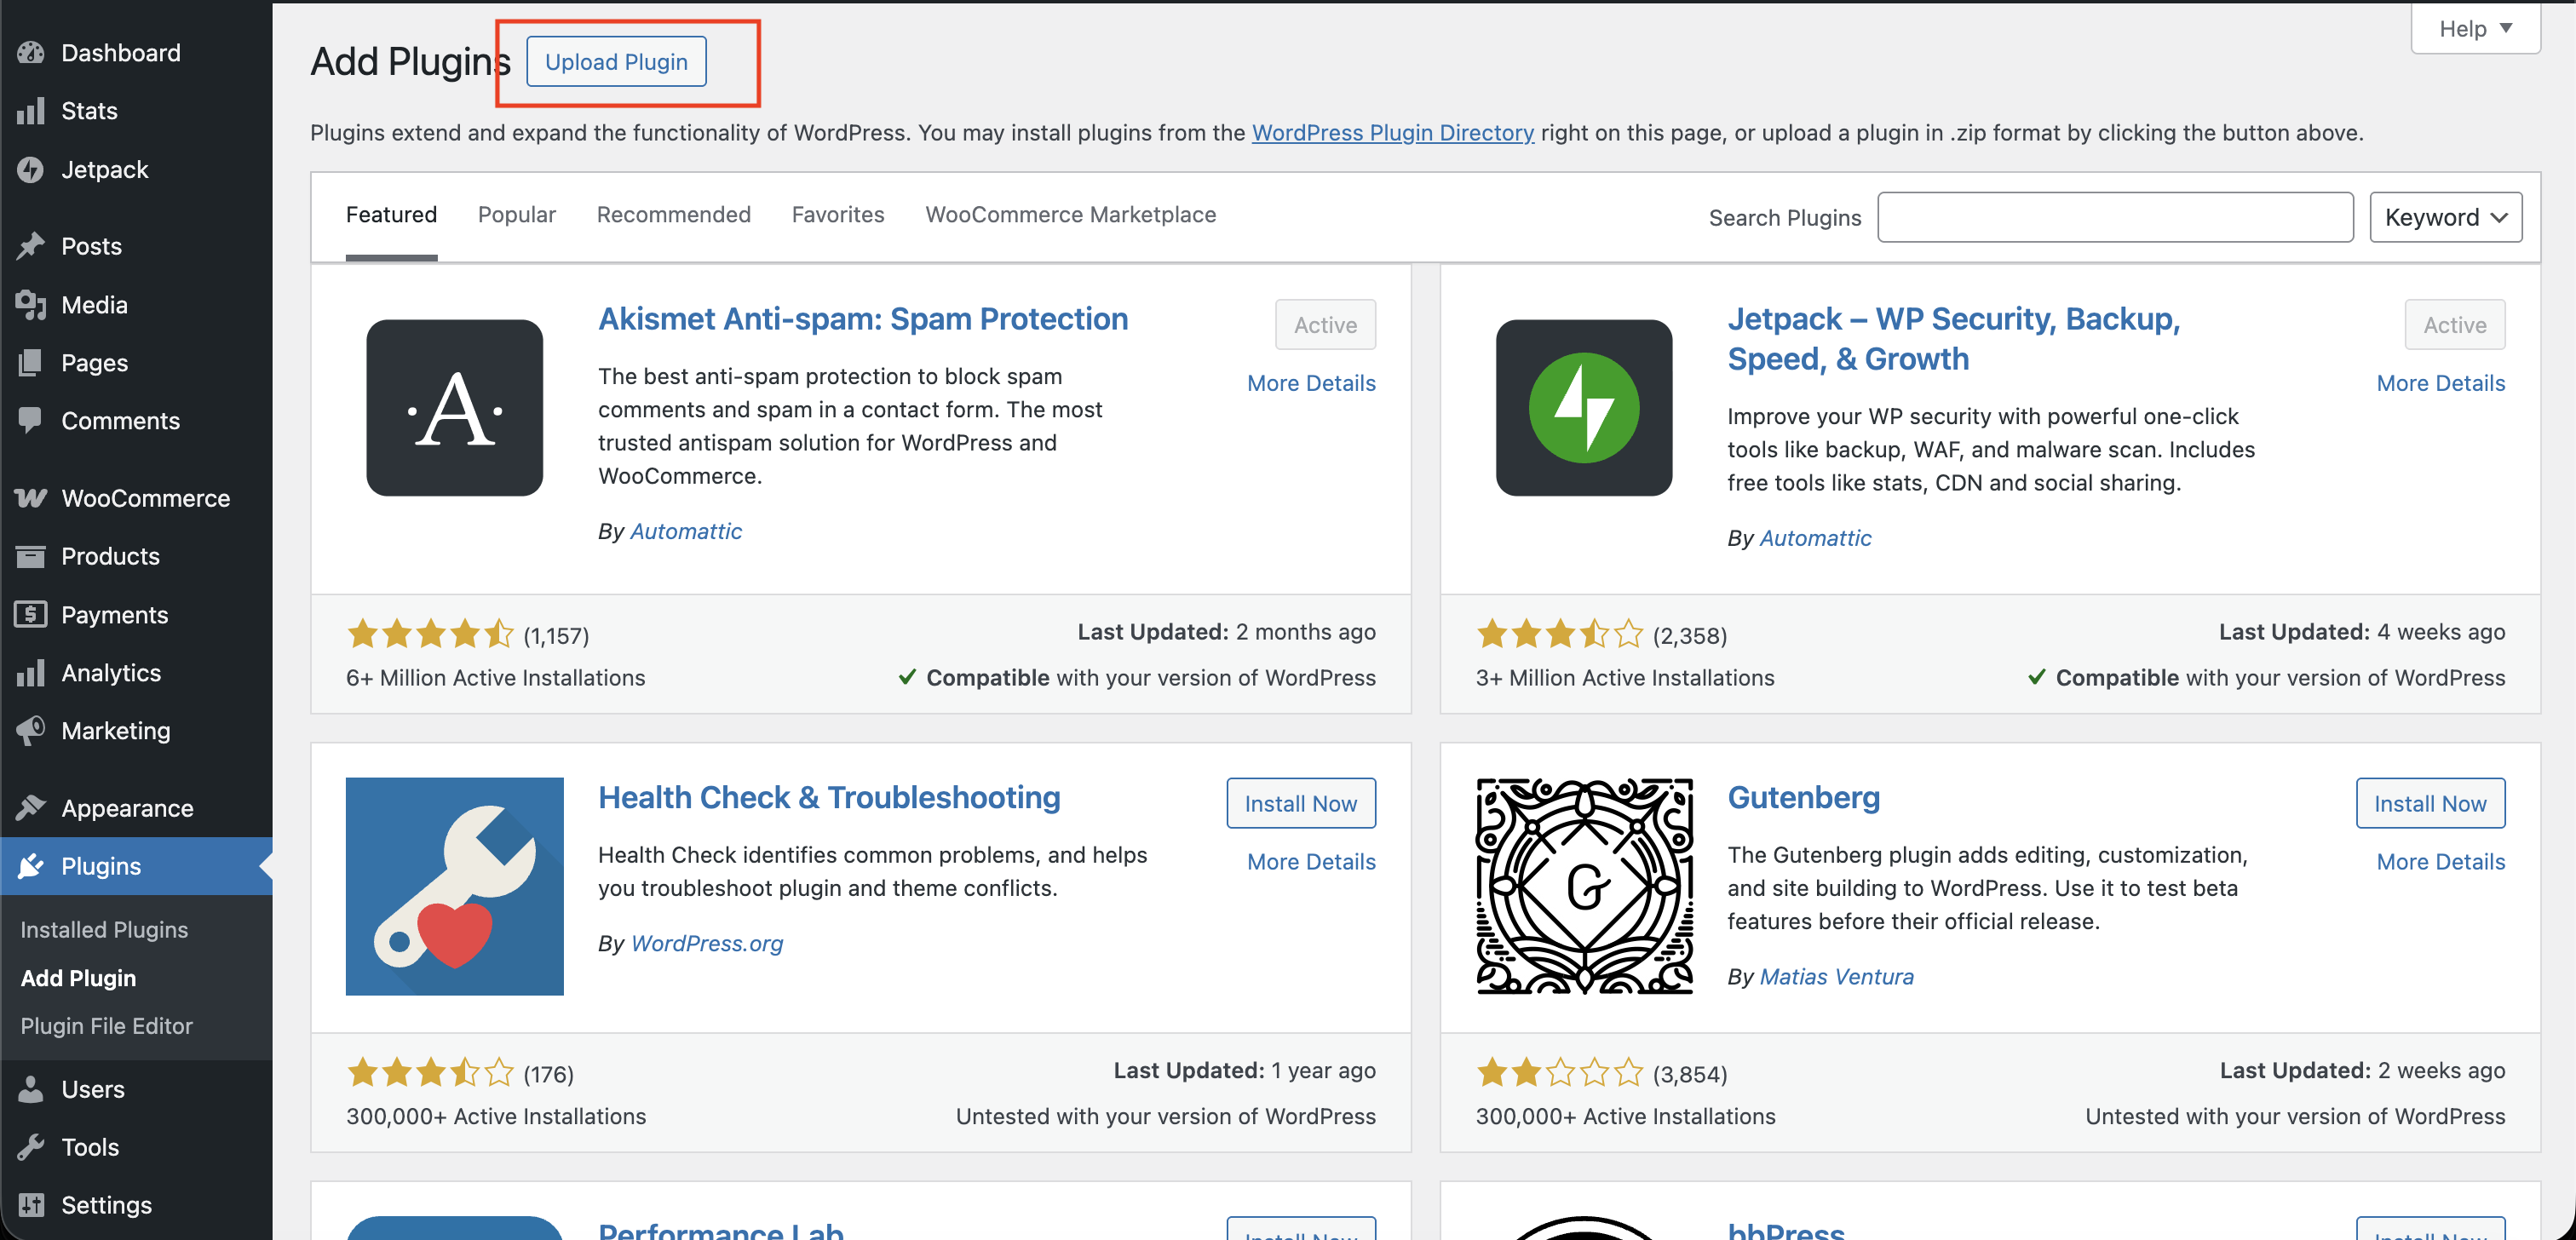
4. From the list of plugins, click Upload Plugin.
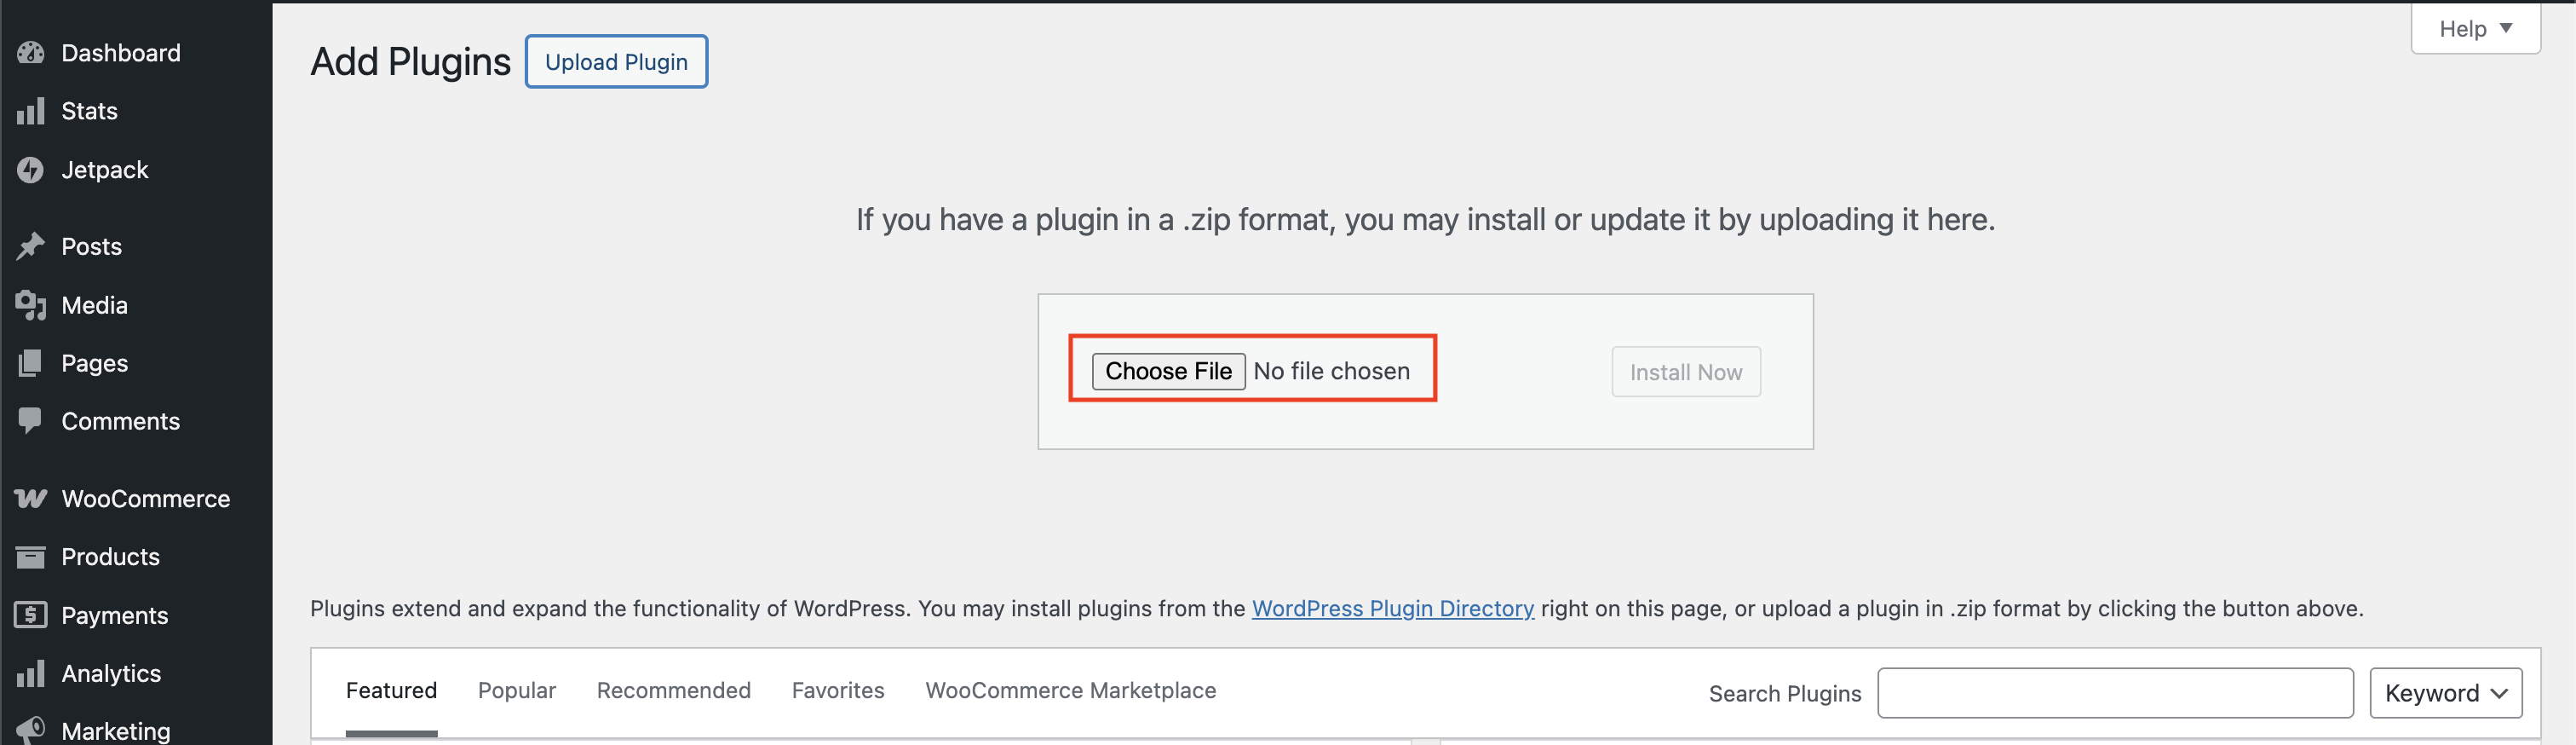
5. Upload the zip file then after sucessfully uploading the plugin, start configuring it.
## Configure the WooCommerce Plugin
Proceed from this section once you have successfully installed the plugin.
1. Once the plugin is installed, you must connect your PayRex merchant account. To start connecting your account, go to the plugin's Payment Settings and click Connect Account.
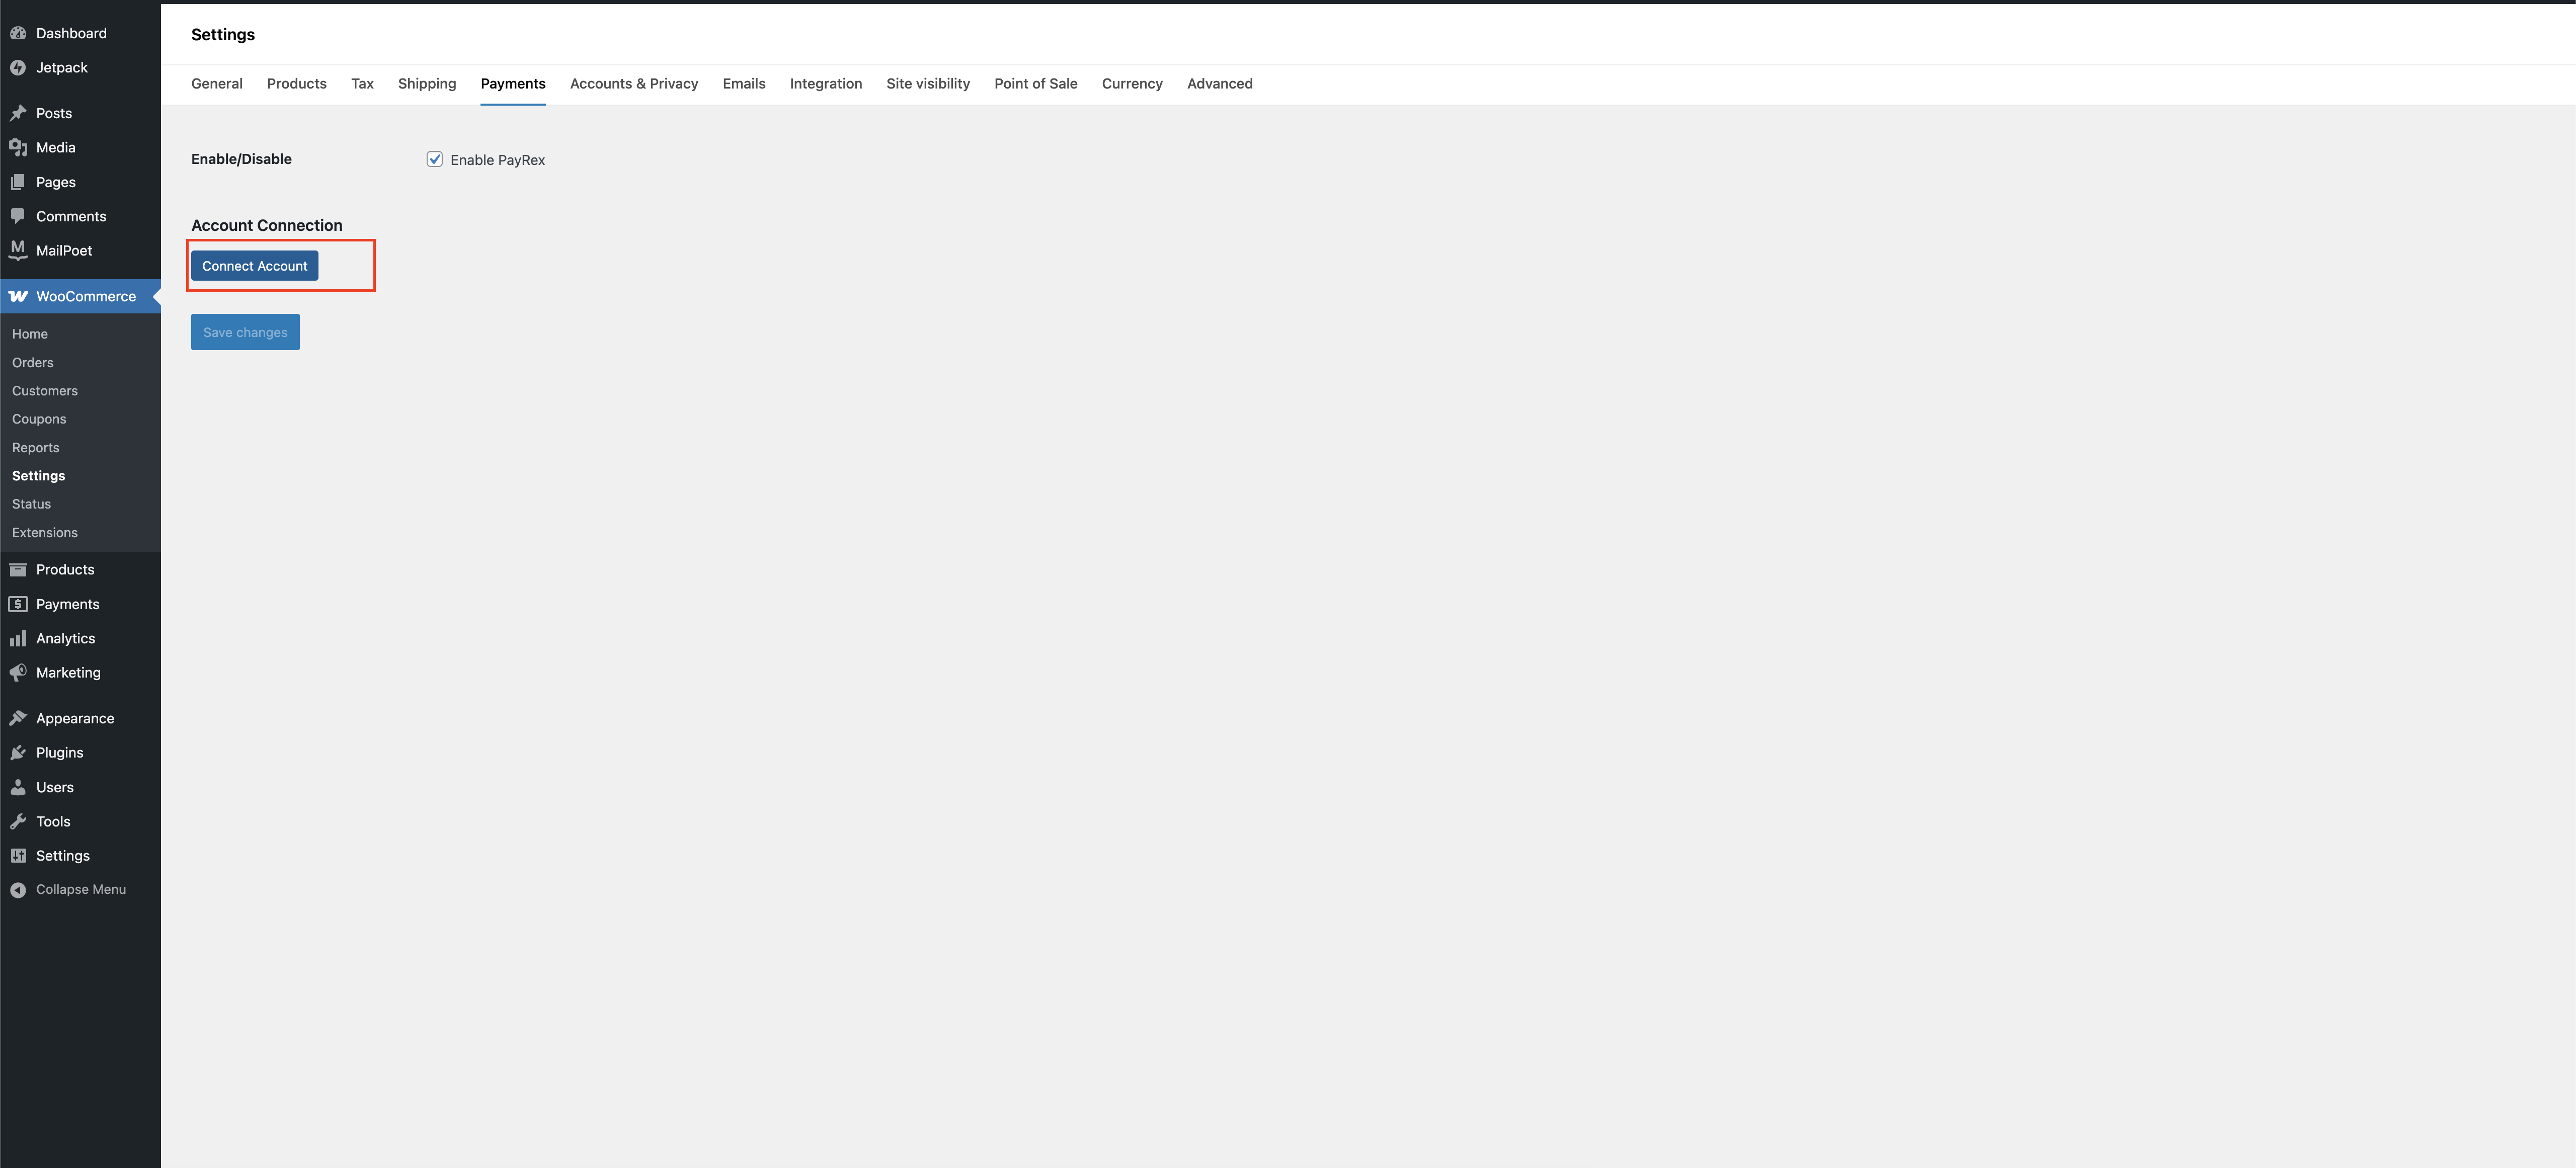
2. Once you clicked Connect Account, you will be redirected to a PayRex login page. Login your PayRex user account to select the merchant account you want to connect.
3. After logging in, select the merchant account you want to link.
4. Linking your PayRex merchant account automatically pulls the relevant configuration settings for your merchant account in the PayRex WooCommerce plugin. You will be redirected back to your store once you have successfully selected the merchant account.
5. Configure further your plugin settings once you are redirected back to your WooCommerce store. You can toggle between test and live mode.
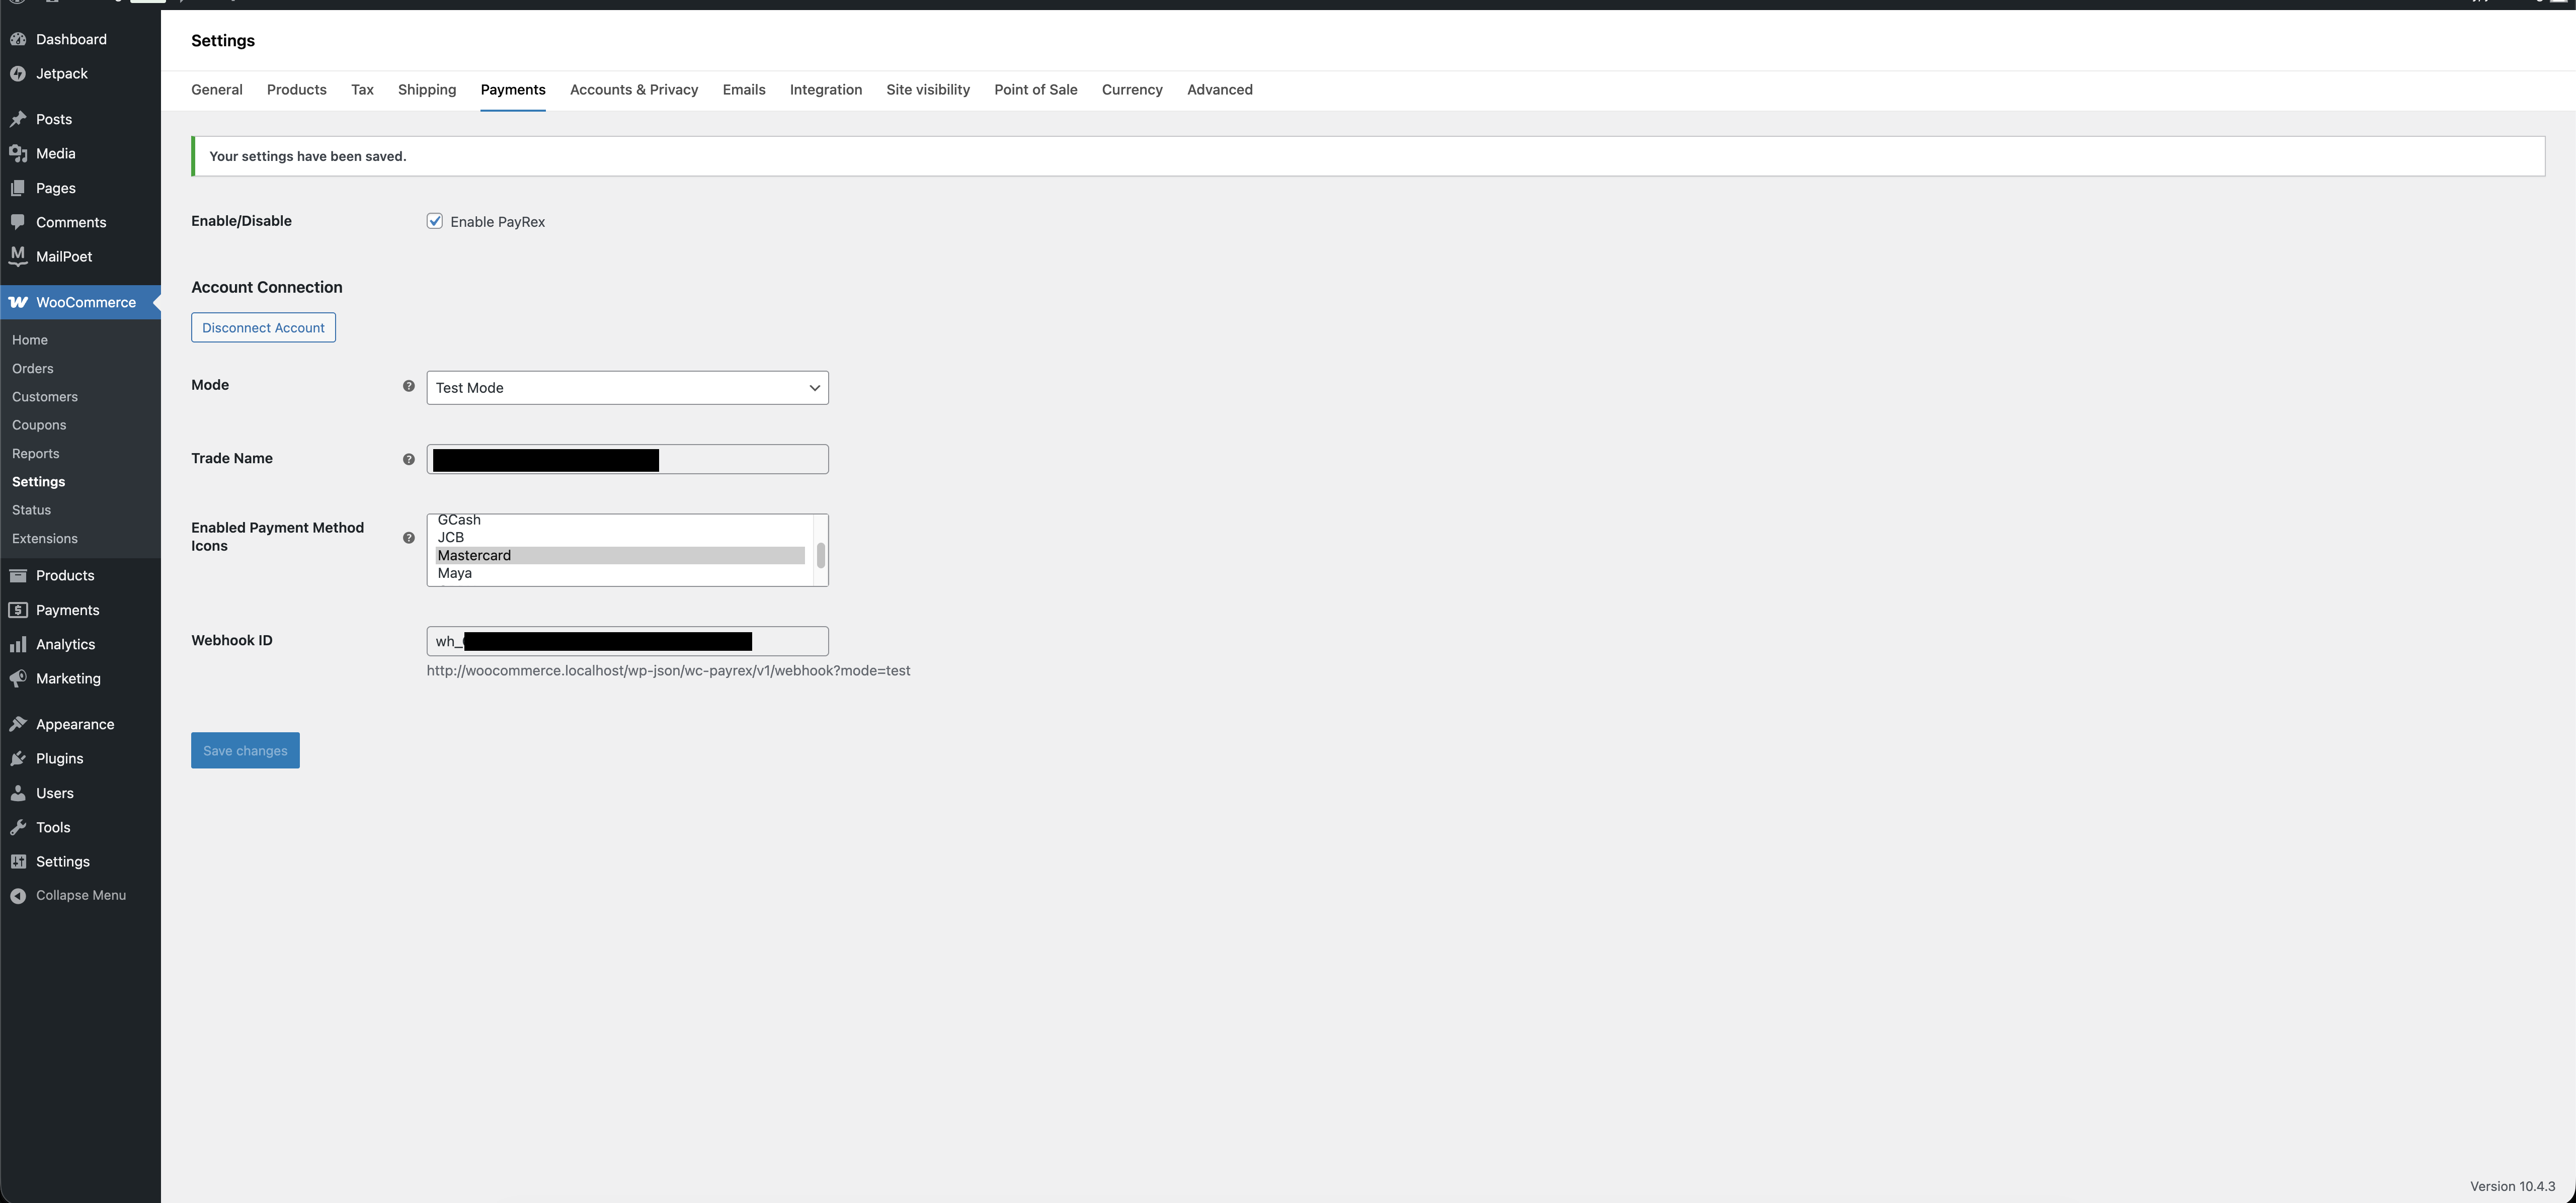
**Mode** - This describes whether the installed plugin is in test or live mode. Test mode simulates test payments. This means your store can complete payments using test transactions. Switching to live mode means you are ready to go live, and you can accept real money from your customers.
**Trade Name** - This is the trade name of your PayRex merchant account. This is the trade name of currently the linked PayRex merchant account.
**Enabled Payment Methods** - This shows the payment methods your store supports. This does not configure what your customers can choose to pay. To manage what your customers can choose to pay, please to this [section](/docs/guide/third_party_plugins/woocommerce/install#configuring-the-allowed-payment-methods)
**Webhook ID** - PayRex automatically updates your WooCommerce orders once your customer successfully paid the order. Under the hood, we automatically created a [PayRex webhook](/docs/guide/developer_handbook/webhooks) for you. You can view these webhooks from your PayRex Dashboard. It is best not to modify the webhook to avoid issues with your integration.
> **INFO**
Ensure that the webhook URL is publicly accessible. If the webhook URL is not publicly accessible, PayRex cannot automatically update your orders.
### Configuring the allowed payment methods
The payment methods allowed for your WooCommerce store can be configured in your PayRex Dashboard. To learn more about the allowed payment methods, you can refer to this [guide](/docs/guide/getting_started/using_the_dashboard/manage_default_payment_methods_dashboard).
### Test payments through test mode
> **WARNING**
Do not switch to test mode if your WooCommerce store already has transacting customers. Once the plugin is installed and enabled, your customers will see PayRex at checkout, so you must turn off test mode from the plugin payment settings.
If your WooCommerce store is still not live, we highly recommend completing a test payment to see the end-to-end payment processing flow. If you already have a live WooCommerce store and want to process live payments, proceed to [Step 4](/docs/guide/third_party_plugins/woocommerce/install#go-live).
1. To start with your test order, enable the Test Mode in the plugin's payment settings.
2. Place a test order on your WooCommerce store. If you want to test a card payment, please refer to our [list](/docs/guide/developer_handbook/testing/testing_your_integration) of test cards.
3. After completing the test transaction, verify that the paid order appears in the WooCommerce Orders Module.
4. Check if a test paid payment is also created within the PayRex dashboard, proceed to the [Payments](https://dashboard.payrexhq.com/t/payments) module of PayRex Dashboard and look for the test payment from the list. Ensure that the test mode toggle is turned on.
> **INFO**
The WooCommerce Order ID should match the ID from PayRex's payment metadata. You can also search the listing by WooCommerce Order ID.
5. If you have successfully completed the steps above, you can now proceed to go** **live by disabling the Test Mode from the payment settings.
### Go Live
1. Go to the plugins payment settings and check if the mode is set to Live mode.
2. Perform a live transaction to confirm successful processing. You must use an actual payment method to complete a live transaction.
3. After completing the live transaction, verify that the paid order appears in the WooCommerce Orders module.
4. Check if the live paid payment is also created within the PayRex dashboard, head over to the [Payments](https://dashboard.payrexhq.com/l/payments) module of PayRex Dashboard and look for the live payment from the payment listing. Ensure that the test mode toggle is turned off.
## Support
For further assistance, contact PayRex support through our chat feature or email us at support@payrexhq.com.
### FAQs
The ticket selling template allows you to easily sell tickets for events and activities. Highlight event details, include engaging visuals, and enable a seamless ticket purchasing experience for your audience.
**Best for:** social gatherings such as musical concerts, theatrical plays, academic and professional conferences, and sporting events
Have other template ideas in mind? [Talk to us](https://www.payrex.com/contact).
---
# PayRex Payouts
Source: https://docs.payrex.com/docs/guide/payouts
Path: docs/guide/payouts/index.mdx
# Payouts
This section will guide you on how and when you will receive your payouts in your bank account
---
# Payouts Overview
Source: https://docs.payrex.com/docs/guide/payouts/overview
Path: docs/guide/payouts/overview.mdx
# Payouts Overview
You receive your customers' payments when PayRex makes payouts settled to your nominated bank account.
To learn more about the payouts module in the PayRex dashboard, you can refer to this [guide](/docs/guide/getting_started/using_the_dashboard/core_resources/payouts).
### Nominating your bank account
The bank account where PayRex will settle your payouts can be added during your [account activation](/docs/guide/getting_started/activate_your_account). When testing PayRex in [test mode](/docs/guide/developer_handbook/testing/testmode), you don't need to nominate a bank account, as test payments do not involve real money.
### Support bank accounts
As of this writing, PayRex only settles to Philippine Peso (PHP) bank accounts opened in the Philippines. To learn more about the supported bank accounts, see this [help article](https://help.payrex.com/en/articles/9258678-what-bank-accounts-can-i-use-to-receive-my-payouts).
### Payout Schedule
PayRex generates payouts for a merchant during banking days. Only the **cleared** payments will be covered by every payout. To learn more about how cleared payments and payout schedules work, check this [support article](https://help.payrex.com/en/articles/10614167-when-will-i-receive-my-payout).
### Minimum payout amount
The minimum balance required to generate a payout is ₱ 20.00. If your balance is below the minimum amount due due to insufficient payments or negative balances from refunds, no payout will be generated.
### Failure to settle to your bank account
If your bank account cannot receive a payout for any reason, your bank returns the amount to us. You can reach out to support@payrex.com or use the chat support if you encounter any delays or failures in your payouts within your Dashboard.
### Payout fees
There is no additional charge or fee when PayRex settles into your bank account.
---
# Bank Reconciliation
Source: https://docs.payrex.com/docs/guide/reports/bank_reconciliation
Path: docs/guide/reports/bank_reconciliation.mdx
# Bank Reconciliation
You can reconcile the money settled to your nominated bank account and your PayRex merchant account's transactions by checking the Payouts listing or through Payout details.
### List of Payouts

If you access the Payouts module in your PayRex Dashboard, you should see the list of payouts created in your PayRex merchant account. Every payout represents a deposited cash to your nominated bank account.
To learn more about payouts, you can refer to this [guide](/docs/guide/payouts/overview).
To learn more about the payouts module in the PayRex dashboard, you can refer to this [guide](/docs/guide/getting_started/using_the_dashboard/core_resources/payouts).
### Payout Details

While you can view the list of payments and its refunds through the payments module of the PayRex Dashboard, it is more efficient to reconcile the transactions for every payout through the payout details module. View a particular payout from the payouts listing and you can reconcile the transactions
---
# PayRex Reports
Source: https://docs.payrex.com/docs/guide/reports
Path: docs/guide/reports/index.mdx
# Reports
This section will guide you on how and when you will receive your payouts in your bank account
---
# Payout Reconciliation
Source: https://docs.payrex.com/docs/guide/reports/payout_reconciliation
Path: docs/guide/reports/payout_reconciliation.mdx
# Payout Reconciliation

The payout reconciliation report helps you summarize a batch of payouts for a specified date range. For example, if you want to get the summary of last week's payouts, you can filter the date range to last week and the payout reconciliation report will provide you a summary.
To learn more about payouts, you can refer to this [guide](/docs/guide/payouts/overview).
This report shows the summary of your PayRex merchant account's transactions across all the payouts for a particular date range:
- Total Payments
- Refunds
- Fees
- Taxes
- Adjustments
- Net amount
All payouts generated on the date range you selected will determine the scope of the report. You can also export the report as a CSV file. The file will contain the exact payout transaction totals, but broken down further by every payout. Furthermore, you can also control which columns will be included or excluded from the exported file.
---
# Third-Party Plugins
Source: https://docs.payrex.com/docs/guide/third_party_plugins
Path: docs/guide/third_party_plugins/index.mdx
# Third-Party Plugins
This section will teach you how to use PayRex's Official Third-Party Plugins.
---
# Shopify
Source: https://docs.payrex.com/docs/guide/third_party_plugins/shopify
Path: docs/guide/third_party_plugins/shopify/index.mdx
# Shopify Plugin
This section will teach you how to install and manage PayRex's Shopify plugin.
---
# Shopify
Source: https://docs.payrex.com/docs/guide/third_party_plugins/shopify/install
Path: docs/guide/third_party_plugins/shopify/install.mdx
# Install Shopify Plugin

This guide provides step-by-step instructions on installing and configuring PayRex's Shopify plugin on your Shopify store.
[Shopify](https://www.shopify.com) is a commerce platform that allows individuals and businesses to create online stores and sell products and services. It is one of the most commonly used commerce platforms in the Philippines.
## Prerequisites
Before proceeding, ensure that you have the following:
- A Shopify store
- A Shopify user account with access to installing a third-party payment provider
- A PayRex merchant account. If you don't have access to a PayRex merchant, check this [guide](/docs/guide/getting_started/creating_an_account) first. If you should be part of an existing PayRex merchant account, please ask your administrator to invite you.
### Step 1: Install PayRex's Payment App Plugin
1. Open the plugin's installation [link](https://apps.shopify.com/payrex-payments).

2. Click the Install button to start linking your Shopify store.

3. If prompted, log in to your Shopify admin account. After logging in, Shopify will ask you to grant the PayRex plugin permission to process your payments on your behalf. Approve the necessary permissions to proceed.
### Step 2: Configure and enable the plugin
1. You will be redirected to PayRex's installation page after you click the Install button. Log in to your PayRex user account to continue.

2. Choose the PayRex merchant account you want to link to your Shopify store after successfully logging in to your PayRex user account.

3. You will be redirected to the Shopify admin panel to configure further the payment settings after you confirm the PayRex's merchant account that you want to link.

4. Configure the payment methods allowed in your **Shopify** store.
There are two things that you have to do to configure further the payment methods used by our plugin in your Shopify store:
#### 4.a - Manage what your customers will see from Shopify
1. Enable the payment methods that your customers will see from your Shopify store. These payment methods will only reflect within Shopify Checkout. You should manage separately the enabled payment methods within the PayRex Checkout page via the PayRex Dashboard. Proceed to [4.b](/docs/guide/third_party_plugins/shopify/install#4b---manage-what-your-customers-will-see-from-payrexs-checkout-page) to configure what your customers will see once they are redirected to PayRex's checkout page.

#### 4.b - Manage what your customers will see from PayRex's Checkout Page
1. Access the PayRex's Dashboard, then go to Settings > Shopify Payment Methods.


2. If you manage multiple Shopify stores, select the store for which you want to configure the allowed payment methods. Manage the payment methods of the selected store. The payment methods you will enable should usually align with the payment methods you enabled from step [4.a](/docs/guide/third_party_plugins/shopify/install#4a---manage-what-your-customers-will-see-from-shopify). If there are more payment methods available within our settings, you can still enable them.


### Step 3. Test payments through test mode
> **WARNING**
Do not proceed with step 3 if your Shopify store already has transacting customers. Once the plugin is installed, your customers will see PayRex at the checkout, so you must turn off test mode from the Shopify payment settings. You can already proceed with step 4.
If your Shopify store is still not live, we highly recommend completing a test payment to see the end-to-end payment processing flow. If you already have a live Shopify store and want to process live payments, proceed to [Step 4](/docs/guide/third_party_plugins/shopify/install#step-4-go-live).
1. To start with your test transaction, enable the Test Mode in Shopify payment gateway settings.

2. Place a test order on your Shopify store. If you want to test a card payment, please refer to our [list](/docs/guide/developer_handbook/testing/testing_your_integration) of test cards.
3. After completing the test transaction, verify that the paid order appears in the Shopify Dashboard.

4. Check if a test paid payment is also created within the PayRex dashboard, proceed to the [Payments](https://dashboard.payrexhq.com/t/payments) module of PayRex Dashboard and look for the test payment from the list. Ensure that the test mode toggle is turned on.
> **INFO**
The Shopify Payment ID should match the ID from PayRex's payment description. You can also search the listing via the Shopify Payment ID.

5. If you have successfully completed the steps above, you can now proceed with going live by disabling the Test Mode from the Shopify gateway settings.
### Step 4: Go Live
1. Go to the Shopify's payment settings and check if the Enabled test mode is disabled.

2. Perform a live transaction to confirm successful processing. You must use an actual payment method to complete a live transaction.
3. After completing the live transaction, verify that the paid order appears in the Shopify Dashboard. Ensure that the Test attribute is either false or does not exist. If you can still see that the Test attribute in Shopify dashboard is set to True, then your payment settings is still in test mode.
4. Check if the live paid payment is also created within the PayRex dashboard, head over to the [Payments](https://dashboard.payrexhq.com/l/payments) module of PayRex Dashboard and look for the live payment from the payment listing. Ensure that the test mode toggle is turned off.
### FAQs
## Support
For further assistance, contact PayRex support through our chat feature or email us at support@payrex.com.
---
# WooCommerce
Source: https://docs.payrex.com/docs/guide/third_party_plugins/woocommerce
Path: docs/guide/third_party_plugins/woocommerce/index.mdx
# WooCommerce Plugin
This section will teach you how to install and manage PayRex's WooCommerce plugin.
---
# WooCommerce
Source: https://docs.payrex.com/docs/guide/third_party_plugins/woocommerce/install
Path: docs/guide/third_party_plugins/woocommerce/install.mdx
# Install WooCommerce Plugin

This guide provides step-by-step instructions on installing and configuring PayRex's WooCommerce plugin on your WooCommerce store.
[WooCommerce](https://woocommerce.com/) is an open-source e-commerce plugin for WordPress that lets businesses create and manage online stores. It supports product listings, payments, shipping, taxes, and extensions, making it flexible for small to large online sellers.
## Prerequisites
Before proceeding, ensure that you have the following:
- A WooCommerce store
- A PayRex merchant account. If you don't have access to a PayRex merchant, check this [guide](/docs/guide/getting_started/creating_an_account) first. If you should be part of an existing PayRex merchant account, please ask your administrator to invite you.
## Installation
### Installation through Wordpress Plugins module
> **WARNING**
If you can still see this card, you cannot search our plugin via WordPress plugins yet. The plugin is still pending approval from the WordPress team. We will update this section once you can search our plugin. In the meantime, manually install our plugin.
### Manual Installation
The manual installation method involves downloading our plugin and uploading it to your web server.
1. Download the zip file version of our plugin. Click this [link](/payments-via-payrex-for-woocommerce.zip) to download
2. Access to your wp-admin and click Plugins from the sidebar.

3. From the plugins module, click Add Plugin.

4. From the list of plugins, click Upload Plugin.

5. Upload the zip file then after sucessfully uploading the plugin, start configuring it.

## Configure the WooCommerce Plugin
Proceed from this section once you have successfully installed the plugin.
1. Once the plugin is installed, you must connect your PayRex merchant account. To start connecting your account, go to the plugin's Payment Settings and click Connect Account.

2. Once you clicked Connect Account, you will be redirected to a PayRex login page. Login your PayRex user account to select the merchant account you want to connect.

3. After logging in, select the merchant account you want to link.

4. Linking your PayRex merchant account automatically pulls the relevant configuration settings for your merchant account in the PayRex WooCommerce plugin. You will be redirected back to your store once you have successfully selected the merchant account.

5. Configure further your plugin settings once you are redirected back to your WooCommerce store. You can toggle between test and live mode.

**Mode** - This describes whether the installed plugin is in test or live mode. Test mode simulates test payments. This means your store can complete payments using test transactions. Switching to live mode means you are ready to go live, and you can accept real money from your customers.
**Trade Name** - This is the trade name of your PayRex merchant account. This is the trade name of currently the linked PayRex merchant account.
**Enabled Payment Methods** - This shows the payment methods your store supports. This does not configure what your customers can choose to pay. To manage what your customers can choose to pay, please to this [section](/docs/guide/third_party_plugins/woocommerce/install#configuring-the-allowed-payment-methods)
**Webhook ID** - PayRex automatically updates your WooCommerce orders once your customer successfully paid the order. Under the hood, we automatically created a [PayRex webhook](/docs/guide/developer_handbook/webhooks) for you. You can view these webhooks from your PayRex Dashboard. It is best not to modify the webhook to avoid issues with your integration.
> **INFO**
Ensure that the webhook URL is publicly accessible. If the webhook URL is not publicly accessible, PayRex cannot automatically update your orders.
### Configuring the allowed payment methods
The payment methods allowed for your WooCommerce store can be configured in your PayRex Dashboard. To learn more about the allowed payment methods, you can refer to this [guide](/docs/guide/getting_started/using_the_dashboard/manage_default_payment_methods_dashboard).
### Test payments through test mode
> **WARNING**
Do not switch to test mode if your WooCommerce store already has transacting customers. Once the plugin is installed and enabled, your customers will see PayRex at checkout, so you must turn off test mode from the plugin payment settings.
If your WooCommerce store is still not live, we highly recommend completing a test payment to see the end-to-end payment processing flow. If you already have a live WooCommerce store and want to process live payments, proceed to [Step 4](/docs/guide/third_party_plugins/woocommerce/install#go-live).
1. To start with your test order, enable the Test Mode in the plugin's payment settings.

2. Place a test order on your WooCommerce store. If you want to test a card payment, please refer to our [list](/docs/guide/developer_handbook/testing/testing_your_integration) of test cards.
3. After completing the test transaction, verify that the paid order appears in the WooCommerce Orders Module.

4. Check if a test paid payment is also created within the PayRex dashboard, proceed to the [Payments](https://dashboard.payrexhq.com/t/payments) module of PayRex Dashboard and look for the test payment from the list. Ensure that the test mode toggle is turned on.
> **INFO**
The WooCommerce Order ID should match the ID from PayRex's payment metadata. You can also search the listing by WooCommerce Order ID.

5. If you have successfully completed the steps above, you can now proceed to go** **live by disabling the Test Mode from the payment settings.
### Go Live
1. Go to the plugins payment settings and check if the mode is set to Live mode.

2. Perform a live transaction to confirm successful processing. You must use an actual payment method to complete a live transaction.
3. After completing the live transaction, verify that the paid order appears in the WooCommerce Orders module.
4. Check if the live paid payment is also created within the PayRex dashboard, head over to the [Payments](https://dashboard.payrexhq.com/l/payments) module of PayRex Dashboard and look for the live payment from the payment listing. Ensure that the test mode toggle is turned off.
## Support
For further assistance, contact PayRex support through our chat feature or email us at support@payrexhq.com.
### FAQs
Go to Developers > Webhooks module
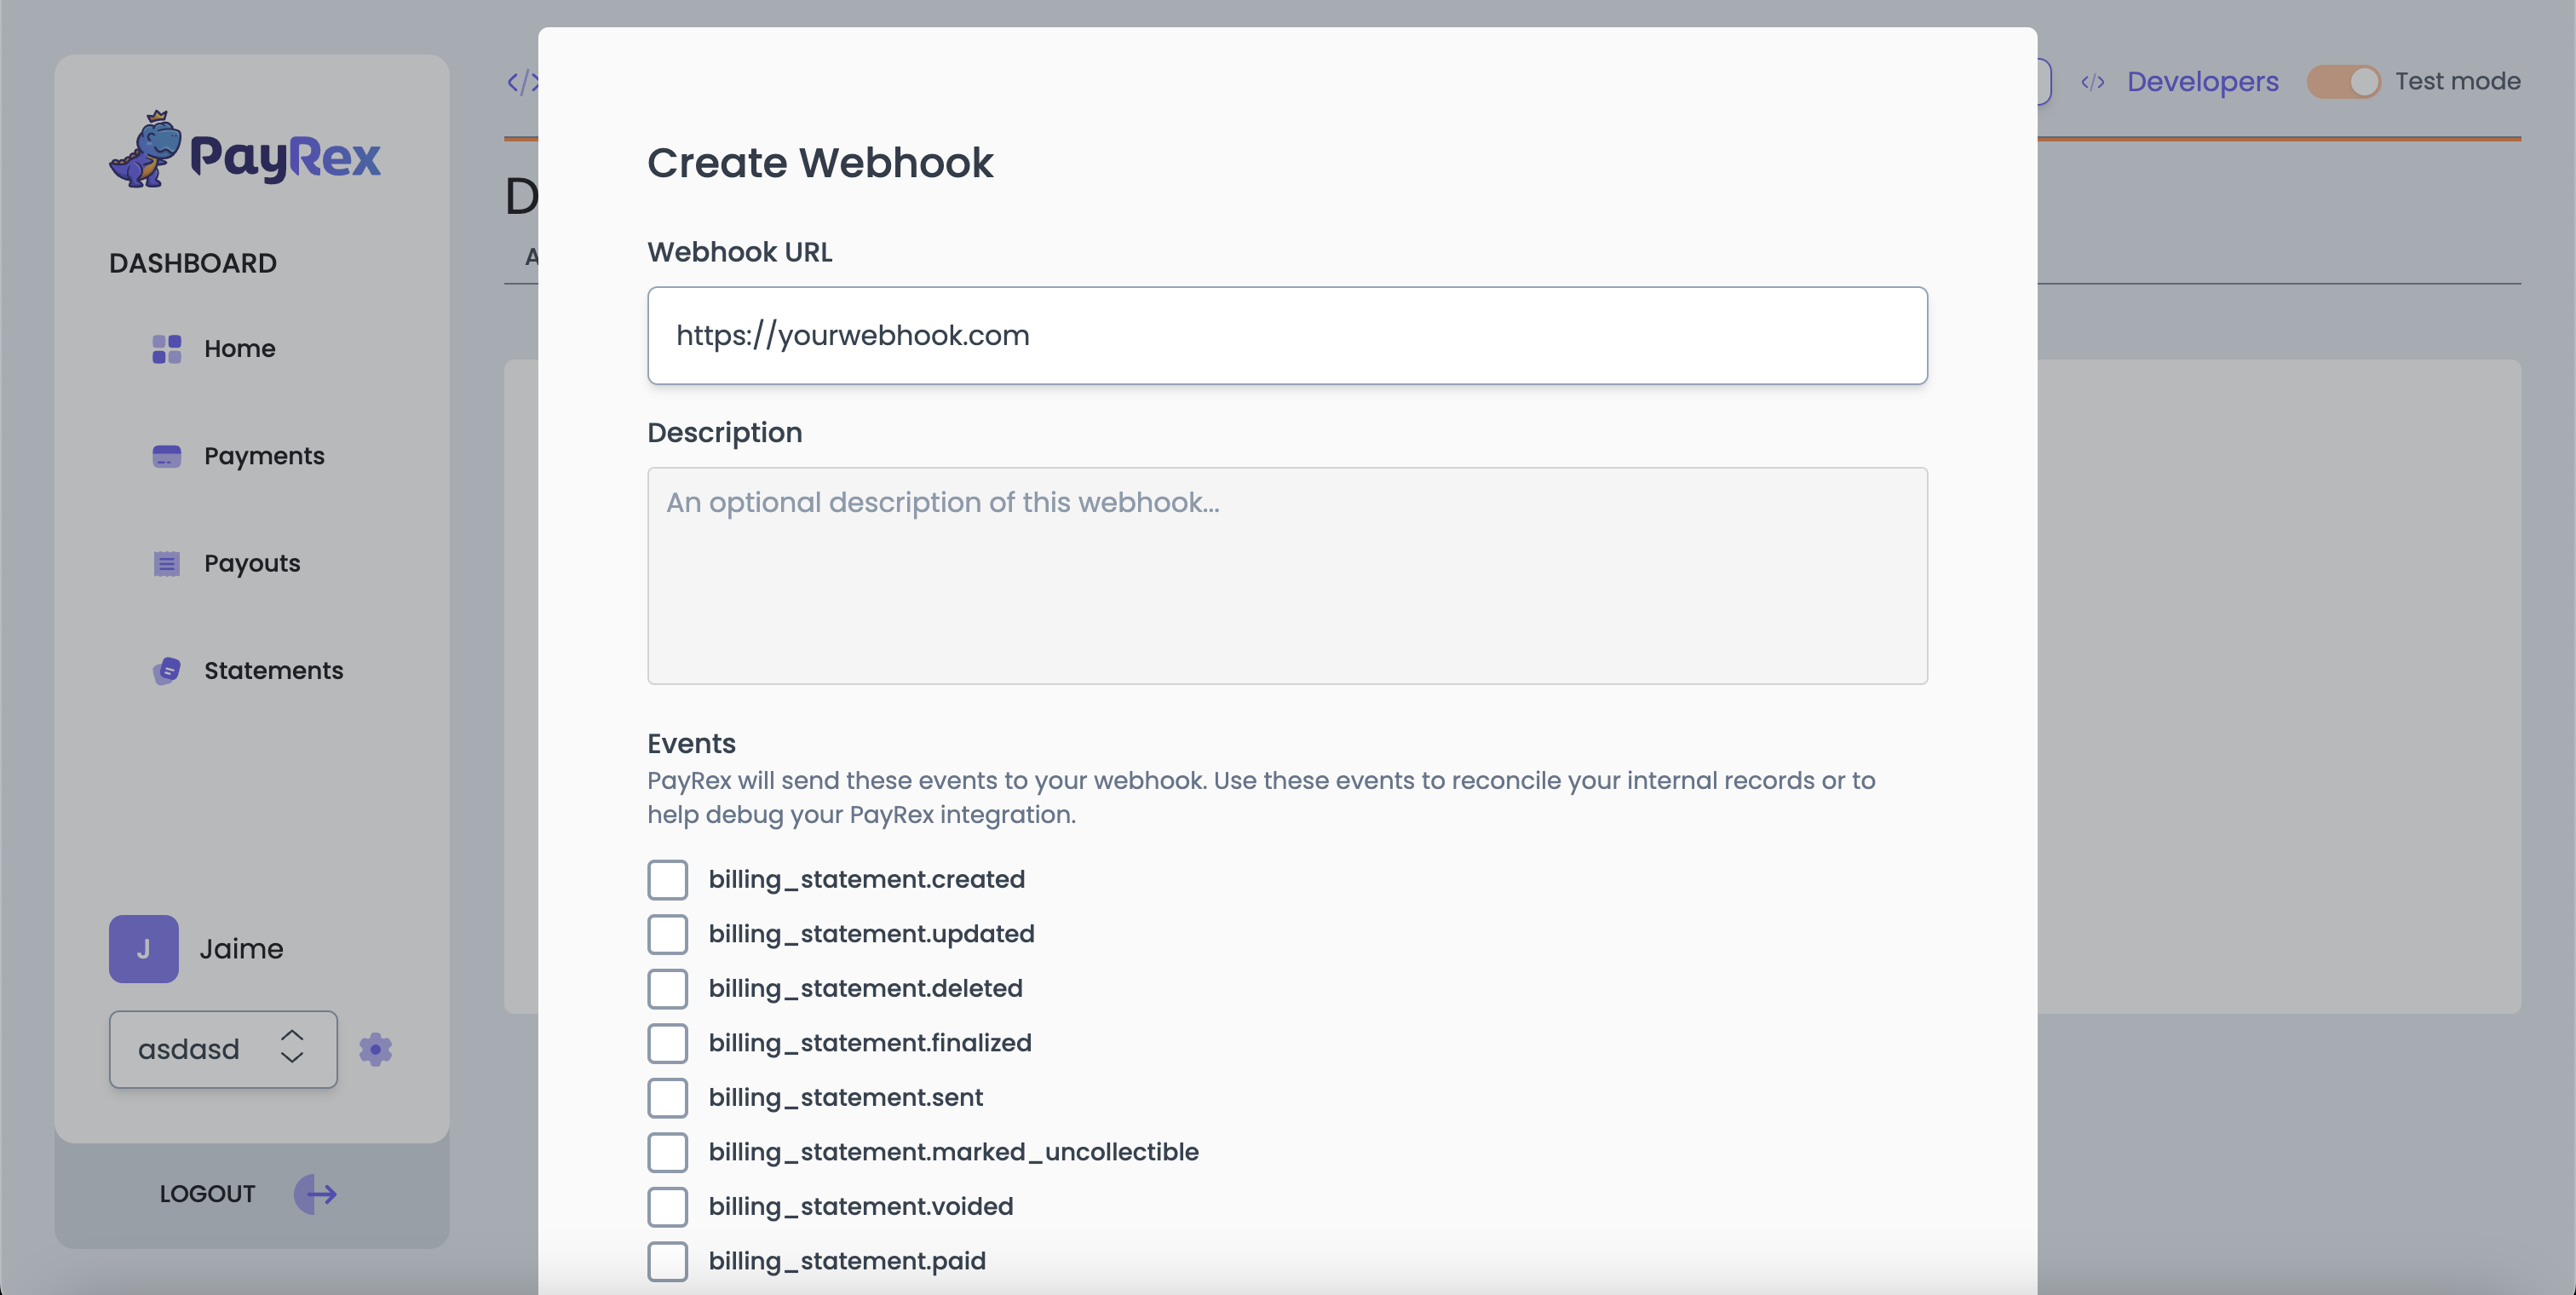
Specify your webhook URL
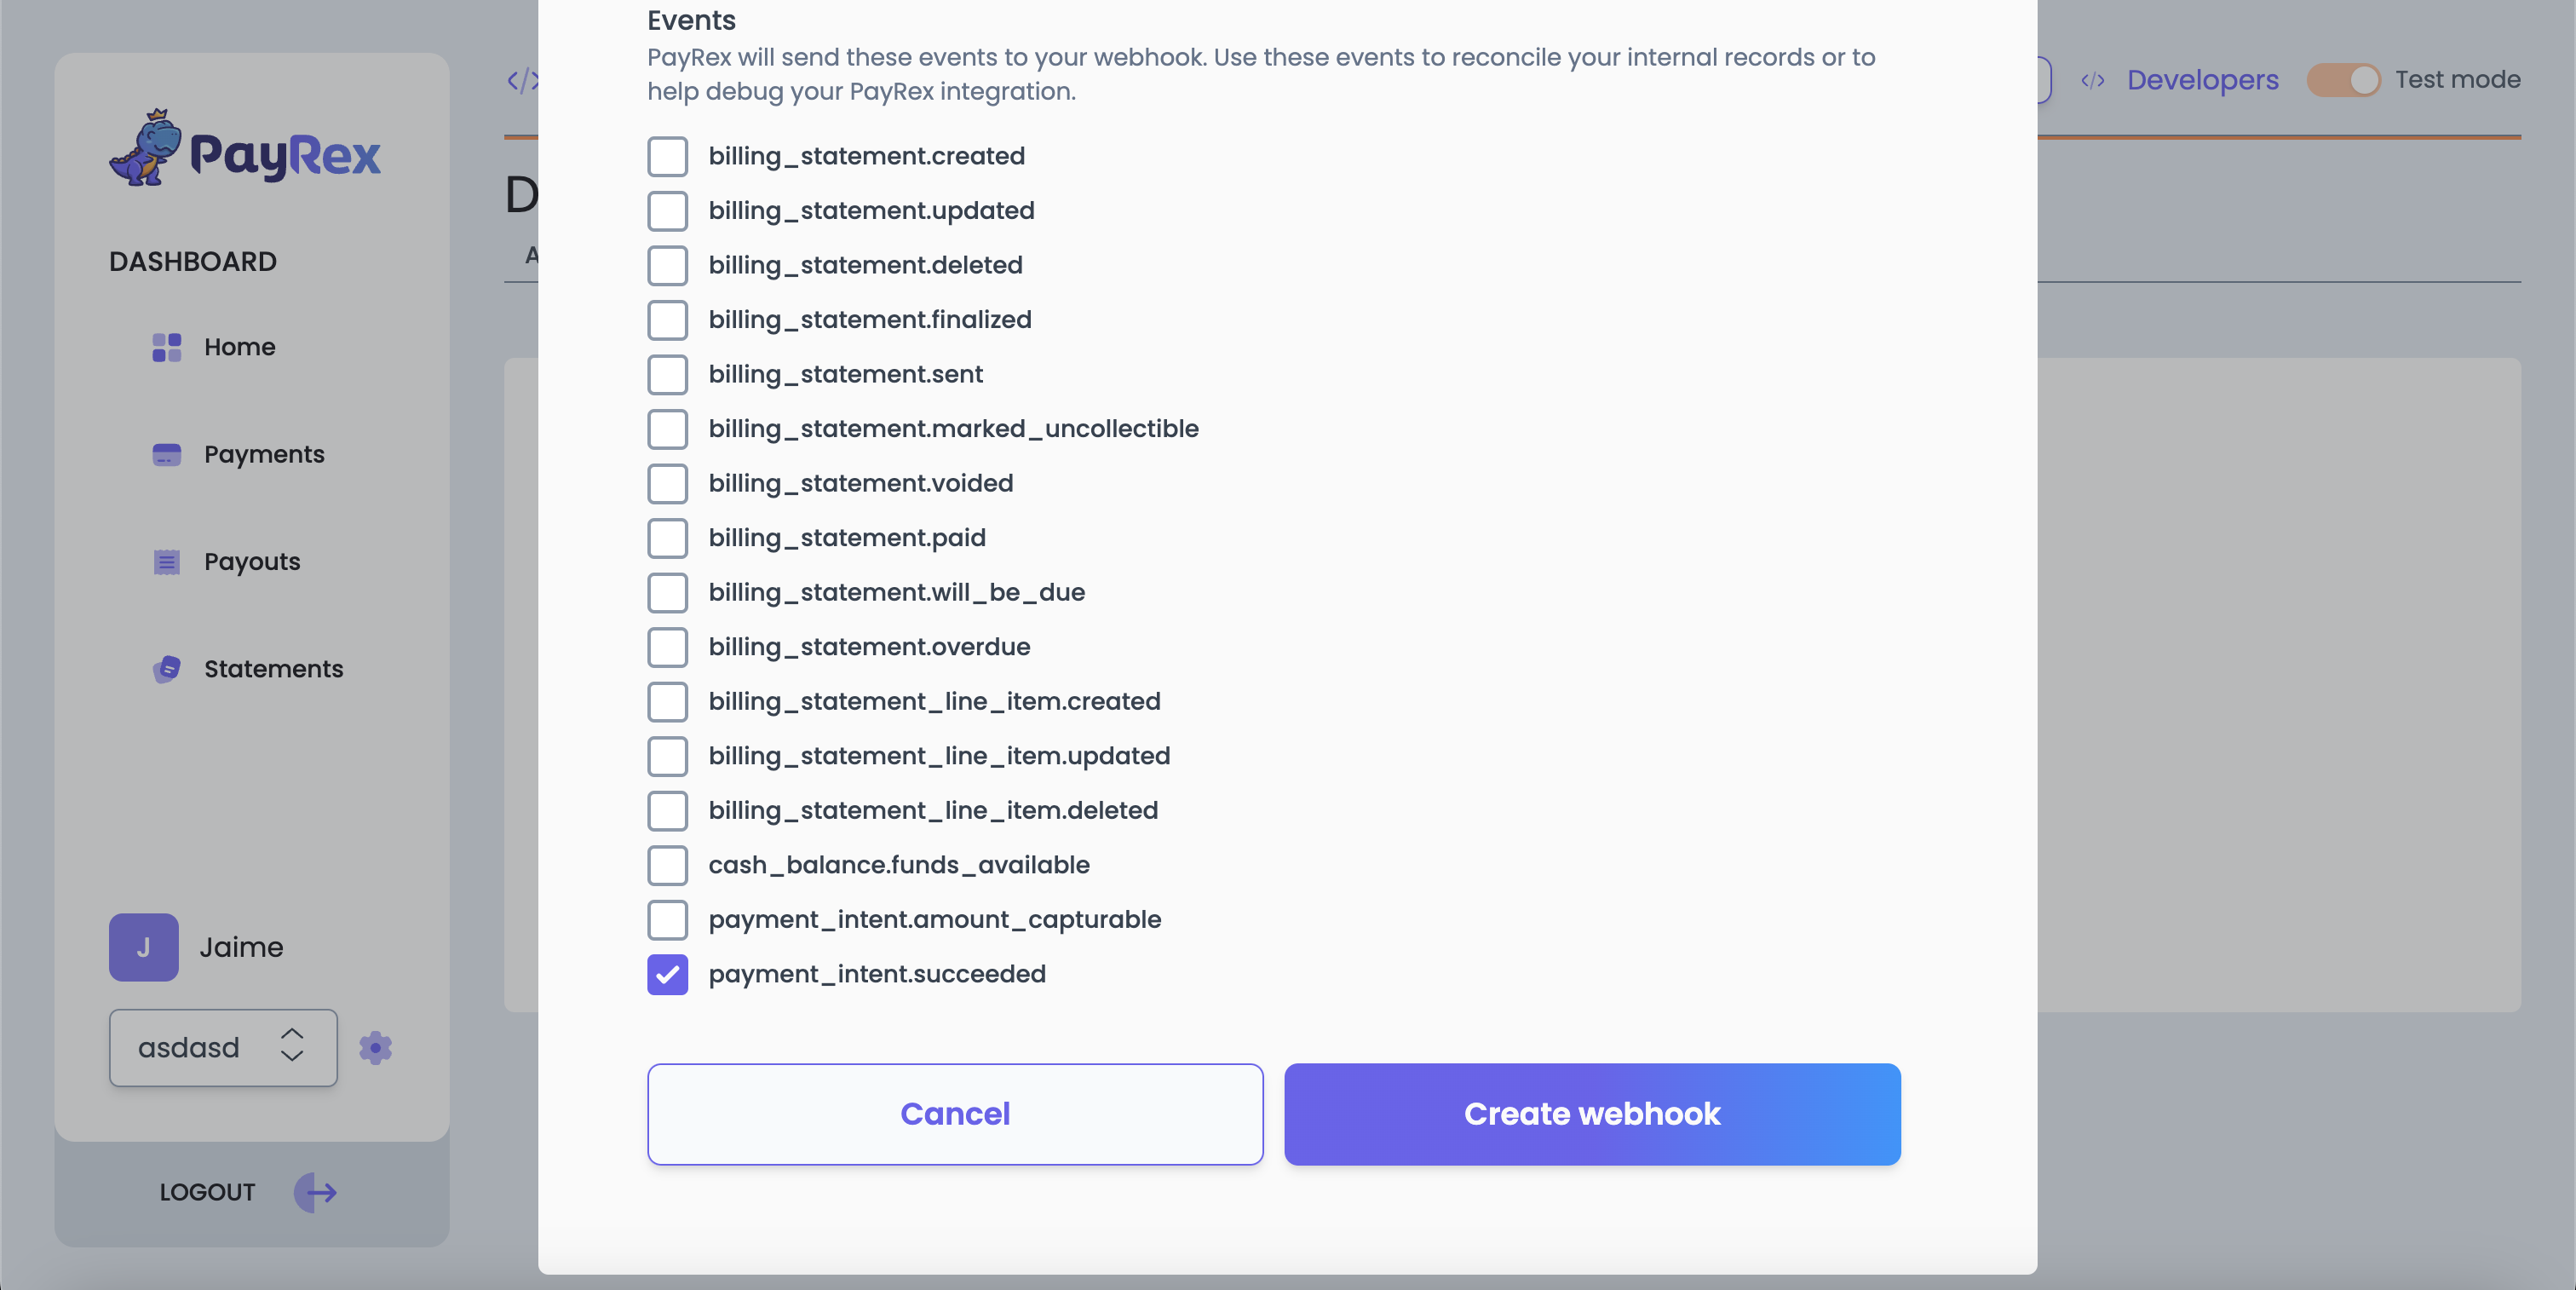
Add the event you want to listen to
Complete the step by clicking the Create webhook button.
### 4. Secure your webhook by implementing webhook signature verification
> **WARNING**
PayRex requires the raw body of the request to perform signature verification. If you are using a framework, ensure it doesn't manipulate the raw body. Any changes or manipulation to the raw body of the request causes the verification to fail.
We highly recommend using our official libraries to verify signatures. Provide the payload sent to your webhook, the Payrex-Signature header, and the webhook's secret key for verification. If verification fails, you will receive an error. To stop receiving the same event, return a 2xx response immediately. Return a 4xx response to retry the event.
#### Manually verifying webhook signatures
If you don't want to use our SDKs to verify the webhook signature, you can verify it with your code.
Below is a sample Payrex-Signature from the HTTP header whenever we send an event to your endpoint.
```txt
Payrex-Signature:t=1496734175,te=5242a89e7ecebeda32sffs62cdca3fa51cad7e77a0e56ff536d0ce8e108d8ad,li=5f7bsa9d200aae63f272406069a9788598b792a944a07aba816edb039989a3n
```
Payrex-Signature is composed of three parts separated by comma `,`:
1. `t` is the timestamp of when we sent the API request.
2. `te` is the test mode signature of the API request.
3. `li` is the live mode signature of the API request.
##### `li` vs `te`
Generate a signature using the Webhook resource's secret key and compare this to the respective mode's value. You must compare the signature that you will generate against the `li`'s value if the event is in live mode or `te` if in test mode.
1. Split `Payrex-Signature` into three parts: `t`, `te`, and `li`. Use a comma `,` to separate the timestamp and the signatures for live and test modes.
2. Concatenate the following to create your own signature:
- The timestamp as a string, e.g. 1425714124
- A period `.` character
- The JSON payload of the request you received from PayRex. You must use the raw payload of the request. Check the documentation on the programming language or framework you're using to get the raw payload of an API request.
3. Run the concatenated values through [HMAC with SHA256 hash function](https://www.freeformatter.com/hmac-generator.html) with the webhook's secret key as the cryptographic key.
4. Compare the signature you created from step 3 against the signature from the `li` if the event happened in live mode while `te` is for test mode. If they do not match, discard the request. This means PayRex did not send the request to your API endpoint.
---
# Manage billing statements with API
Source: https://docs.payrex.com/docs/guide/finance_automation/billing_statements/api
Path: docs/guide/finance_automation/billing_statements/api.mdx
# Manage billing statements with API
In this section, learn how to create and manage billing statements using PayRex API. Manage customers, create a billing statement, and send it.
Managing billing statements via API is best if you want to embed the workflow within your internal system or the platform you currently use. If you prefer to use our Dashboard to manage billing statements, please refer to the no-code section.
If you want to learn about the general overview of billing statements, you can refer to this [link](/docs/guide/finance_automation/billing_statements/overview).
## 1. Set up the server-side
### Install one of the server-side SDKs and initialize with your secret API key
Install the appropriate SDK depending on your programming language and import it. If we don't support yet the programming language you're using, you may skip this step and use your preferred REST client.
### Create a customer resource or retrieve an existing one
A customer resource represents the customer that will pay the billing statement. If you haven't created a customer resource, create one and you can store its ID for future purchases. If a customer resource already exists, use its ID when creating a draft billing statement.
> **INFO**
A customer resource represents the customer that will pay the billing statement. If you haven't created a customer resource, create one, and you can store its ID for future purchases. If a customer resource exists, use its ID when creating a draft billing statement.
### Create a billing statement
Create a billing statement after a customer resource is created or retrieved. A billing statement has `draft` status once created.
### Complete the required details of a billing statement
After you create a `draft` billing statement, you must update the required details before you can finalize it and send it to your customer.
### Finalize a billing statement
Once the required details are filled out, you can finalize the billing statement. Once finalized, you cannot edit the details anymore, so make sure that the details are correct. If you need to edit the details, you must create a new billing statement.
## 2. Send the billing statement to your customer
Once the billing statement is finalized, some details will be updated e.g. the billing statement's URL. You can now send the billing statement to your customer.
## 3. Subscribe to your customer payments
The best way to monitor payments from your customers is through webhooks. You can create a webhook and subscribe to `payment_intent.succeeded` event. A billing statement has a payment intent attribute you can reference from your webhook. If you don't know yet about payment intents, refer to this [guide](/docs/guide/developer_handbook/payment_intents_api).
You can refer to this [guide](/docs/guide/developer_handbook/payments/after_payment/handle_webhook_event) to know more about actions you can take after receiving a payment.
> **INFO**
We will create `billing_statement` related webhook events soon. In the meantime, you can refer to the payment_intent events to get notified about customer payments.
## Require or make billing information fields optional [OPTIONAL]
By default, PayRex will show all the billing information fields in our payment form. The billing information provided by your customer will be used to complete the payment and increase the accuracy of assessing the transaction risk. PayRex can allow you to either always show a certain billing information field or let PayRex handle it for you.
On top of your code to create a checkout session, you can pass another attribute called `billing_details_collection` to manage the behavior of the billing information fields rendered in the payment form.
| Billing information field setting | Description |
| --------------------------------- | ---------------------------------------------------------------------------------------- |
| auto | Set this configuration if you will let PayRex handle if a field a required field or not. |
| always | Set this configuration if you want to always show the field to your customer. |
> **WARNING**
If your chargeback rate is increasing, there's a chance that our Fraud & Risk team will require you to show all billing information fields to manage your chargeback rate.
## Voiding, marking as uncollectible and deleting billing statements [OPTIONAL]
You can call our APIs to automate voiding, marking as uncollectible, and deleting billing statements.
### Voiding a billing statement
### Mark uncollectible a billing statement
### Delete a billing statement
---
# Manage PayRex billing statements via Dashboard
Source: https://docs.payrex.com/docs/guide/finance_automation/billing_statements/dashboard
Path: docs/guide/finance_automation/billing_statements/dashboard.mdx
# Manage billing statements via Dashboard
This section will teach you how to create, edit, and send a billing statement from the Dashboard.
Managing billing statements via Dashboard is a quick way to test and try billing statements. This approach is a no-code tool; you don't need to write code to use billing statements.
If you want to learn about the general overview of billing statements, you can refer to this [link](/docs/guide/finance_automation/billing_statements/overview).
## 1. Create a billing statement
To create a billing statement, complete the following steps:
1. Once you log in via Dashboard, go to the billing statements module and click the **create billing statement** button.
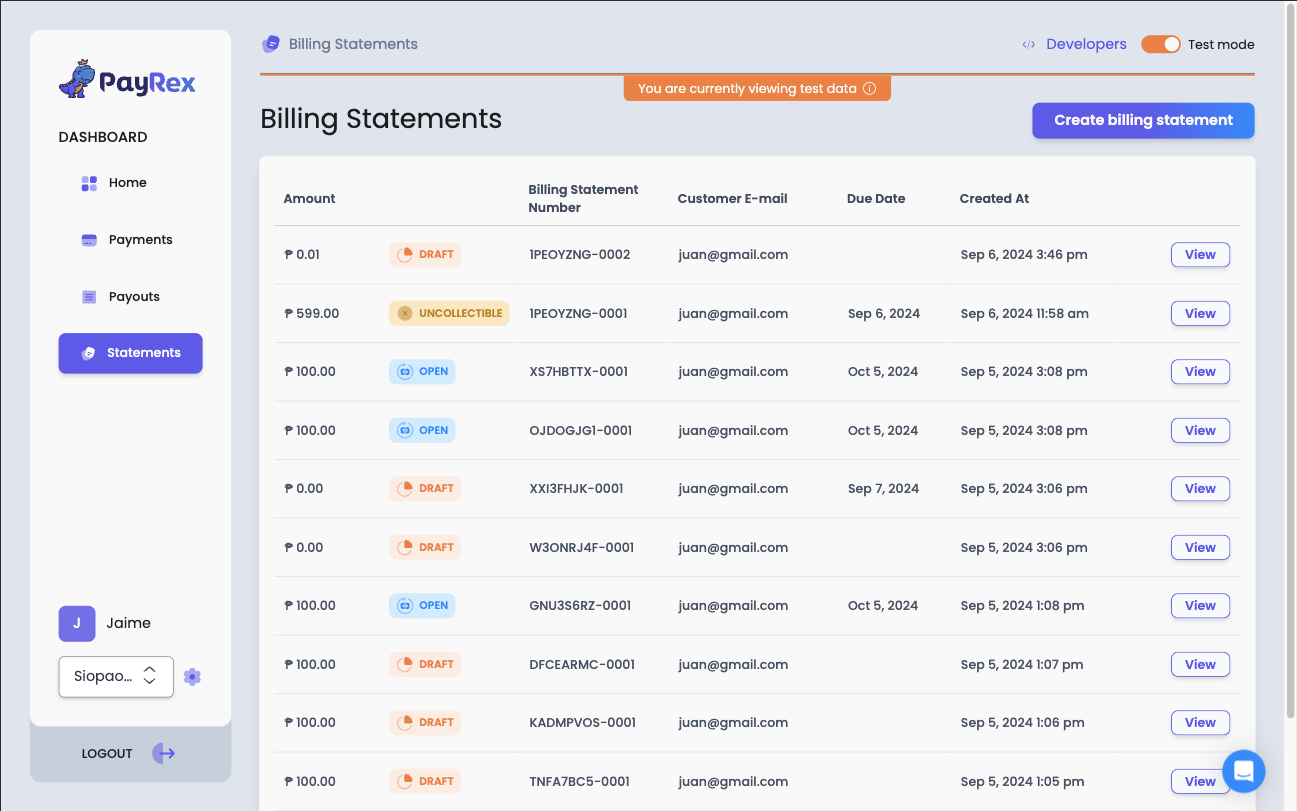
2. Specify the customer details and proceed.
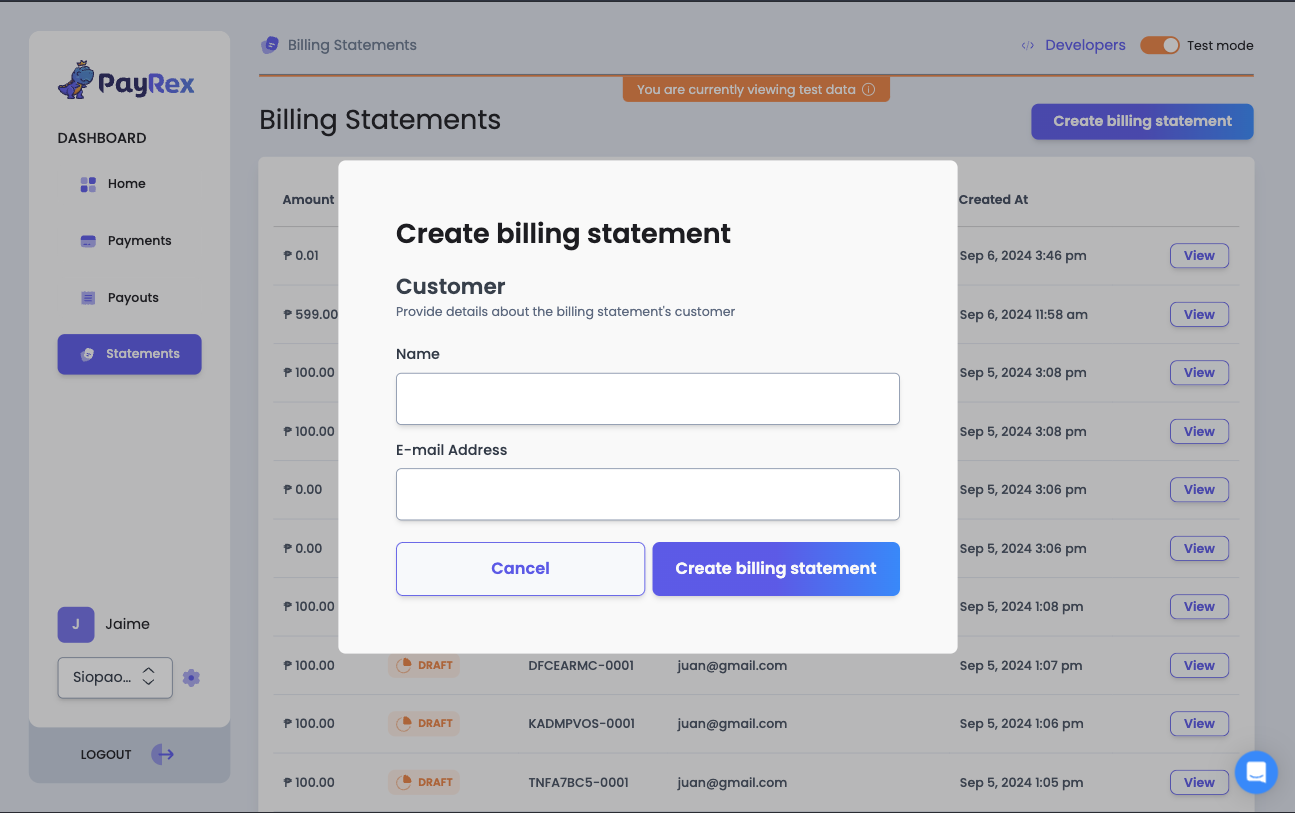
> **INFO**
As of this writing, every new billing statement is a new customer. We are working on a feature allowing you to use an existing customer.
3. Once the draft billing statement is created, you can complete the required details. Start by specifying the due date.
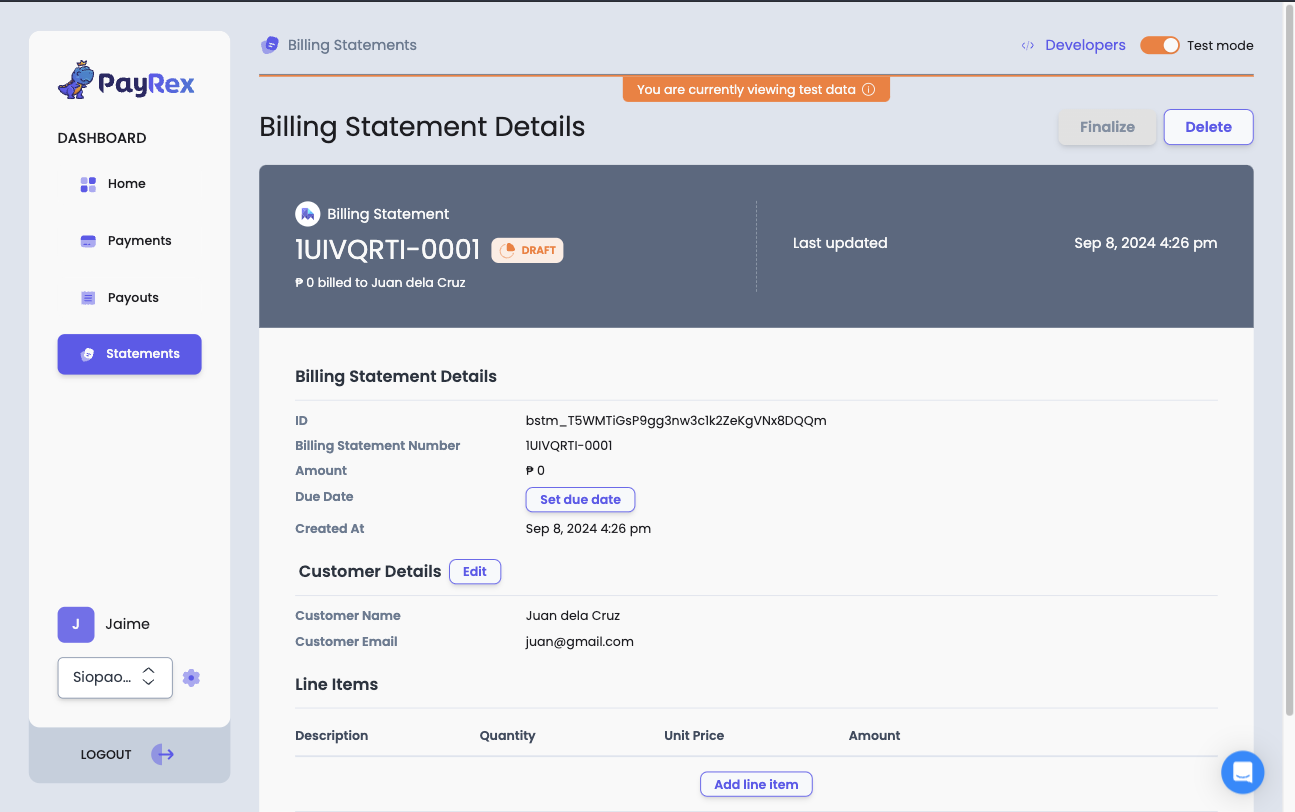
4. Add at least one billing statement line item. Specify the line item's quantity, unit price, and description.
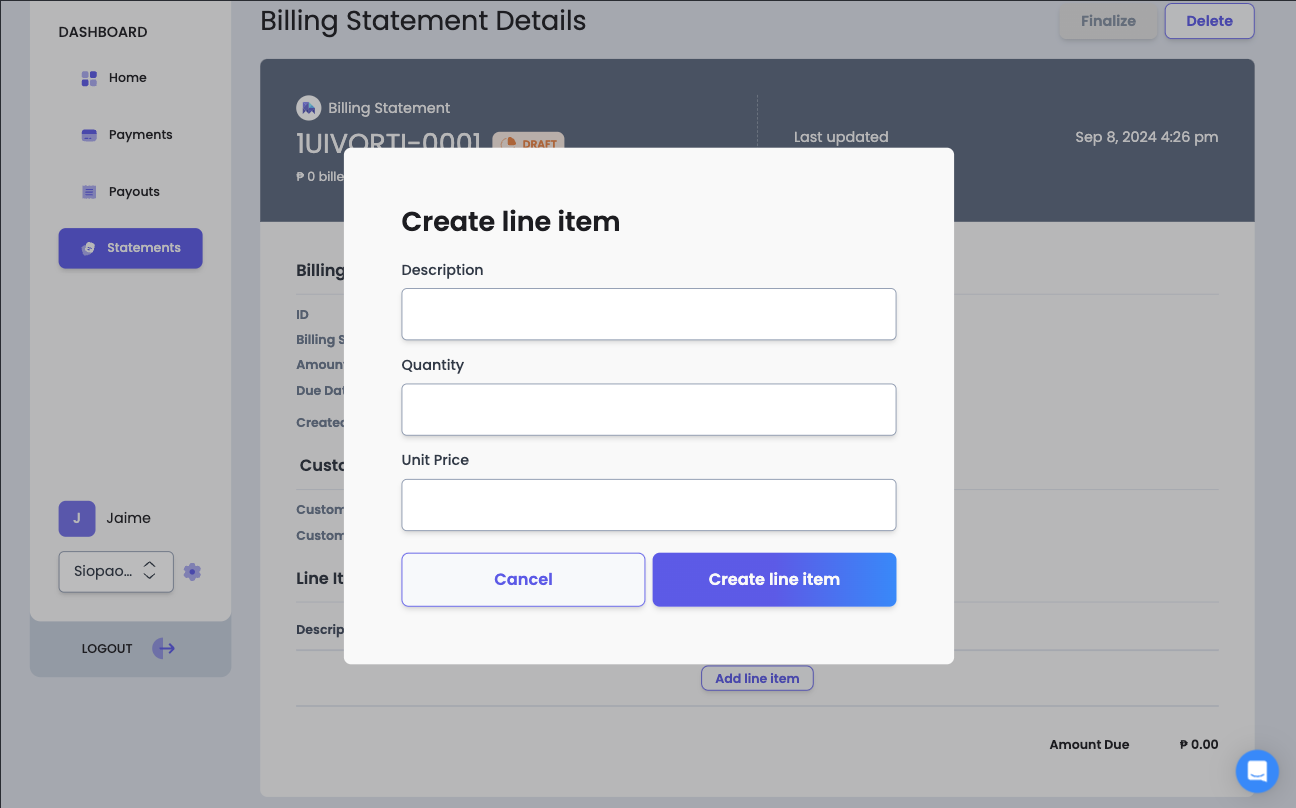
> **INFO**
We will allow you to manage products within PayRex and use these products as line items. If you want us to incorporate your feedback into our first product iteration, please reach out to helloworld@payrex.com.
5. Once you're satisfied with the details of the billing statement, you can finalize it by clicking **Finalize**.
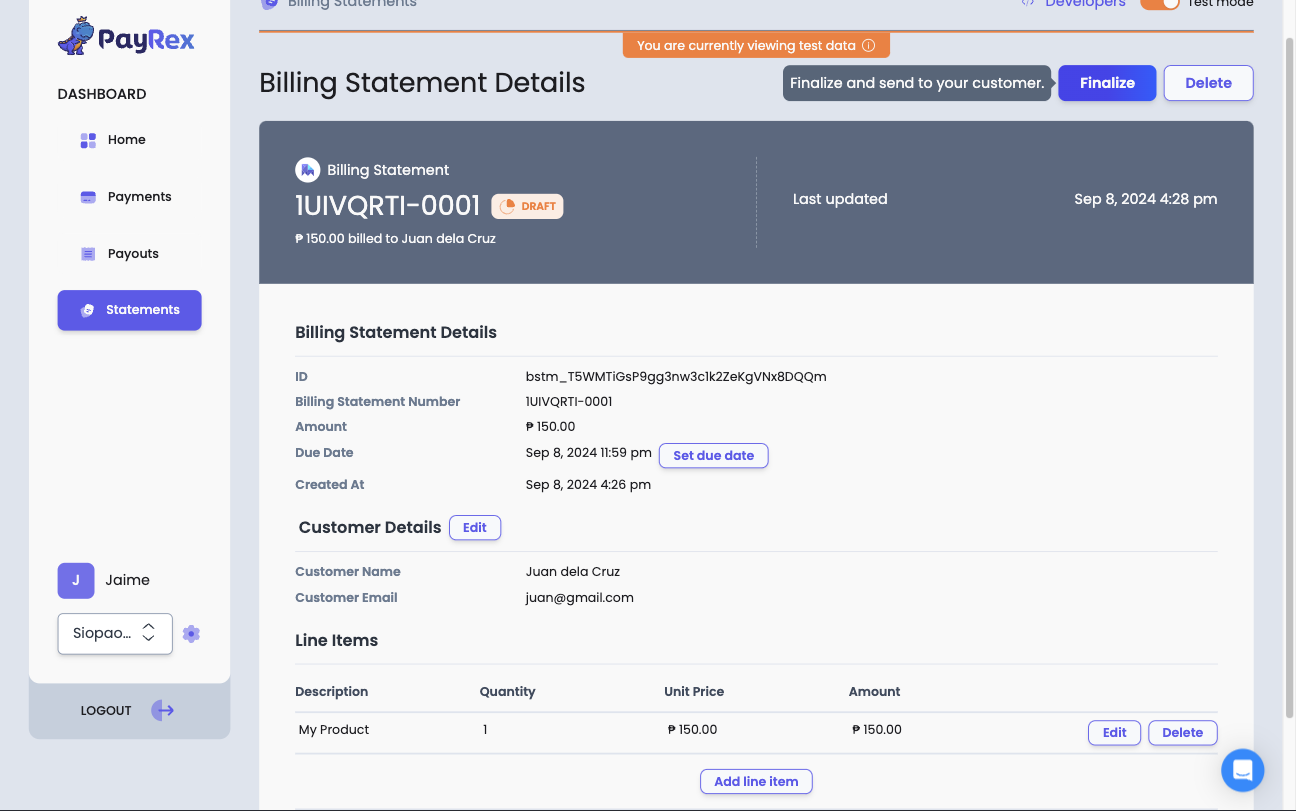
## 2. Send the billing statement to your customer
1. Copy the URL of the billing statement and send it to your customer via email or IMs such as Viber, messenger, etc.
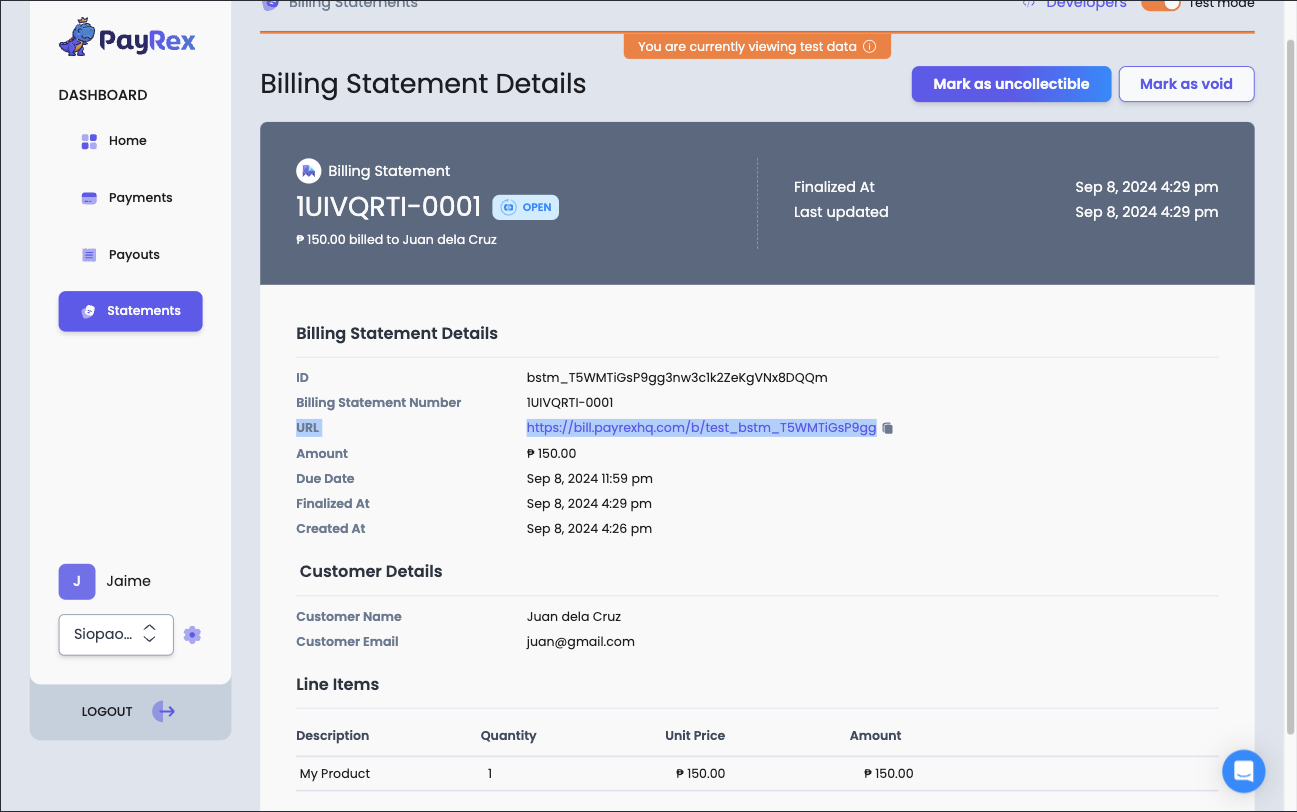
> **INFO**
- Create a billing statement spiel template to personalize your message to your customer before sending it.
- PayRex will send your billing statement via the e-mail associated with the billing statement's customer.
## 3. Wait until your customer completes the payment
Once your customer has accessed the URL, they can complete the payment. Once the customer successfully pays the billing statement, you can see that it is paid.
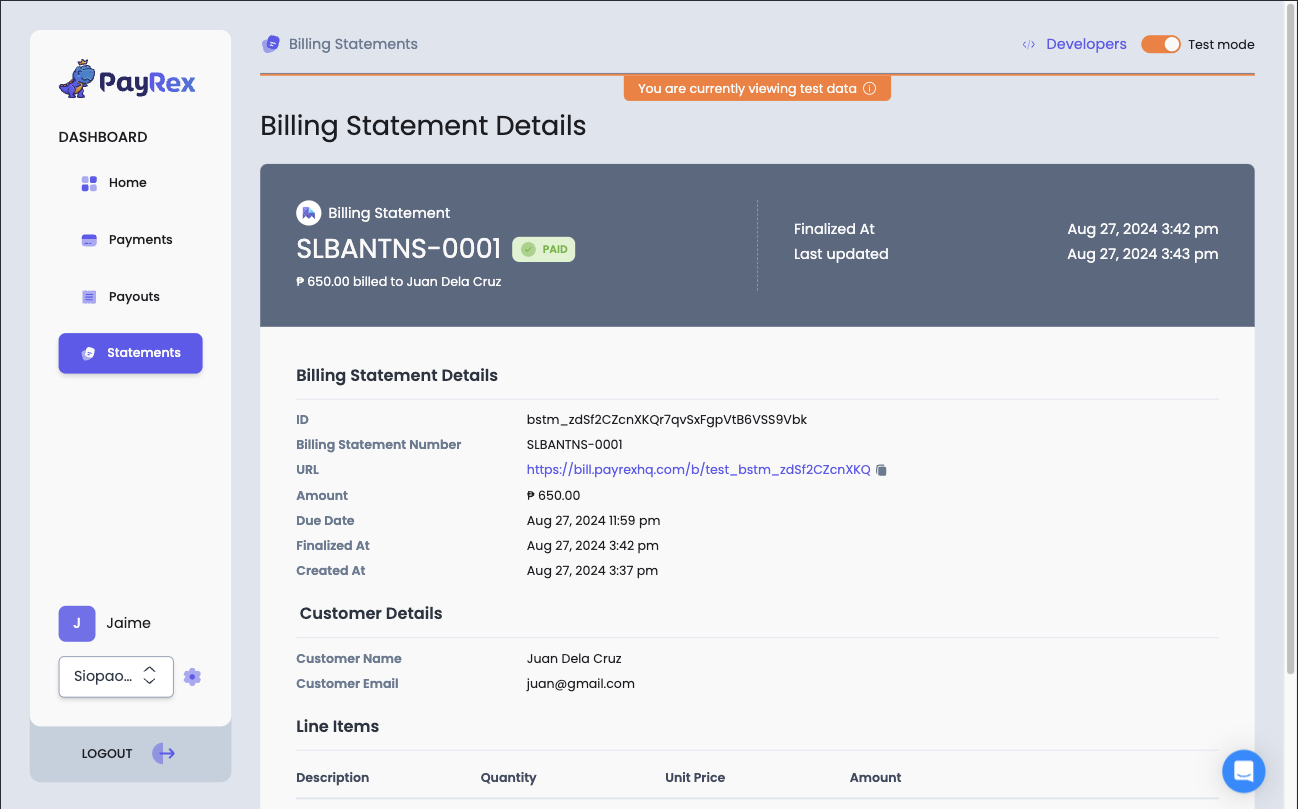
## Voiding, marking as uncollectible and deleting billing statements
Depending on the current status of the billing statement, you can either void it, mark it as uncollectible, or delete it. These actions are available at the top right while viewing a billing statement.
Please refer to the [overview](/docs/guide/finance_automation/billing_statements/overview) for information about the different statuses of a billing statement.
---
# PayRex Billing Statements
Source: https://docs.payrex.com/docs/guide/finance_automation/billing_statements
Path: docs/guide/finance_automation/billing_statements/index.mdx
# Billing Statements
This section will guide you to create and manage billing statements to receive payments from your customers.
---
# Billing statements Overview
Source: https://docs.payrex.com/docs/guide/finance_automation/billing_statements/overview
Path: docs/guide/finance_automation/billing_statements/overview.mdx
# Billing statements Overview
Billing statements are one-time payment links that contain customer information, the due date, and an itemized list of your business's products or services. You can send the billing statement to your customers to collect payments.
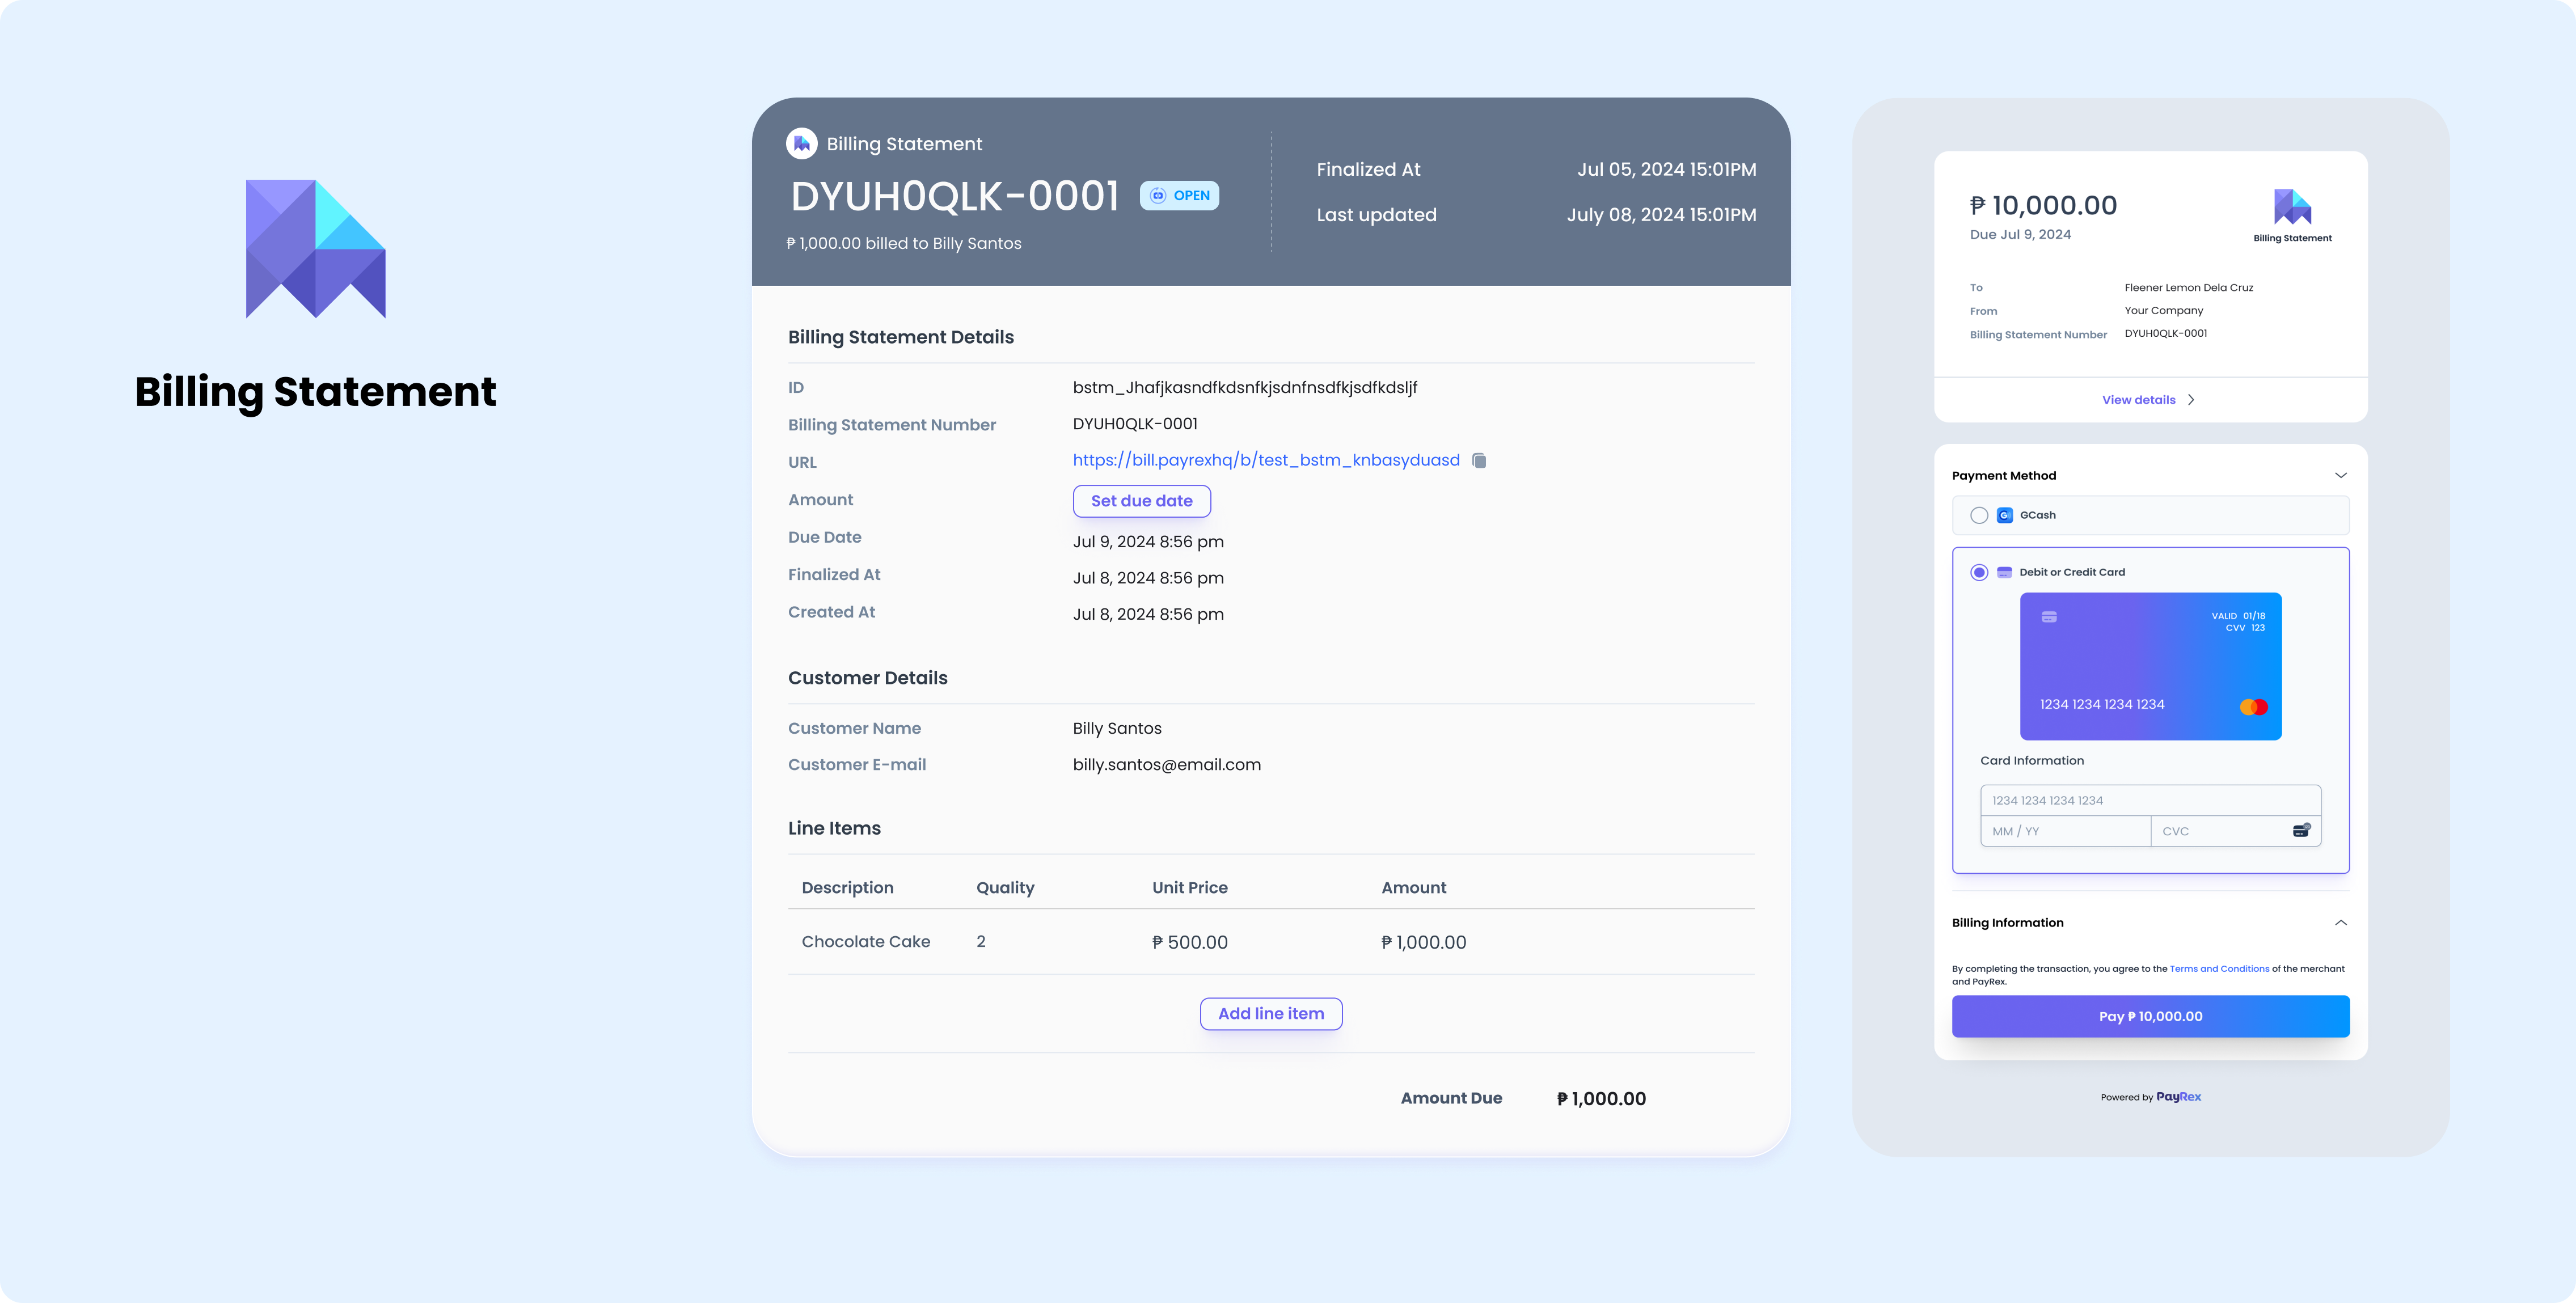
As of this writing, PayRex can only facilitate one-off payments, but we plan to offer subscriptions in the future. If you want us to consider your use case for subscriptions, please email helloworld@payrex.com.
You can use the [Dashboard](/docs/guide/finance_automation/billing_statements/dashboard) or [API](/docs/guide/finance_automation/billing_statements/api) to create and manage billing statements.
## The billing statement lifecycle
After creating a billing statement, it will transition to a different status once created and processed.
See below the lifecycle of a billing statement:
1. A newly created billing statement has a `draft` status.
2. Once the required fields are filled out, e.g., due date, line items, and customer details, you can mark the billing statement as finalized. A finalized billing statement will change its status to `open`. The billing statement becomes read-only, and your customer can pay it.
3. While the billing statement is in `open` status, PayRex will wait until your customer successfully paid the billing statement.
- PayRex will update the billing statement's status to `paid` if the payment is completed.
- If there are failed payment attempts, the billing statement's status remains `open`.
4. Optionally, you can change the status of the `open` billing statement to `void` or `uncollectible`.
## Billing statement statuses
As discussed above, the billing statement will transition from one status to another. Certain actions can be taken for every status transition.
| Status | Description | Possible Actions |
| --------------- | --------------------------------------------------------------------------------------------------------------- | ------------------------------------------------------------------------------------------------------------------------------------------------------------------------------------------------ |
| draft | Your customer cannot pay the billing statement. `draft` is the initial status of a billing statement. |
- Edit details such as due date and line items
- Once you've edited the billing statement, you click the finalize button to transition to `open` status.
- You can delete the billing statement.
- Send the billing statement to your customer so they can complete a payment.
- You can change the billing statement's status to either `void` or `uncollectible`.
- No actions needed
- You can change the status to `uncollectible`.
- You can change the status to `void`.
More details
:heavy_check_mark: The **account owner** can: **User invitations** - View or delete user invitations - Invite users with administrator and non-administrator roles - Update assigned roles on user invitations **Users** - View list of users - Update user's assigned role - Remove users with administrator and non-administrator roles **Payments** - View and export list of payments - Refund payments **Billing statements** - View and export list of billing statements - Create and update billing statement details **Customers** - View list of customers - View, create, update, and delete customers **Pages** - View list of pages - Create and update page details - View and export list of payments under a page **Product catalog** - View and export product catalog listing - Add or bulk import new products - View and update product information - View, add, update, or delete product prices and images **Payouts** - View list of payouts - View and export list of transactions under a payout **Developers** - View and copy developer API keys **Customer Support** - Ask to change account ownership - Ask to update existing bank account details **Chargebacks** - Receive chargeback notificationsMore details
:heavy_check_mark: The **administrator** can: **User invitations** - View or delete user invitations - Invite users with non-administrator roles - Update assigned roles on user invitations **Users** - View list of users - Update user's assigned role - Remove users with non-administrator roles **Payments** - View and export list of payments - Refund payments **Billing statements** - View and export list of billing statements - Create and update billing statement details **Customers** - View list of customers - View, create, update, and delete customers **Pages** - View list of pages - Create and update page details - View and export list of payments under a page **Product catalog** - View and export product catalog listing - Add or bulk import new products - View and update product information - View, add, update, or delete product prices and images **Payouts** - View list of payouts - View and export list of transactions under a payout **Developers** - View and copy developer API keys:heavy_multiplication_x: The **administrator** cannot: **User Invitations** - Invite users with administrator roles **Users** - Delete users with administrator roles **Customer Support** - Ask to change account ownership - Ask to update existing bank account details **Chargebacks** - Receive chargeback notifications
More details
:heavy_check_mark: The **IAM administrator** can: **User invitations** - View or delete user invitations - Invite users with non-administrator roles - Update assigned roles on user invitations **Users** - View list of users - Update user's assigned role - Remove users with non-administrator roles:heavy_multiplication_x: The **IAM administrator** cannot: **User Invitations** - Invite users with administrator roles **Users** - Delete users with administrator roles **Payments** - View and export list of payments - Refund payments **Billing statements** - View and export list of billing statements - Create and update billing statement details **Customers** - View list of customers - View, create, update, and delete customers **Pages** - View list of pages - Create and update page details - View and export list of payments under a page **Product catalog** - View and export product catalog listing - Add or bulk import new products - View and update product information - View, add, update, or delete product prices and images **Payouts** - View list of payouts - View and export list of transactions under a payout **Developers** - View and copy developer API keys **Customer Support** - Ask to change account ownership - Ask to update existing bank account details **Chargebacks** - Receive chargeback notifications
More details
:heavy_check_mark: The **developer** can: **Payments** - View and export list of payments - Refund payments **Billing statements** - View and export list of billing statements - Create and update billing statement details **Customers** - View list of customers - View, create, update, and delete customers **Pages** - View list of pages - Create and update page details - View and export list of payments under a page **Product catalog** - View and export product catalog listing - View product details, prices, and images **Developers** - View and copy developer API keys:heavy_multiplication_x: The **developer** cannot: **User invitations** - View or delete user invitations - Invite users with administrator and non-administrator roles - Update assigned roles on user invitations **Users** - View list of users - Update user's assigned role - Remove users with administrator and non-administrator roles **Product catalog** - Add or bulk import new products - Update product details - Add, update, or delete product prices and images **Payouts** - View list of payouts - View and export list of transactions under a payout **Customer Support** - Ask to change account ownership - Ask to update existing bank account details **Chargebacks** - Receive chargeback notifications
More details
:heavy_check_mark: The **billing statements manager** can: **Billing statements** - View and export list of billing statements - Create and update billing statement details **Customers** - View list of customers - View customer details:heavy_multiplication_x: The **billing statements manager** cannot: **User invitations** - View or delete user invitations - Invite users with administrator and non-administrator roles - Update assigned roles on user invitations **Users** - View list of users - Update user's assigned role - Remove users with administrator and non-administrator roles **Payments** - View and export list of payments - Refund payments **Customers** - Create, update, and delete customers **Pages** - View list of pages - Create and update page details - View and export list of payments under a page **Product catalog** - View and export product catalog listing - Add or bulk import new products - View and update product information - View, add, update, or delete product prices and images **Payouts** - View list of payouts - View and export list of transactions under a payout **Developers** - View and copy developer API keys **Customer Support** - Ask to change account ownership - Ask to update existing bank account details **Chargebacks** - Receive chargeback notifications
More details
:heavy_check_mark: The **pages manager** can: **Pages** - View list of pages - Create and update page details - View and export list of payments under a page **Product catalog** - View product catalog listing - View product details, prices, and images:heavy_multiplication_x: The **pages manager** cannot: **User invitations** - View or delete user invitations - Invite users with administrator and non-administrator roles - Update assigned roles on user invitations **Users** - View list of users - Update user's assigned role - Remove users with administrator and non-administrator roles **Payments** - View and export list of payments - Refund payments **Billing statements** - View and export list of billing statements - Create and update billing statement details **Product catalog** - Export product catalog listing - Add or bulk import new products - Update product details - Add, update, or delete product prices and images **Customers** - View list of customers - View, create, update, and delete customers **Payouts** - View list of payouts - View and export list of transactions under a payout **Developers** - View and copy developer API keys **Customer Support** - Ask to change account ownership - Ask to update existing bank account details **Chargebacks** - Receive chargeback notifications
More details
:heavy_check_mark: The **product catalog manager** can: **Product catalog** - View and export product catalog listing - Add or bulk import new products - View and update product information - Add, update, or delete product images:heavy_multiplication_x: The **product catalog manager** cannot: **User invitations** - View or delete user invitations - Invite users with administrator and non-administrator roles - Update assigned roles on user invitations **Users** - View list of users - Update user's assigned role - Remove users with administrator and non-administrator roles **Payments** - View and export list of payments - Refund payments **Billing statements** - View and export list of billing statements - Create and update billing statement details **Pages** - View list of pages - Create and update page details - View and export list of payments under a page **Customers** - View list of customers - View, create, update, and delete customers **Payouts** - View list of payouts - View and export list of transactions under a payout **Developers** - View and copy developer API keys **Customer Support** - Ask to change account ownership - Ask to update existing bank account details **Chargebacks** - Receive chargeback notifications
More details
:heavy_check_mark: The **refund analyst** can: **Payments** - View list of payments - Refund payments **Billing statements** - View list of billing statements **Customers** - View list of customers - View customer details **Pages** - View list of pages - View list of payments under a page:heavy_multiplication_x: The **refund analyst** cannot: **User invitations** - View or delete user invitations - Invite users with administrator and non-administrator roles - Update assigned roles on user invitations **Users** - View list of users - Update user's assigned role - Remove users with administrator and non-administrator roles **Payments** - Export list of payments **Billing statements** - Create and update billing statement details - Export list of billing statements **Customers** - Create, update, and delete customers **Pages** - Create and update page details - Export list of payments under a page **Product catalog** - View and export product catalog listing - Add or bulk import new products - View and update product information - View, add, update, or delete product prices and images **Developers** - View and copy developer API keys **Customer Support** - Ask to change account ownership - Ask to update existing bank account details **Chargebacks** - Receive chargeback notifications
More details
:heavy_check_mark: The **view and export-only** can: **Payments** - View and export list of payments **Billing statements** - View and export list of billing statements **Customers** - View list of customers - View customer details **Pages** - View list of pages - View and export list of payments under a page **Product catalog** - View and export product catalog listing - View product details, prices, and images **Payouts** - View list of payouts - View and export list of transactions under a payout:heavy_multiplication_x: The **view and export-only** cannot: **User invitations** - View or delete user invitations - Invite users with administrator and non-administrator roles - Update assigned roles on user invitations **Users** - View list of users - Update user's assigned role - Remove users with administrator and non-administrator roles **Payments** - Refund payments **Billing statements** - Create and update billing statement details **Customers** - Create, update, and delete customers **Pages** - Create and update page details **Product catalog** - Add or bulk import new products - Update product information - Add, update, or delete product prices and images **Developers** - View and copy developer API keys **Customer Support** - Ask to change account ownership - Ask to update existing bank account details **Chargebacks** - Receive chargeback notifications
More details
:heavy_check_mark: The **view-only** can: **Payments** - View list of payments **Billing statements** - View list of billing statements **Customers** - View list of customers - View customer details **Pages** - View list of pages - View list of payments under a page **Product catalog** - View product catalog listing - View product details, prices, and images **Payouts** - View list of payouts - View list of transactions under a payout:heavy_multiplication_x: The **view-only** cannot: **User invitations** - View or delete user invitations - Invite users with administrator and non-administrator roles - Update assigned roles on user invitations **Users** - View list of users - Update user's assigned role - Remove users with administrator and non-administrator roles **Payments** - Export list of payments **Billing statements** - Export list of billing statements **Customers** - Create, update, and delete customers **Pages** - Export list of payments under a page **Product catalog** - Export product catalog listing - Add or bulk import new products - Update product details - Update or delete product prices and images **Payouts** - Export list of transactions under a payout **Developers** - View and copy developer API keys **Customer Support** - Ask to change account ownership - Ask to update existing bank account details **Chargebacks** - Receive chargeback notifications
The custom amount template allows your customers to input the specific amount when completing a payment.
**Best for:** collecting partial payments such as downpayment for bulk or wholesale orders or leeway for rent.
### Fixed Amount
The fixed amount template allows you to control the amount your customers can pay.
**Best for:** receiving payments for merchandise or services with fixed prices
### Donation
The donation template provides your sponsors/donors with a means to contribute financially to your organization. Share your cause using compelling images to make it easy to donate.
**Best for:** fundraising events, donation drives, and other causes
### Storefront
The storefront template showcases your products and services, enabling customers to add several items to their cart and complete their purchase in a single transaction. It is a personalized online store without the overhead cost of maintaining a website or subscribing to e-commerce platforms.
**Best for:** offering a variety of products and services
### Ticket selling (coming soon!)
The ticket selling template allows you to easily sell tickets for events and activities. Highlight event details, include engaging visuals, and enable a seamless ticket purchasing experience for your audience.
**Best for:** social gatherings such as musical concerts, theatrical plays, academic and professional conferences, and sporting events
Have other template ideas in mind? [Talk to us](https://www.payrex.com/contact).
---
# PayRex Payouts
Source: https://docs.payrex.com/docs/guide/payouts
Path: docs/guide/payouts/index.mdx
# Payouts
This section will guide you on how and when you will receive your payouts in your bank account
---
# Payouts Overview
Source: https://docs.payrex.com/docs/guide/payouts/overview
Path: docs/guide/payouts/overview.mdx
# Payouts Overview
You receive your customers' payments when PayRex makes payouts settled to your nominated bank account.
To learn more about the payouts module in the PayRex dashboard, you can refer to this [guide](/docs/guide/getting_started/using_the_dashboard/core_resources/payouts).
### Nominating your bank account
The bank account where PayRex will settle your payouts can be added during your [account activation](/docs/guide/getting_started/activate_your_account). When testing PayRex in [test mode](/docs/guide/developer_handbook/testing/testmode), you don't need to nominate a bank account, as test payments do not involve real money.
### Support bank accounts
As of this writing, PayRex only settles to Philippine Peso (PHP) bank accounts opened in the Philippines. To learn more about the supported bank accounts, see this [help article](https://help.payrex.com/en/articles/9258678-what-bank-accounts-can-i-use-to-receive-my-payouts).
### Payout Schedule
PayRex generates payouts for a merchant during banking days. Only the **cleared** payments will be covered by every payout. To learn more about how cleared payments and payout schedules work, check this [support article](https://help.payrex.com/en/articles/10614167-when-will-i-receive-my-payout).
### Minimum payout amount
The minimum balance required to generate a payout is ₱ 20.00. If your balance is below the minimum amount due due to insufficient payments or negative balances from refunds, no payout will be generated.
### Failure to settle to your bank account
If your bank account cannot receive a payout for any reason, your bank returns the amount to us. You can reach out to support@payrex.com or use the chat support if you encounter any delays or failures in your payouts within your Dashboard.
### Payout fees
There is no additional charge or fee when PayRex settles into your bank account.
---
# Bank Reconciliation
Source: https://docs.payrex.com/docs/guide/reports/bank_reconciliation
Path: docs/guide/reports/bank_reconciliation.mdx
# Bank Reconciliation
You can reconcile the money settled to your nominated bank account and your PayRex merchant account's transactions by checking the Payouts listing or through Payout details.
### List of Payouts

If you access the Payouts module in your PayRex Dashboard, you should see the list of payouts created in your PayRex merchant account. Every payout represents a deposited cash to your nominated bank account.
To learn more about payouts, you can refer to this [guide](/docs/guide/payouts/overview).
To learn more about the payouts module in the PayRex dashboard, you can refer to this [guide](/docs/guide/getting_started/using_the_dashboard/core_resources/payouts).
### Payout Details

While you can view the list of payments and its refunds through the payments module of the PayRex Dashboard, it is more efficient to reconcile the transactions for every payout through the payout details module. View a particular payout from the payouts listing and you can reconcile the transactions
---
# PayRex Reports
Source: https://docs.payrex.com/docs/guide/reports
Path: docs/guide/reports/index.mdx
# Reports
This section will guide you on how and when you will receive your payouts in your bank account
---
# Payout Reconciliation
Source: https://docs.payrex.com/docs/guide/reports/payout_reconciliation
Path: docs/guide/reports/payout_reconciliation.mdx
# Payout Reconciliation

The payout reconciliation report helps you summarize a batch of payouts for a specified date range. For example, if you want to get the summary of last week's payouts, you can filter the date range to last week and the payout reconciliation report will provide you a summary.
To learn more about payouts, you can refer to this [guide](/docs/guide/payouts/overview).
This report shows the summary of your PayRex merchant account's transactions across all the payouts for a particular date range:
- Total Payments
- Refunds
- Fees
- Taxes
- Adjustments
- Net amount
All payouts generated on the date range you selected will determine the scope of the report. You can also export the report as a CSV file. The file will contain the exact payout transaction totals, but broken down further by every payout. Furthermore, you can also control which columns will be included or excluded from the exported file.
---
# Third-Party Plugins
Source: https://docs.payrex.com/docs/guide/third_party_plugins
Path: docs/guide/third_party_plugins/index.mdx
# Third-Party Plugins
This section will teach you how to use PayRex's Official Third-Party Plugins.
---
# Shopify
Source: https://docs.payrex.com/docs/guide/third_party_plugins/shopify
Path: docs/guide/third_party_plugins/shopify/index.mdx
# Shopify Plugin
This section will teach you how to install and manage PayRex's Shopify plugin.
---
# Shopify
Source: https://docs.payrex.com/docs/guide/third_party_plugins/shopify/install
Path: docs/guide/third_party_plugins/shopify/install.mdx
# Install Shopify Plugin

This guide provides step-by-step instructions on installing and configuring PayRex's Shopify plugin on your Shopify store.
[Shopify](https://www.shopify.com) is a commerce platform that allows individuals and businesses to create online stores and sell products and services. It is one of the most commonly used commerce platforms in the Philippines.
## Prerequisites
Before proceeding, ensure that you have the following:
- A Shopify store
- A Shopify user account with access to installing a third-party payment provider
- A PayRex merchant account. If you don't have access to a PayRex merchant, check this [guide](/docs/guide/getting_started/creating_an_account) first. If you should be part of an existing PayRex merchant account, please ask your administrator to invite you.
### Step 1: Install PayRex's Payment App Plugin
1. Open the plugin's installation [link](https://apps.shopify.com/payrex-payments).

2. Click the Install button to start linking your Shopify store.

3. If prompted, log in to your Shopify admin account. After logging in, Shopify will ask you to grant the PayRex plugin permission to process your payments on your behalf. Approve the necessary permissions to proceed.
### Step 2: Configure and enable the plugin
1. You will be redirected to PayRex's installation page after you click the Install button. Log in to your PayRex user account to continue.

2. Choose the PayRex merchant account you want to link to your Shopify store after successfully logging in to your PayRex user account.

3. You will be redirected to the Shopify admin panel to configure further the payment settings after you confirm the PayRex's merchant account that you want to link.

4. Configure the payment methods allowed in your **Shopify** store.
There are two things that you have to do to configure further the payment methods used by our plugin in your Shopify store:
#### 4.a - Manage what your customers will see from Shopify
1. Enable the payment methods that your customers will see from your Shopify store. These payment methods will only reflect within Shopify Checkout. You should manage separately the enabled payment methods within the PayRex Checkout page via the PayRex Dashboard. Proceed to [4.b](/docs/guide/third_party_plugins/shopify/install#4b---manage-what-your-customers-will-see-from-payrexs-checkout-page) to configure what your customers will see once they are redirected to PayRex's checkout page.

#### 4.b - Manage what your customers will see from PayRex's Checkout Page
1. Access the PayRex's Dashboard, then go to Settings > Shopify Payment Methods.


2. If you manage multiple Shopify stores, select the store for which you want to configure the allowed payment methods. Manage the payment methods of the selected store. The payment methods you will enable should usually align with the payment methods you enabled from step [4.a](/docs/guide/third_party_plugins/shopify/install#4a---manage-what-your-customers-will-see-from-shopify). If there are more payment methods available within our settings, you can still enable them.


### Step 3. Test payments through test mode
> **WARNING**
Do not proceed with step 3 if your Shopify store already has transacting customers. Once the plugin is installed, your customers will see PayRex at the checkout, so you must turn off test mode from the Shopify payment settings. You can already proceed with step 4.
If your Shopify store is still not live, we highly recommend completing a test payment to see the end-to-end payment processing flow. If you already have a live Shopify store and want to process live payments, proceed to [Step 4](/docs/guide/third_party_plugins/shopify/install#step-4-go-live).
1. To start with your test transaction, enable the Test Mode in Shopify payment gateway settings.

2. Place a test order on your Shopify store. If you want to test a card payment, please refer to our [list](/docs/guide/developer_handbook/testing/testing_your_integration) of test cards.
3. After completing the test transaction, verify that the paid order appears in the Shopify Dashboard.

4. Check if a test paid payment is also created within the PayRex dashboard, proceed to the [Payments](https://dashboard.payrexhq.com/t/payments) module of PayRex Dashboard and look for the test payment from the list. Ensure that the test mode toggle is turned on.
> **INFO**
The Shopify Payment ID should match the ID from PayRex's payment description. You can also search the listing via the Shopify Payment ID.

5. If you have successfully completed the steps above, you can now proceed with going live by disabling the Test Mode from the Shopify gateway settings.
### Step 4: Go Live
1. Go to the Shopify's payment settings and check if the Enabled test mode is disabled.

2. Perform a live transaction to confirm successful processing. You must use an actual payment method to complete a live transaction.
3. After completing the live transaction, verify that the paid order appears in the Shopify Dashboard. Ensure that the Test attribute is either false or does not exist. If you can still see that the Test attribute in Shopify dashboard is set to True, then your payment settings is still in test mode.
4. Check if the live paid payment is also created within the PayRex dashboard, head over to the [Payments](https://dashboard.payrexhq.com/l/payments) module of PayRex Dashboard and look for the live payment from the payment listing. Ensure that the test mode toggle is turned off.
### FAQs
How do I issue a refund for payments processed via Shopify?
Refunds for payments processed via Shopify must be completed within your Shopify Dashboard. This will ensure that PayRex also updates your Shopify payments to refunded.
Can I start using PayRex's Shopify plugin even if my PayRex merchant account has not yet been activated?
Yes, you can test PayRex's Shopify plugin even if your PayRex merchant account has not yet been activated. However, you can only process **test payments**. To process live payments, you must complete your [account activation](/docs/guide/getting_started/activate_your_account).
As a merchant, can I use PayRex's Shopify plugin without a PayRex merchant account?
Unfortunately, no. A PayRex merchant account is required to link to a Shopify store.
What are the currently supported currencies?
As of the moment, we only support Philippine Peso ₱.
After clicking the install button from Shopify, nothing is happening. What should I do to fix this issue?
This could be a cache issue from Shopify. Please try installing our plugin using a different browser.
How do I issue a refund for payments processed via WooCommerce?
Refunds for payments processed via WooCommerce must be completed within your WooCommerce Admin Dashboard. This will ensure that PayRex also updates your WooCommerce orders to refunded.
Can I start using PayRex's WooCommerce plugin even if my PayRex merchant account has not yet been activated?
Yes, you can test PayRex's WooCommerce plugin even if your PayRex merchant account has not yet been activated. However, you can only process **test payments**. To process live payments, you must complete your [account activation](/docs/guide/getting_started/activate_your_account).
As a merchant, can I use PayRex's WooCommerce plugin without a PayRex merchant account?
Unfortunately, no. A PayRex merchant account is required to link to a WooCommerce store.
What are the currently supported currencies?
As of the moment, we only support Philippine Peso ₱.