Save a payment method without a payment
Learn how to save a customer payment method without a payment through PayRex Elements
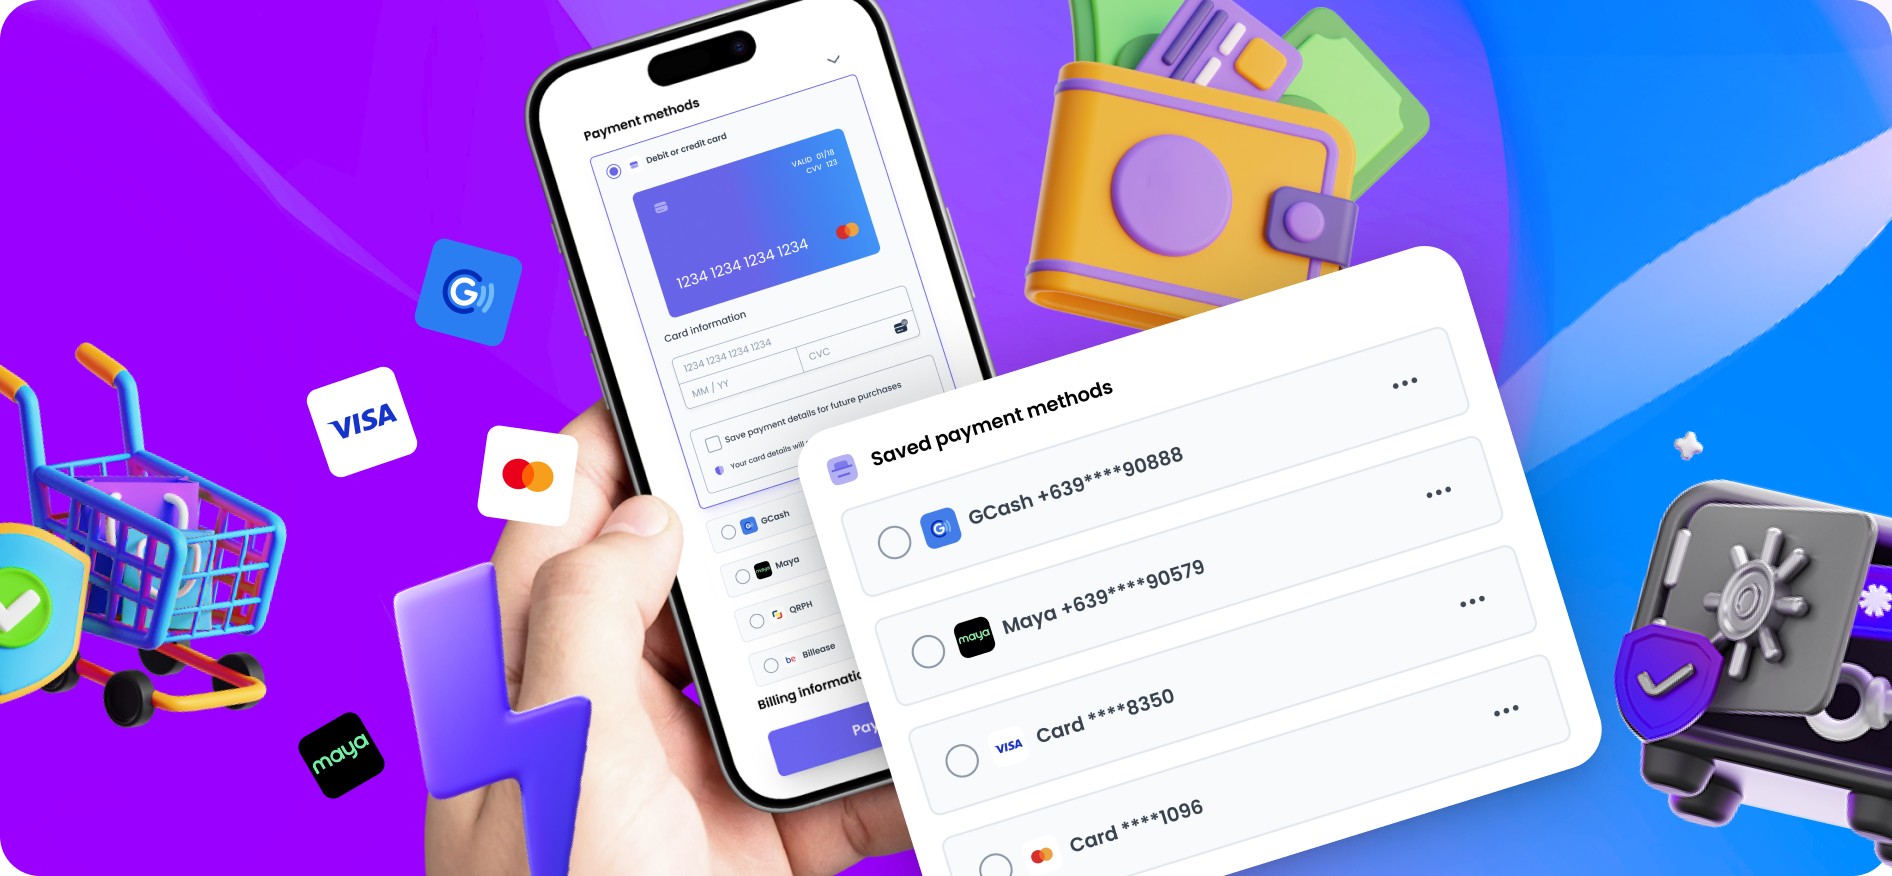
Saving a payment method without a payment through PayRex Elements allows your customers to:
- Store their payment methods such as card, gcash, and maya, and use them to complete purchases in the future.
- See a list of saved payment methods while buying from your website.
- Get charged regularly without being present in the payment form.
Compliance and Regulations
You must explicitly obtain the customer's consent. For example, include a "Save my payment method for future use" checkbox to collect consent.
Your PayRex account will be restricted if you violate any terms and conditions. Before implementing the store customer payment method feature, work with your legal team to ensure that it complies with legal and compliance.
When saving a customer's payment method, your business is responsible for complying with all applicable laws and regulations. These requirements typically apply when you intend to store a customer's payment method for future transactions, such as presenting it during future checkouts or charging the customer when they are not actively using your website or application. Your website or app should clearly explain how payment method details will be stored and used, and customers should explicitly provide their consent to opt in.
A saved customer's payment method should only be used for the specific purposes described in your terms and conditions. If you plan to charge the payment method while the customer is offline and also offer it as a saved option for future purchases, you must obtain the customer's explicit consent for that use. A common approach is to provide a checkbox labeled "Save my payment method for future use" during checkout.
If you intend to charge the customer while they are not present in your payment form, your terms should clearly state:
- The customer's authorization for you to initiate one or more payments on their behalf for specified transactions.
- The expected timing and frequency of charges, such as installment payments, subscriptions, or unscheduled top-ups.
- How the payment amount will be calculated or determined.
- Your cancellation policy, if the payment method will be used for subscription-based services.
You should also maintain a record of the customer's written consent to these terms.
Save a payment method through PayRex Elements
If you are not familiar yet with implementing our payment services through PayRex Elements, you can read this guide.
This feature is initially released for PayRex Elements. We will release save payment method feature to other channels such as Checkout and Billing Statements soon.
1. Set up the server-side
Install the server-side SDK and initialize with your secret API key
Install the appropriate SDK for your programming language and import it. If we don't support your programming language yet, you may skip this step and use your preferred REST client.
- Node via npm
- PHP via composer
- Python via pip
- Ruby via gem
npm install payrex-node
composer install payrex/payrex-php
pip install payrex-python
gem install payrex-ruby
- Node
- PHP
- Python
- Ruby
// Protect your PayRex Secret API key at all costs. One common approach
// to store it in an environment variable.
// Add your PayRex test secret API key.
const payrexSecretApiKey = '';

const payrex = require('payrex-node')(payrexSecretApiKey);

// Create a customer
// NOTE: If you already have created the customer resource,
// please reference the existing customer id instead of creating a new
// one all the time.
const customer = await payrex.customers.create({
  currency: "PHP",
  name: "<Name of the customer>",
  email: "<Email of the customer>",
  // This is purely optional. If you want a two-way reference of the customer id
  metadata: {
    internal_customer_id: 'Some internal id of the customer'
  }
});

// Create a Setup Intent
const setupIntent = await payrex.setupIntents.create({
  payment_methods: ['gcash', 'card', 'maya'],
  customer_id: customer.id,
  // Pass off_session if you will charge the customer either they are present from the checkout page
  // or not present. Use on_session or don't pass pass the usage parameter if you will only allow the customer
  // to pay while they are present from the payment page.
  usage: 'off_session'
});

const output = {
  clientSecret: setupIntent.clientSecret,
}

console.log(JSON.stringify(output));
<?php

require_once '../vendor/autoload.php';

// Protect your PayRex Secret API key at all costs. One common approach
// to store it in an environment variable.
// Add your PayRex test secret API key.
$payrexSecretApiKey = '';
$payrex = new \Payrex\PayrexClient($payrexSecretApiKey);

// Create a customer
// NOTE: If you already have created the customer resource,
// please reference the existing customer id instead of creating a new
// one all the time.
$customer = $payrex->customers->create([
  currency: "PHP",
  name: "<Name of the customer>",
  email: "<Email of the customer>",
  // This is purely optional. If you want a two-way reference of the customer id
  metadata: {
    internal_customer_id: 'Some internal id of the customer'
  }
]);

// Create a Setup Intent
$setupIntent = $payrex->setupIntents->create([
  'payment_methods' => [
      'card',
      'gcash',
      'maya'
  ],
  'customer_id' => $customer->id,
  // Pass off_session if you will charge the customer either they are present from the checkout page
  // or not present. Use on_session or don't pass pass the usage parameter if you will only allow the customer
  // to pay while they are present from the payment page.
  'usage' => 'off_session'
]);

$output = [
  'clientSecret' => $setupIntent->client_secret,
];

echo json_encode($output);
from payrex import Client as PayrexClient

# Protect your PayRex Secret API key at all costs. One common approach
# to store it in an environment variable.
# Add your PayRex test secret API key.
payrex_secret_api_key = ''
payrex = PayrexClient(payrex_secret_api_key)

# Create a customer
# NOTE: If you already have created the customer resource,
# please reference the existing customer id instead of creating a new
# one all the time.
customer = payrex.customers.create(
  {
    'currency: "PHP",
    'name: "<Name of the customer>",
    'email': "<Email of the customer>",
    # This is purely optional. If you want a two-way reference of the customer id
    'metadata': {
      'internal_customer_id': 'Some internal id of the customer'
    }
  }
)

# Create a Setup Intent
setup_intent = payrex.setup_intents.create(
  {
    'payment_methods': [
        'card',
        'gcash',
        'maya'
    ],
    'customer_id': customer.id,
    # Pass off_session if you will charge the customer either they are present from the checkout page
    # or not present. Use on_session or don't pass pass the usage parameter if you will only allow the customer
    # to pay while they are present from the payment page.
    'usage': 'off_session'
  },
)

output = {
  'client_secret': setup_intent.client_secret
}

print(output)
require "payrex-ruby"

# Protect your PayRex Secret API key at all costs. One common approach
# to store it in an environment variable.
# Add your PayRex test secret API key.
payrex_secret_api_key = ""
payrex = Payrex::Client.new(payrex_secret_api_key)

# Create a customer
# NOTE: If you already have created the customer resource,
# please reference the existing customer id instead of creating a new
# one all the time.
customer = payrex.customers.create(
  currency: "PHP",
  name: "<Name of the customer>",
  email: "<Email of the customer>",
  # This is purely optional. If you want a two-way reference of the customer id
  metadata: {
    internal_customer_id: 'Some internal id of the customer'
  }
)

# Create a SetupIntent with amount and currency
setup_intent = payrex.setup_intents.create(
  payment_methods: [
    "card",
    "gcash",
    "maya"
  ],
  customer_id: customer.id,
  # Pass off_session if you will charge the customer either they are present from the checkout page
  # or not present. Use on_session or don't pass pass the usage parameter if you will only allow the customer
  # to pay while they are present from the payment page.
  usage: 'off_session'
)

output = {
  clientSecret: setup_intent.client_secret
}

puts output.to_json
Create a customer or reference an existing customer
When your customer signs up or creates an account with your business, create a Customer resource through the Customers API. A Customer resource represents someone who will have their first transaction in the future.
You can also use a Customer resource to trace all payments they make through PayRex. Another purpose of the Customer resource is to serve as the entity that holds all the payment methods they save in PayRex.
If you want to learn more about the Customer resource, you can check this guide.
You must create a Customer resource only once per customer. Reference the same Customer ID for the succeeding payments. You can save the PayRex customer ID and relate it to your customer.
- Node
- PHP
- Python
- Ruby
// Protect your PayRex Secret API key at all costs. One common approach
// to store it in an environment variable.
// Add your PayRex test secret API key.
const payrexSecretApiKey = '';

const payrex = require('payrex-node')(payrexSecretApiKey);

// Create a customer
// NOTE: If you already have created the customer resource,
// please reference the existing customer id instead of creating a new
// one all the time.
const customer = await payrex.customers.create({
  currency: "PHP",
  name: "<Name of the customer>",
  email: "<Email of the customer>",
  // This is purely optional. If you want a two-way reference of the customer id
  metadata: {
    internal_customer_id: 'Some internal id of the customer'
  }
});

// Create a Setup Intent
const setupIntent = await payrex.setupIntents.create({
  payment_methods: ['gcash', 'card', 'maya'],
  customer_id: customer.id,
  // Pass off_session if you will charge the customer either they are present from the checkout page
  // or not present. Use on_session or don't pass pass the usage parameter if you will only allow the customer
  // to pay while they are present from the payment page.
  usage: 'off_session'
});

const output = {
  clientSecret: setupIntent.clientSecret,
}

console.log(JSON.stringify(output));
<?php

require_once '../vendor/autoload.php';

// Protect your PayRex Secret API key at all costs. One common approach
// to store it in an environment variable.
// Add your PayRex test secret API key.
$payrexSecretApiKey = '';
$payrex = new \Payrex\PayrexClient($payrexSecretApiKey);

// Create a customer
// NOTE: If you already have created the customer resource,
// please reference the existing customer id instead of creating a new
// one all the time.
$customer = $payrex->customers->create([
  currency: "PHP",
  name: "<Name of the customer>",
  email: "<Email of the customer>",
  // This is purely optional. If you want a two-way reference of the customer id
  metadata: {
    internal_customer_id: 'Some internal id of the customer'
  }
]);

// Create a Setup Intent
$setupIntent = $payrex->setupIntents->create([
  'payment_methods' => [
      'card',
      'gcash',
      'maya'
  ],
  'customer_id' => $customer->id,
  // Pass off_session if you will charge the customer either they are present from the checkout page
  // or not present. Use on_session or don't pass pass the usage parameter if you will only allow the customer
  // to pay while they are present from the payment page.
  'usage' => 'off_session'
]);

$output = [
  'clientSecret' => $setupIntent->client_secret,
];

echo json_encode($output);
from payrex import Client as PayrexClient

# Protect your PayRex Secret API key at all costs. One common approach
# to store it in an environment variable.
# Add your PayRex test secret API key.
payrex_secret_api_key = ''
payrex = PayrexClient(payrex_secret_api_key)

# Create a customer
# NOTE: If you already have created the customer resource,
# please reference the existing customer id instead of creating a new
# one all the time.
customer = payrex.customers.create(
  {
    'currency: "PHP",
    'name: "<Name of the customer>",
    'email': "<Email of the customer>",
    # This is purely optional. If you want a two-way reference of the customer id
    'metadata': {
      'internal_customer_id': 'Some internal id of the customer'
    }
  }
)

# Create a Setup Intent
setup_intent = payrex.setup_intents.create(
  {
    'payment_methods': [
      'card',
      'gcash',
      'maya'
    ],
    'customer_id': customer.id,
    # Pass off_session if you will charge the customer either they are present from the checkout page
    # or not present. Use on_session or don't pass pass the usage parameter if you will only allow the customer
    # to pay while they are present from the payment page.
    'usage': 'off_session'
  },
)

output = {
  'client_secret': setup_intent.client_secret
}

print(output)
require "payrex-ruby"

# Protect your PayRex Secret API key at all costs. One common approach
# to store it in an environment variable.
# Add your PayRex test secret API key.
payrex_secret_api_key = ""
payrex = Payrex::Client.new(payrex_secret_api_key)

# Create a customer
# NOTE: If you already have created the customer resource,
# please reference the existing customer id instead of creating a new
# one all the time.
customer = payrex.customers.create(
  currency: "PHP",
  name: "<Name of the customer>",
  email: "<Email of the customer>",
  # This is purely optional. If you want a two-way reference of the customer id
  metadata: {
    internal_customer_id: 'Some internal id of the customer'
  }
)

# Create a SetupIntent with amount and currency
setup_intent = payrex.setup_intents.create(
  payment_methods: [
    "card",
    "gcash",
    "maya"
  ],
  customer_id: customer.id,
  # Pass off_session if you will charge the customer either they are present from the checkout page
  # or not present. Use on_session or don't pass pass the usage parameter if you will only allow the customer
  # to pay while they are present from the payment page.
  usage: 'off_session'
)

output = {
  clientSecret: setup_intent.client_secret
}

puts output.to_json
Create a setup intent
The example below creates a Setup Intent via Ajax. If you prefer to create a setup intent before rendering your checkout page, you can adjust the code below.
Create a Setup Intent on the server side. A Setup Intent resource tracks the lifecycle of your customer's attempt to save a payment method. In the response, return the setup intent's client secret to proceed with the next steps on the client.
If you are not familiar with Setup Intents, you can check this guide.
After initializing the SDK with your secret API key, you must create a setup intent. A setup intent is a resource that manages the lifecycle of your customer's attempt to save a payment method. Once a setup intent is created, return the setup intent's client_secret attribute in the response. The setup intent's client_secret will be used on the client side, which is the next step of the integration process.
To learn more about the other possible payload when creating a setup intent, you can check the API reference.
- Node
- PHP
- Python
- Ruby
// Protect your PayRex Secret API key at all costs. One common approach
// to store it in an environment variable.
// Add your PayRex test secret API key.
const payrexSecretApiKey = '';

const payrex = require('payrex-node')(payrexSecretApiKey);

// Create a customer
// NOTE: If you already have created the customer resource,
// please reference the existing customer id instead of creating a new
// one all the time.
const customer = await payrex.customers.create({
  currency: "PHP",
  name: "<Name of the customer>",
  email: "<Email of the customer>",
  // This is purely optional. If you want a two-way reference of the customer id
  metadata: {
    internal_customer_id: 'Some internal id of the customer'
  }
});

// Create a Setup Intent
const setupIntent = await payrex.setupIntents.create({
  payment_methods: ['gcash', 'card', 'maya'],
  customer_id: customer.id,
  // Pass off_session if you will charge the customer either they are present from the checkout page
  // or not present. Use on_session or don't pass pass the usage parameter if you will only allow the customer
  // to pay while they are present from the payment page.
  usage: 'off_session'
});

const output = {
  clientSecret: setupIntent.clientSecret,
}

console.log(JSON.stringify(output));
<?php

require_once '../vendor/autoload.php';

// Protect your PayRex Secret API key at all costs. One common approach
// to store it in an environment variable.
// Add your PayRex test secret API key.
$payrexSecretApiKey = '';
$payrex = new \Payrex\PayrexClient($payrexSecretApiKey);

// Create a customer
// NOTE: If you already have created the customer resource,
// please reference the existing customer id instead of creating a new
// one all the time.
$customer = $payrex->customers->create([
  currency: "PHP",
  name: "<Name of the customer>",
  email: "<Email of the customer>",
  // This is purely optional. If you want a two-way reference of the customer id
  metadata: {
    internal_customer_id: 'Some internal id of the customer'
  }
]);

// Create a Setup Intent
$setupIntent = $payrex->setupIntents->create([
  'payment_methods' => [
      'card',
      'gcash',
      'maya'
  ],
  'customer_id' => $customer->id,
  // Pass off_session if you will charge the customer either they are present from the checkout page
  // or not present. Use on_session or don't pass pass the usage parameter if you will only allow the customer
  // to pay while they are present from the payment page.
  'usage' => 'off_session'
]);

$output = [
  'clientSecret' => $setupIntent->client_secret,
];

echo json_encode($output);
from payrex import Client as PayrexClient

# Protect your PayRex Secret API key at all costs. One common approach
# to store it in an environment variable.
# Add your PayRex test secret API key.
payrex_secret_api_key = ''
payrex = PayrexClient(payrex_secret_api_key)

# Create a customer
# NOTE: If you already have created the customer resource,
# please reference the existing customer id instead of creating a new
# one all the time.
customer = payrex.customers.create(
  {
    'currency: "PHP",
    'name: "<Name of the customer>",
    'email': "<Email of the customer>",
    # This is purely optional. If you want a two-way reference of the customer id
    'metadata': {
      'internal_customer_id': 'Some internal id of the customer'
    }
  }
)

# Create a Setup Intent
setup_intent = payrex.setup_intents.create(
  {
    'payment_methods': [
      'card',
      'gcash',
      'maya'
    ],
    'customer_id': customer.id,
    # Pass off_session if you will charge the customer either they are present from the checkout page
    # or not present. Use on_session or don't pass pass the usage parameter if you will only allow the customer
    # to pay while they are present from the payment page.
    usage: 'off_session'
  },
)

output = {
  'client_secret': setup_intent.client_secret
}

print(output)
require "payrex-ruby"

# Protect your PayRex Secret API key at all costs. One common approach
# to store it in an environment variable.
# Add your PayRex test secret API key.
payrex_secret_api_key = ""
payrex = Payrex::Client.new(payrex_secret_api_key)

# Create a customer
# NOTE: If you already have created the customer resource,
# please reference the existing customer id instead of creating a new
# one all the time.
customer = payrex.customers.create(
  currency: "PHP",
  name: "<Name of the customer>",
  email: "<Email of the customer>",
  # This is purely optional. If you want a two-way reference of the customer id
  metadata: {
    internal_customer_id: 'Some internal id of the customer'
  }
)

# Create a SetupIntent with amount and currency
setup_intent = payrex.setup_intents.create(
  payment_methods: [
    "card",
    "gcash",
    "maya"
  ],
  customer_id: customer.id,
  # Pass off_session if you will charge the customer either they are present from the checkout page
  # or not present. Use on_session or don't pass pass the usage parameter if you will only allow the customer
  # to pay while they are present from the payment page.
  usage: 'off_session'
)

output = {
  clientSecret: setup_intent.client_secret
}

puts output.to_json
2. Create a checkout page on the client-side.
Load Payrex.js
From the client side, load the PayRex javascript library called Payrex.js. This library helps you maintain compliance, such as PCI-DSS, by ensuring that payment information is not passed to your server but sent directly to PayRex.
Payrex.js domain is js.payrexhq.com, and you must load the javascript library from this domain. Do not store a copy of this javascript library.
If you prefer CommonJS or ES6 modules when importing PayRex.JS, you can use our official library.
<!DOCTYPE html>
<html lang="en">
  <head>
    <meta charset="utf-8" />
    <meta name="description" content="A demo application of PayRex payments product" />
    <meta name="viewport" content="width=device-width, initial-scale=1" />
    <title>PHP Demo Application for PayRex</title>
    <link rel="stylesheet" href="checkout.css" />
  </head>
  <body>
    <div class="container">
      <button id="btn-pay" type="button" onClick="payAction()">
        <div class="spinner hidden" id="spinner"></div>
        <span id="btn-pay-text">Pay</span>
      </button>
      <div id="payment-element">
        <!--Payrex.js will mount the Payment Element here. -->
      </div>
    </div>
    <!-- Include PayRexJS script -->
    <script type="text/javascript" src="https://js.payrexhq.com"></script>
    <script type="text/javascript" src="checkout.js" defer></script>
  </body>
</html>
Add a payment element placeholder div
Add an empty placeholder div within your checkout page where the Payment Element will be mounted. PayRex will insert the payment form to this placeholder div to collect payment information.
<!DOCTYPE html>
<html lang="en">
  <head>
    <meta charset="utf-8" />
    <meta name="description" content="A demo application of PayRex payments product" />
    <meta name="viewport" content="width=device-width, initial-scale=1" />
    <title>PHP Demo Application for PayRex</title>
    <link rel="stylesheet" href="checkout.css" />
  </head>
  <body>
    <div class="container">
      <button id="btn-pay" type="button" onClick="payAction()">
        <div class="spinner hidden" id="spinner"></div>
        <span id="btn-pay-text">Pay</span>
      </button>
      <div id="payment-element">
        <!--Payrex.js will mount the Payment Element here. -->
      </div>
    </div>
    <!-- Include PayRexJS script -->
    <script type="text/javascript" src="https://js.payrexhq.com"></script>
    <script type="text/javascript" src="checkout.js" defer></script>
  </body>
</html>
Initialize Payrex.js
Once the payment form is created and Payrex.js is loaded, initialize Payrex.js with your public API key from the client side. You will use Payrex.js to create an instance of a Payment Element and complete the payment on the client.
// Add your PayRex Public API key.
const payrex = window.Payrex('');
let elements;

initialize();
checkSetupIntentStatus();

async function savePaymentMethodAction() {
  showLoading(true)
  await payrex.attachPaymentMethod({
    elements,
    options: {
      // Return URL is where the customer will be redirected after completing a payment.
      return_url: "http://localhost:4242/checkout.html",
    },
  });
  showLoading(false)
}

function showLoading(flag) {
  const btnPayText = document.querySelector("#btn-pay-text");
  const spinner = document.querySelector("#spinner");

  // Disable the button to ensure that no double payment might happen
  btnPayText.disabled = flag

  if (flag) {
    // Disable the button and show a spinner
    spinner.classList.remove("hidden");
    btnPayText.classList.add("hidden");
  } else {
    spinner.classList.add("hidden");
    btnPayText.classList.remove("hidden");
  }
}

async function initialize() {
  const {clientSecret} = await fetch(
    "/create_setup_intent.php",
    {
      method: "POST",
    }
  ).then((r) => r.json());

  elements = payrex.elements({
    clientSecret
  });

  const paymentElementOptions = {
    layout: "accordion",
  };

  const paymentElement = elements.create(
    "payment",
    paymentElementOptions
  );

  paymentElement.mount("#payment-element");
}

// Fetches the setup intent status after payment submission
async function checkSetupIntentStatus() {
  const clientSecret = new URLSearchParams(window.location.search).get(
    "setup_intent_client_secret"
  );

  if (!clientSecret) {
    return;
  }

  const setupIntent = await payrex.getSetupIntent(clientSecret);

  switch (setupIntent.status) {
    case "succeeded":
      window.alert("Saving of payment method succeeded.")
      break;
    case "processing":
      window.alert("Saving of payment method is still being processed.")
      break;
    case "awaiting_payment_method":
      window.alert("Saving of payment method was not successful. Try again..")

      break;
    default:
      window.alert("Something went wrong")

      break;
  }
}
Fetch the Setup Intent from the server-side
Call the API endpoint you created from the server-side to create a setup intent once your checkout page loads. The clientSecret attribute returned by your API endpoint completes the payment.
// Add your PayRex Public API key.
const payrex = window.Payrex('');
let elements;

initialize();
checkSetupIntentStatus();

async function savePaymentMethodAction() {
  showLoading(true)
  await payrex.attachPaymentMethod({
    elements,
    options: {
      // Return URL is where the customer will be redirected after completing the process.
      return_url: "http://localhost:4242/checkout.html",
    },
  });
  showLoading(false)
}

function showLoading(flag) {
  const btnPayText = document.querySelector("#btn-pay-text");
  const spinner = document.querySelector("#spinner");

  // Disable the button to ensure that no double payment might happen
  btnPayText.disabled = flag

  if (flag) {
    // Disable the button and show a spinner
    spinner.classList.remove("hidden");
    btnPayText.classList.add("hidden");
  } else {
    spinner.classList.add("hidden");
    btnPayText.classList.remove("hidden");
  }
}

async function initialize() {
  const {clientSecret} = await fetch(
    "/create_setup_intent.php",
    {
      method: "POST",
    }
  ).then((r) => r.json());

  elements = payrex.elements({
    clientSecret
  });

  const paymentElementOptions = {
    layout: "accordion",
  };

  const paymentElement = elements.create(
    "payment",
    paymentElementOptions
  );

  paymentElement.mount("#payment-element");
}

// Fetches the setup intent status after submission
async function checkSetupIntentStatus() {
  const clientSecret = new URLSearchParams(window.location.search).get(
    "setup_intent_client_secret"
  );

  if (!clientSecret) {
    return;
  }

  const setupIntent = await payrex.getSetupIntent(clientSecret);

  switch (setupIntent.status) {
    case "succeeded":
      window.alert("Saving of payment method succeeded.")
      break;
    case "processing":
      window.alert("Saving of payment method is still being processed.")
      break;
    case "awaiting_payment_method":
      window.alert("Saving of payment method was not successful. Try again..")

      break;
    default:
      window.alert("Something went wrong")

      break;
  }
}
Initialize PayRex Elements
Initialize the PayRex Elements UI library with the Setup Intent client secret. PayRex Elements manages the UI components that will help you collect payment details from your customers.
// Add your PayRex Public API key.
const payrex = window.Payrex('');
let elements;

initialize();
checkSetupIntentStatus();

async function savePaymentMethodAction() {
  showLoading(true)
  await payrex.attachPaymentMethod({
    elements,
    options: {
      // Return URL is where the customer will be redirected after completing the process.
      return_url: "http://localhost:4242/checkout.html",
    },
  });
  showLoading(false)
}

function showLoading(flag) {
  const btnPayText = document.querySelector("#btn-pay-text");
  const spinner = document.querySelector("#spinner");

  // Disable the button to ensure that no double trigger will happen
  btnPayText.disabled = flag

  if (flag) {
    // Disable the button and show a spinner
    spinner.classList.remove("hidden");
    btnPayText.classList.add("hidden");
  } else {
    spinner.classList.add("hidden");
    btnPayText.classList.remove("hidden");
  }
}

async function initialize() {
  const {clientSecret} = await fetch(
    "/create_setup_intent.php",
    {
      method: "POST",
    }
  ).then((r) => r.json());

  elements = payrex.elements({
    clientSecret
  });

  const paymentElementOptions = {
    layout: "accordion",
  };

  const paymentElement = elements.create(
    "payment",
    paymentElementOptions
  );

  paymentElement.mount("#payment-element");
}

// Fetches the setup intent status after submission
async function checkSetupIntentStatus() {
  const clientSecret = new URLSearchParams(window.location.search).get(
    "setup_intent_client_secret"
  );

  if (!clientSecret) {
    return;
  }

  const setupIntent = await payrex.getSetupIntent(clientSecret);

  switch (setupIntent.status) {
    case "succeeded":
      window.alert("Saving of payment method succeeded.")
      break;
    case "processing":
      window.alert("Saving of payment method is still being processed.")
      break;
    case "awaiting_payment_method":
      window.alert("Saving of payment method was not successful. Try again..")

      break;
    default:
      window.alert("Something went wrong")

      break;
  }
}
3. Complete saving a payment method on the client
For test cards, you can refer to this guide.
Handle the submit event of the pay button
Listen to your pay button's onClick event and attach a PaymentMethod resource to the Setup Intent through the PayRex API. If you prefer to listen to a form-submit event, it could be your alternative approach.
Make sure that the button is disabled while the payment is being processed from our end. This will avoid possible double payment from your customer.
// Add your PayRex Public API key.
const payrex = window.Payrex('');
let elements;

initialize();
checkSetupIntentStatus();

async function savePaymentMethodAction() {
  showLoading(true)
  await payrex.attachPaymentMethod({
    elements,
    options: {
      // Return URL is where the customer will be redirected after submission
      return_url: "http://localhost:4242/checkout.html",
    },
  });
  showLoading(false)
}

function showLoading(flag) {
  const btnPayText = document.querySelector("#btn-pay-text");
  const spinner = document.querySelector("#spinner");

  // Disable the button to ensure that no double saving might happen
  btnPayText.disabled = flag

  if (flag) {
    // Disable the button and show a spinner
    spinner.classList.remove("hidden");
    btnPayText.classList.add("hidden");
  } else {
    spinner.classList.add("hidden");
    btnPayText.classList.remove("hidden");
  }
}

async function initialize() {
  const {clientSecret} = await fetch(
    "/create_setup_intent.php",
    {
      method: "POST",
    }
  ).then((r) => r.json());

  elements = payrex.elements({
    clientSecret
  });

  const paymentElementOptions = {
    layout: "accordion",
  };

  const paymentElement = elements.create(
    "payment",
    paymentElementOptions
  );

  paymentElement.mount("#payment-element");
}

// Fetches the setup intent status after payment submission
async function checkSetupIntentStatus() {
  const clientSecret = new URLSearchParams(window.location.search).get(
    "setup_intent_client_secret"
  );

  if (!clientSecret) {
    return;
  }

  const setupIntent = await payrex.getSetupIntent(clientSecret);

  switch (setupIntent.status) {
    case "succeeded":
      window.alert("Saving of payment method succeeded.")
      break;
    case "processing":
      window.alert("Saving of payment method is still being processed.")
      break;
    case "awaiting_payment_method":
      window.alert("Saving of payment method was not successful. Try again..")

      break;
    default:
      window.alert("Something went wrong")

      break;
  }
}
Attach a PaymentMethod to the setup intent
Call .attachPaymentMethod() from Payrex.js and pass along the Payment Element instance and a return_url to instruct PayRex to redirect your customer after they complete the payment.
For payment methods that require authentication, such as credit cards, PayRex will display a modal for authentication, e.g., 3DS for credit or debit cards, or redirect your customer to an authentication page, depending on the payment method. After your customer completes the authentication process, they will be redirected to your nominated return_url.
// Add your PayRex Public API key.
const payrex = window.Payrex('');
let elements;

initialize();
checkPaymentIntentStatus();

async function savePaymentMethodAction() {
  showLoading(true)
  await payrex.attachPaymentMethod({
    elements,
    options: {
      // Return URL is where the customer will be redirected after completing a payment.
      return_url: "http://localhost:4242/checkout.html",
    },
  });
  showLoading(false)
}

function showLoading(flag) {
  const btnPayText = document.querySelector("#btn-pay-text");
  const spinner = document.querySelector("#spinner");

  // Disable the button to ensure that no double payment might happen
  btnPayText.disabled = flag

  if (flag) {
    // Disable the button and show a spinner
    spinner.classList.remove("hidden");
    btnPayText.classList.add("hidden");
  } else {
    spinner.classList.add("hidden");
    btnPayText.classList.remove("hidden");
  }
}

async function initialize() {
  const {clientSecret} = await fetch(
    "/create_setup_intent.php",
    {
      method: "POST",
    }
  ).then((r) => r.json());

  elements = payrex.elements({
    clientSecret
  });

  const paymentElementOptions = {
    layout: "accordion",
  };

  const paymentElement = elements.create(
    "payment",
    paymentElementOptions
  );

  paymentElement.mount("#payment-element");
}

// Fetches the setup intent status after submission
async function checkSetupIntentStatus() {
  const clientSecret = new URLSearchParams(window.location.search).get(
    "setup_intent_client_secret"
  );

  if (!clientSecret) {
    return;
  }

  const setupIntent = await payrex.getSetupIntent(clientSecret);

  switch (setupIntent.status) {
    case "succeeded":
      window.alert("Saving of payment method succeeded.")
      break;
    case "processing":
      window.alert("Saving of payment method is still being processed.")
      break;
    case "awaiting_payment_method":
      window.alert("Saving of payment method was not successful. Try again..")

      break;
    default:
      window.alert("Something went wrong")

      break;
  }
}
Show success/failed status message after redirection
Once PayRex redirects your customer to your nominated return_url, Payrex.js appends the setup_intent_client_secret query parameter, which is the setup intent's client_secret. Use this parameter to retrieve the setup intent to determine if saving the payment method succeeds and show the relevant message to your customer.
// Add your PayRex Public API key.
const payrex = window.Payrex('');
let elements;

initialize();
checkSetupIntentStatus();

async function payAction() {
  showLoading(true)
  await payrex.attachPaymentMethod({
    elements,
    options: {
      // Return URL is where the customer will be redirected after completing a payment.
      return_url: "http://localhost:4242/checkout.html",
    },
  });
  showLoading(false)
}

function showLoading(flag) {
  const btnPayText = document.querySelector("#btn-pay-text");
  const spinner = document.querySelector("#spinner");

  // Disable the button to ensure that no double payment might happen
  btnPayText.disabled = flag

  if (flag) {
    // Disable the button and show a spinner
    spinner.classList.remove("hidden");
    btnPayText.classList.add("hidden");
  } else {
    spinner.classList.add("hidden");
    btnPayText.classList.remove("hidden");
  }
}

async function initialize() {
  const {clientSecret} = await fetch(
    "/create_setup_intent.php",
    {
      method: "POST",
    }
  ).then((r) => r.json());

  elements = payrex.elements({
    clientSecret
  });

  const paymentElementOptions = {
    layout: "accordion",
  };

  const paymentElement = elements.create(
    "payment",
    paymentElementOptions
  );

  paymentElement.mount("#payment-element");
}

// Fetches the setup intent status after payment submission
async function checkSetupIntentStatus() {
  const clientSecret = new URLSearchParams(window.location.search).get(
    "setup_intent_client_secret"
  );

  if (!clientSecret) {
    return;
  }

  const setupIntent = await payrex.getSetupIntent(clientSecret);

  switch (setupIntent.status) {
    case "succeeded":
      window.alert("Saving of payment method succeeded.")
      break;
    case "processing":
      window.alert("Saving of payment method is still being processed.")
      break;
    case "awaiting_payment_method":
      window.alert("Saving of payment method was not successful. Try again..")

      break;
    default:
      window.alert("Something went wrong")

      break;
  }
}
Charging the saved payment method later
To charge a customer after they saved a payment method, find the customer and its payment method ID to charge. You can find the list of payment methods associated with your customer via the API or the Dashboard, then charge the customer using the Customer ID and a Payment Method ID.
In this section, you charge the customer while they are not present on a payment page, called off-session payment. You should have saved a payment method with a setup intent that has a usage value of off_session.
List the payment methods of a customer
The example below shows how to get a customer's payment methods via the API. If you want to manually locate the payment method ID in the Dashboard, head to the customers module and look for the payment method ID.
- Node
- PHP
- Python
- Ruby
// Protect your PayRex Secret API key at all costs. One common approach
// to store it in an environment variable.
// Add your PayRex test secret API key.
const payrexSecretApiKey = '';

const payrex = require('payrex-node')(payrexSecretApiKey);

const paymentMethods = await payrex.customers.listPaymentMethods('<insert customer id>')

paymentMethods.data.forEach((paymentMethod) => {
  console.log(paymentMethod.id)
})
<?php

require_once '../vendor/autoload.php';

// Protect your PayRex Secret API key at all costs. One common approach
// to store it in an environment variable.
// Add your PayRex test secret API key.
$payrexSecretApiKey = '';
$payrex = new \Payrex\PayrexClient($payrexSecretApiKey);

$paymentMethods = $payrex->customers->listPaymentMethods('<insert customer id>');

foreach($paymentMethods->data as $paymentMethod) {
  echo $paymentMethod->id;
}
from payrex import Client as PayrexClient

# Protect your PayRex Secret API key at all costs. One common approach
# to store it in an environment variable.
# Add your PayRex test secret API key.
payrex_secret_api_key = ''
payrex = PayrexClient(payrex_secret_api_key)

paymentMethods = payrex.customers.listPaymentMethods('<insert customer id>')

for paymentMethod in paymentMethods.data:
    print(paymentMethod.id)
require "payrex-ruby"

# Protect your PayRex Secret API key at all costs. One common approach
# to store it in an environment variable.
# Add your PayRex test secret API key.
payrex_secret_api_key = ""
payrex = Payrex::Client.new(payrex_secret_api_key)

payment_methods = payrex.customers.list_payment_methods('<insert customer id>')

payment_methods.data.each do |payment_method|
  puts payment_method.id
end
Charge the customer using a saved payment method
Once you have located the customer ID and payment method ID to charge using an off-session payment, use a Payment Intent to charge the customer. When creating a Payment Intent via the create payment intent endpoint, you must associate the customer ID, then attach the payment method ID to the payment intent using the attach payment intent endpoint.
You will experience an asynchronous behavior for all off-session payments. This means that once you have successfully charged the customer, you might always see a processing Payment Intent status in the response when calling the attach payment intent endpoint. To ensure that you're checking the final payment intent status, you can subscribe to the payment_intent.succeeded webhook event.
You can simulate recurring payments in test mode. Before going live, reach out to our chat support to enable recurring payments in production. We carefully review your business first to see if you are ready and allowed for recurring payments.
- Node
- PHP
- Python
- Ruby
// Protect your PayRex Secret API key at all costs. One common approach
// to store it in an environment variable.
// Add your PayRex test secret API key.
const payrexSecretApiKey = '';

const payrex = require('payrex-node')(payrexSecretApiKey);

// Create a PaymentIntent with amount and currency.
// Do not forget to reference the customer id
let paymentIntent = await payrex.paymentIntents.create({
  // Amount is in cents. The sample below is 100.00.
  amount: 10000,
  currency: 'PHP',
  payment_methods: ['gcash', 'card', 'maya'],
  customer_id: '<add customer id>'
});

// The line below will finalize charge the customer. Make sure the saved payment method is designed
// for off_session payments
paymentIntent = await payrex.paymentIntents.attach(paymentIntent.id, {
  payment_method_id: '<insert the saved payment method id of the customer>'
})
<?php

require_once '../vendor/autoload.php';

// Protect your PayRex Secret API key at all costs. One common approach
// to store it in an environment variable.
// Add your PayRex test secret API key.
$payrexSecretApiKey = '';
$payrex = new \Payrex\PayrexClient($payrexSecretApiKey);

// Create a PaymentIntent with amount and currency.
// Do not forget to reference the customer id
$paymentIntent = $payrex->paymentIntents->create([
  // Amount is in cents. The sample below is 100.00.
  'amount' => 10000,
  'currency' => 'PHP',
  'payment_methods' => [
      'card',
      'gcash'
  ],
  'customer_id' => '<add customer id>'
]);

// The line below will finalize charge the customer. Make sure the saved payment method is designed
// for off_session payments
paymentIntent = await payrex.paymentIntents.attach(paymentIntent.id, {
  payment_method_id: '<insert the saved payment method id of the customer>'
})
from payrex import Client as PayrexClient

# Protect your PayRex Secret API key at all costs. One common approach
# to store it in an environment variable.
# Add your PayRex test secret API key.
payrex_secret_api_key = ''
payrex = PayrexClient(payrex_secret_api_key)

# Create a PaymentIntent with amount and currency
# Do not forget to reference the customer id
payment_intent = payrex.payment_intents.create(
    {
        # Amount is in cents. The sample below is 100.00.
        'amount': 10000,
        'currency': 'PHP',
        'payment_methods': [
            'card',
            'gcash'
        ],
        'customer_id': '<add customer id>'
    }
)

# The line below will finalize charge the customer. Make sure the saved payment method is designed
# for off_session payments
payment_intent = await payrex.payment_intents.attach(paymentIntent.id, {
  payment_method_id: '<insert the saved payment method id of the customer>'
})
require "payrex-ruby"

# Protect your PayRex Secret API key at all costs. One common approach
# to store it in an environment variable.
# Add your PayRex test secret API key.
payrex_secret_api_key = ""
payrex = Payrex::Client.new(payrex_secret_api_key)

# Create a PaymentIntent with amount and currency
# Do not forget to reference the customer id
payment_intent = payrex.payment_intents.create(
  # Amount is in cents. The sample below is 100.00.
  amount: 10000,
  currency: "PHP",
  payment_methods: [
    "card",
    "gcash"
  ],
  customer_id: '<add customer id>'
)

payment_intent = await payrex.payment_intents.attach(
  payment_intent.id,
  {
    payment_method_id: '<insert the saved payment method id of the customer>'
  }
)
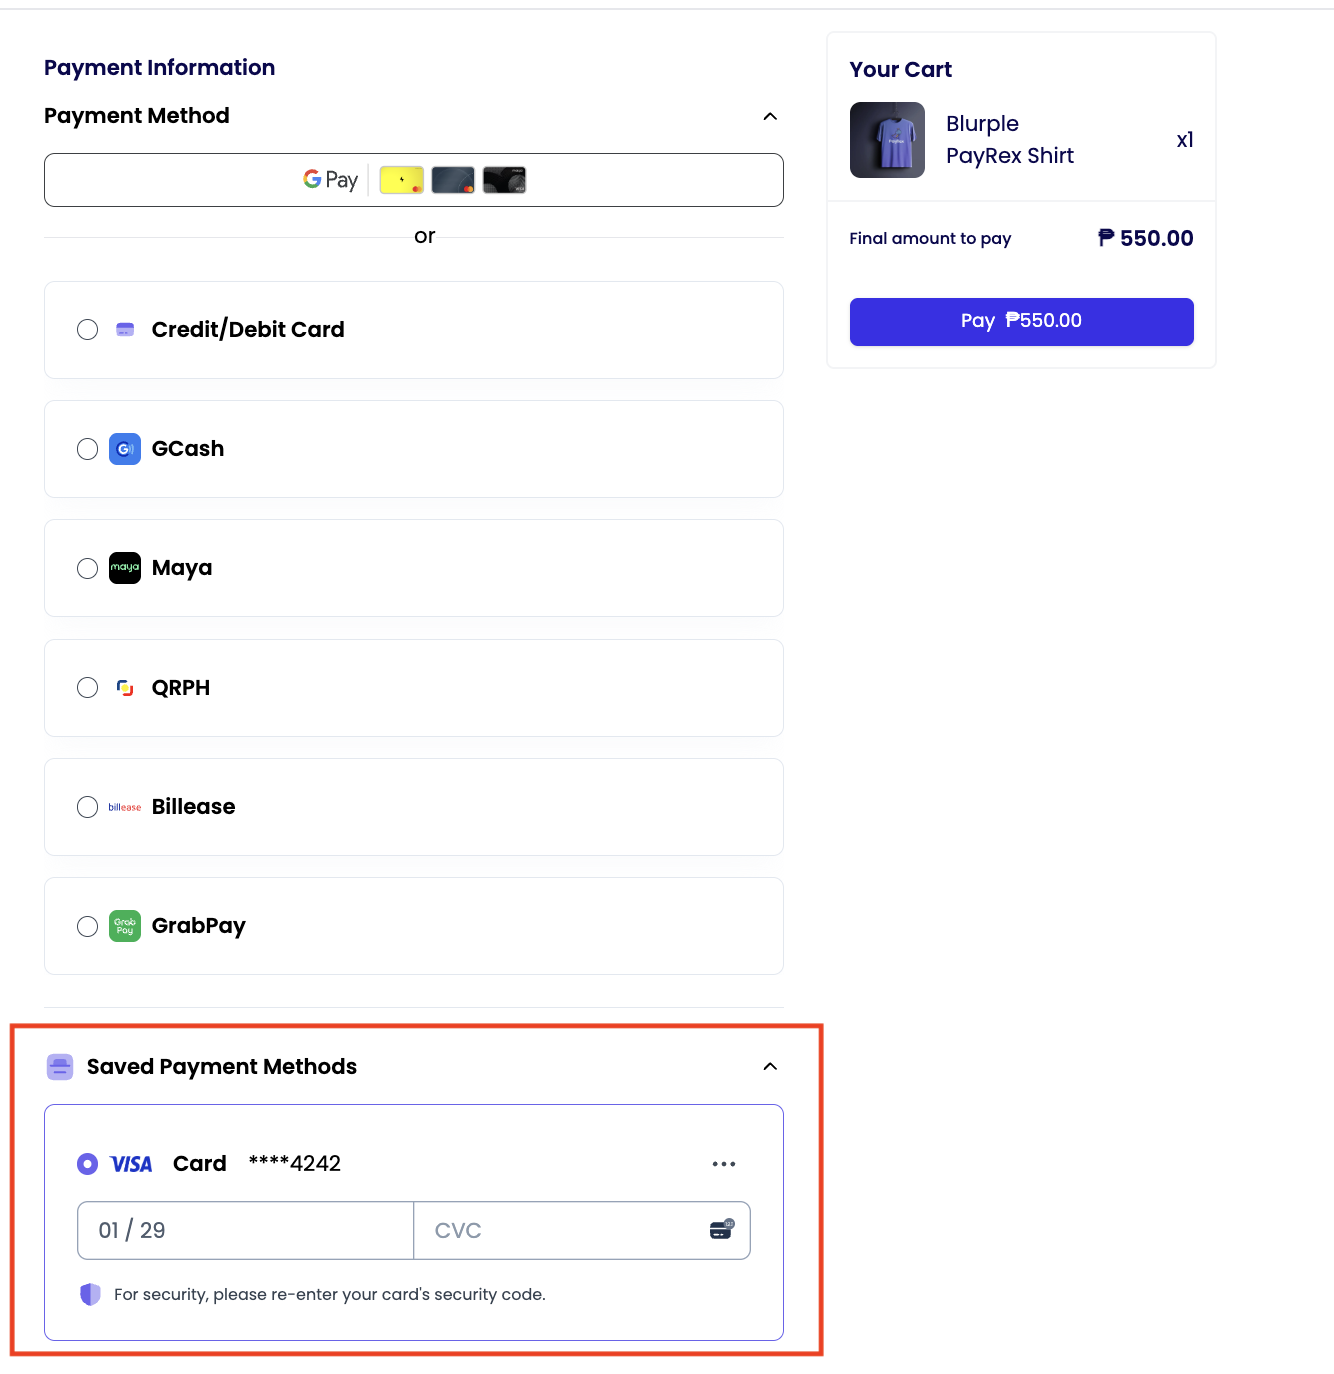
Show the saved payment methods from a payment page
The customer's saved payment methods can be used through a PayRex Element. The customer can save their payment method on your payment form and use it for future payments. This section shows you how to integrate the saved payment methods feature, which enables the PayRex Elements to:
- Display saved payment methods to buyers for future purchases
- Allow customers to use the saved payments to complete future purchases while they are present in the payment form.
Create payment intent and a customer session
Create a customer session resource on your server by using the customer's ID then use the customer session when rendering a PayRex Element. A customer session resource allows you to configure your customer's user experience with the saved payment methods feature. With a customer session, you can:
- Toggle whether the customer can save future payment methods in addition to the existing saved payment methods, or just allow the customer to use the existing saved payment methods.
- Toggle if the customer can delete an existing saved payment method within the payment form.
- Toggle if the customer can use a saved payment method to complete a purchase, or allow the customer to save new payment methods.
In line with creating a customer session on your server, also create a payment intent with a customer ID. If you don't know yet how to integrate PayRex's payment services via PayRex Elements, you can read this guide.
- payment_method_save - allows the customer to save more payment methods
- payment_method_remove - allows the customer to delete existing saved payment methods
- payment_method_redisplay - allows the customer to use a saved payment method to complete payment.
- Node
- PHP
- Python
- Ruby
// Protect your PayRex Secret API key at all costs. One common approach
// to store it in an environment variable.
// Add your PayRex test secret API key.
const payrexSecretApiKey = '';

const payrex = require('payrex-node')(payrexSecretApiKey);

// Create a PaymentIntent with amount and currency
const paymentIntent = await payrex.paymentIntents.create({
  // Amount is in cents. The sample below is 100.00.
  amount: 10000,
  currency: 'PHP',
  payment_methods: ['gcash', 'card', 'maya', 'qrph'],
  customer_id: '<insert the customer id>'
});

// Create a customer session
const customerSession = await payrex.customerSessions.create({
  customer_id: '<insert the customer id>',
  payment_intent_id: paymentIntent.id,
  components: {
    payment_element: {
      payment_method_redisplay: 'enabled',
      payment_method_remove: 'enabled',
      payment_method_save: 'enabled'
    }
  }
})

const output = {
  clientSecret: paymentIntent.clientSecret,
  customerSessionClientSecret: customerSession.clientSecret
}

console.log(JSON.stringify(output));
<?php

require_once '../vendor/autoload.php';

// Protect your PayRex Secret API key at all costs. One common approach
// to store it in an environment variable.
// Add your PayRex test secret API key.
$payrexSecretApiKey = '';
$payrex = new \Payrex\PayrexClient($payrexSecretApiKey);

// Create a PaymentIntent with amount and currency
$paymentIntent = $payrex->paymentIntents->create([
  // Amount is in cents. The sample below is 100.00.
  'amount' => 10000,
  'currency' => 'PHP',
  'payment_methods' => [
      'card',
      'gcash',
      'maya',
      'qrph'
  ],
  'customer_id' => '<insert the customer id>',
]);

// Create a customer session
$customerSession = $payrex->customerSessions.create([
  'customer_id' => '<insert the customer id>',
  'payment_intent_id' => $paymentIntent->id,
  'components' => [
    'payment_element' => [
      'payment_method_redisplay' => 'enabled',
      'payment_method_remove' => 'enabled',
      'payment_method_save' => 'enabled'
    ]
  ]
]);

$output = [
  'clientSecret' => $paymentIntent->client_secret,
  'customerSessionClientSecret' => $customerSession->client_secret,
];

echo json_encode($output);
from payrex import Client as PayrexClient

# Protect your PayRex Secret API key at all costs. One common approach
# to store it in an environment variable.
# Add your PayRex test secret API key.
payrex_secret_api_key = ''
payrex = PayrexClient(payrex_secret_api_key)

# Create a PaymentIntent with amount and currency
payment_intent = payrex.payment_intents.create(
  {
    # Amount is in cents. The sample below is 100.00.
    'amount': 10000,
    'currency': 'PHP',
    'payment_methods': [
      'card',
      'gcash',
      'maya',
      'qrph'
    ],
    'customer_id': '<insert the customer id>',
  }
)

# Create a customer session
customer_session = payrex.customer_sessions.create(
  {
    'customer_id': '<insert the customer id>',
    'payment_intent_id': payment_intent.id,
    'components': {
      'payment_element': {
        'payment_method_redisplay': 'enabled',
        'payment_method_remove': 'enabled',
        'payment_method_save': 'enabled'
      }
    }
  }
)

output = {
  'client_secret': payment_intent.client_secret,
  'customer_session_client_secret': customer_session.client_secret
}

print(output)
require "payrex-ruby"

# Protect your PayRex Secret API key at all costs. One common approach
# to store it in an environment variable.
# Add your PayRex test secret API key.
payrex_secret_api_key = ""
payrex = Payrex::Client.new(payrex_secret_api_key)

# Create a PaymentIntent with amount and currency
payment_intent = payrex.payment_intents.create(
  # Amount is in cents. The sample below is 100.00.
  amount: 10000,
  currency: "PHP",
  payment_methods: [
    "card",
    "gcash",
    "maya",
    "qrph"
  ],
  customer_id: '<insert the customer id>'
)

# Create a customer session
customer_session = payrex.customer_sessions.create(
  customer_id: '<insert the customer id>',
  payment_intent_id: payment_intent.id,
  components: {
    payment_element: {
      payment_method_redisplay: 'enabled',
      payment_method_remove: 'enabled',
      payment_method_save: 'enabled'
    }
  }
)

output = {
  clientSecret: payment_intent.client_secret,
  customerSessionClientSecret: customer_session.client_secret
}

puts output.to_json
Use the payment intent and customer session to show the list of payment methods within PayRex Elements
// Add your PayRex Public API key.
const payrex = window.Payrex('');
let elements;

initialize();
checkPaymentIntentStatus();

async function payAction() {
  showLoading(true)
  await payrex.attachPaymentMethod({
    elements,
    options: {
      // Return URL is where the customer will be redirected after completing a payment.
      return_url: "http://localhost:4242/checkout.html",
    },
  });
  showLoading(false)
}

function showLoading(flag) {
  const btnPayText = document.querySelector("#btn-pay-text");
  const spinner = document.querySelector("#spinner");

  // Disable the button to ensure that no double payment might happen
  btnPayText.disabled = flag

  if (flag) {
    // Disable the button and show a spinner
    spinner.classList.remove("hidden");
    btnPayText.classList.add("hidden");
  } else {
    spinner.classList.add("hidden");
    btnPayText.classList.remove("hidden");
  }
}

async function initialize() {
  const { clientSecret, customerSessionClientSecret } = await fetch(
    "/create_payment_intent.php",
    {
      method: "POST",
    }
  ).then((r) => r.json());

  elements = payrex.elements({
    clientSecret,
    customerSessionClientSecret
  });

  const paymentElementOptions = {
    layout: "accordion",
  };

  const paymentElement = elements.create(
    "payment",
    paymentElementOptions
  );

  paymentElement.mount("#payment-element");
}

// Fetches the payment intent status after payment submission
async function checkPaymentIntentStatus() {
  const clientSecret = new URLSearchParams(window.location.search).get(
    "payment_intent_client_secret"
  );

  if (!clientSecret) {
    return;
  }

  const paymentIntent = await payrex.getPaymentIntent(clientSecret);

  switch (paymentIntent.status) {
    case "succeeded":
      window.alert("Payment succeeded.")
      break;
    case "processing":
      window.alert("Payment is still being processed.")
      break;
    case "awaiting_payment_method":
      window.alert("Payment was not successful. Try again..")

      break;
    default:
      window.alert("Something went wrong")

      break;
  }
}